Modo's multiresolution sculpting supports the layering of sculpting data, so you can separate and control sculpting in multiple passes. For example, you can adjust broad forms of a model on one sculpting layer, and then do smaller details on another layer independent of the first, and edit the opacity afterwards to further control the final look.
Layers also allow you to experiment non-destructively, as new layers can be removed without affecting other layers. Each new layer you add to an item affects all other layers, regardless of layer position, so one layer can add shape to a model, and the next layer can be used to remove the added forms. When combined with a sculpting modifier, you can control the strength of individual layers relative to values generated by another item, so corrective sculpts can be controlled by transform values, or any other criteria.
Sculpting layers are specific to Catmull-Clark multiresolution models, which you can enable for your selected Mesh Item in the Painting/Sculpting layout or directly in the item's Properties panel.
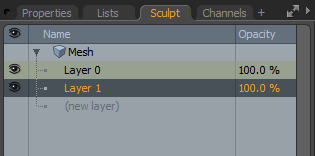
Sculpting layers can be found in the Painting interface, in the Sculpt viewport on the bottom right of the screen.
NOTE: If the viewport is not visible, you can add it manually by clicking on the + icon and selecting Data Lists > Sculpting.
The viewport shows selected meshes that have multiresolution enabled and their layers. When sculpting, the viewport always shows the blended result of all layers at their current opacity level.
The Name column in the middle displays the layer's name. You can edit it by clicking the name and entering a new one. The eye icon on the left indicates the state of the layer. If the icon is turned off, the displacement vectors of the layer are not rendered. Opacity, on the right, specifies the strength of a layer's sculpting information as it applies its displacement to a mesh. Edit it by clicking on the field and entering a new value. You can enter both positive and negative values, and even drive values higher than 100% for interesting effects.
To create a new layer, in the Sculpt viewport, click (new layer) below the existing layers. A new layer is added called Layer with a number appended to the end.
To edit a layer, right-click its name. In the pop-up menu the following commands are available.
|
Command |
Description |
|---|---|
|
Rename |
Changes the name of the layer. The layer name must be unique in the mesh. |
|
Duplicate |
Duplicates the current layer. |
|
Apply Opacity |
Applies the opacity value to displacement vectors and resets the opacity to 1.0. |
|
Merge Layers |
Merges all layers in a mesh into the current layer. |
|
Add Modifier |
Adds a sculpting modifier to the current sculpt layer. This drives the Opacity value through the item channel. |
|
Clear |
Clears the displacement vectors in the current layer. |
|
Remove |
Removes the current layer. |
|
Import Layer |
Imports the displacement vectors to the current layer from an external XML file. |
|
Export Layer |
Exports the displacement vectors in the current layer to an external XML file. |
A sculpting modifier adds a channel item related to a specific sculpting layer that you can place in the Schematic viewport. With this, you can change the transparency of a particular sculpting layer automatically, when linked to another channel.
For example, if you bend a leg object with two joints, the knee area might suffer from the deformation, so a sculpting layer can be added to fix the shape. However, when the leg is straight, you no longer need the fix, so you can automatically drive the opacity of that layer depending on the rotation of the joints, using a modifier linked to the rotation of the lower leg joint.
To add a sculpting modifier, right-click on a layer in the Sculpt viewport and in the pop-up menu, click Add Modifer. Single sculpt modifiers drive one layer's opacity. To control the opacities of multiple layers at once, add a modifier to each layer. The modifier identifies the layer with the modifier item name. If you rename a layer with the Rename command from the context menu, the modifier name linked to the sculpting layer is also renamed automatically.
The sculpting modifier is a kind of deformer, but it does not deform vertex positions.