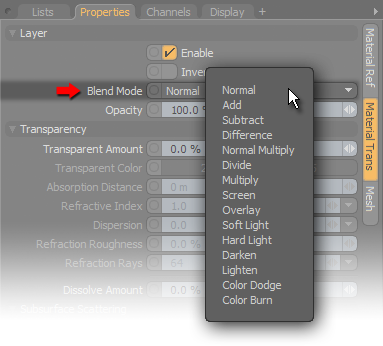
The flexibility and power of the Shader Tree is extended with the use of Blend Modes, a means of determining how multiple layers interact with each other. The key point here is that there must be more than one layer in order for blending to work. The Shader Tree's layered approach to shading surfaces works in a fashion similar to layers in an image editor such as Photoshop; any layer above another obscures the layers below, unless one (or more) of three conditions is true:
• A mask is applied, either as a layer or a surface tag, limiting the effect of the layer exclusively to areas inside the mask. This reveals lower layers outside the masked region.
• The transparency of the layer is changed to reveal the lower layers.
• A Blend Mode other than Normal is specified, changing the way the layer interacts with the lower layers.

Most item layers in the Shader Tree offer a Blend Mode option to combine two or more layers in various ways using mathematical operations. The mode is specified by left-clicking on the Blend Mode button to open a contextual menu, and then selecting the mode from the available options.
NOTE: Blend Mode results are only visible in the final render or in the Preview viewport.
Blend Modes affect the RGB color values (even if you just have black and white specified) and have a couple of rules that need to be adhered to:
• There must be more than one layer of the same Effect type. For example, a Diffuse Color layer can only use the Multiply mode with another layer specified as Diffuse Color.
• A layer with a Blend Mode applied only affects other layers below it in the Shader Tree.
The following table show the various Blend Modes, with samples to illustrate the effect.
|
Original Images |
|
|
|
|
2 Layers - |
|
|
|
|
Blend Mode |
Results |
||
|
Normal |
|
|
|
|
Add |
|
|
|
|
Subtract |
|
|
|
|
Difference |
|
|
|
|
Normal Multiply |
|
|
|
|
Divide |
|
|
|
|
Multiply |
|
|
|
|
Screen |
|
|
|
|
Overlay |
|
|
|
|
Soft Light |
|
|
|
|
Hard Light |
|
|
|
|
Lighten |
|
|
|
|
Darken |
|
|
|
|
Color Dodge |
|
|
|
|
Color Burn |
|
|
|
Blend Modes work by calculating the math (as specified) on the individual RGB channels. Add, for instance, takes the values from the two layers and adds them together for the result. Depending on the texture and the blend mode, it may produce values beyond 100%. To reduce or eliminate clipping for certain effects that can't be driven higher than 100% (such as Displacement), you may also need to adjust a layer's transparency. The following example shows how this works.
|
|
|
|
|
|
1.) Cellular displacement layer |
2.) Noise layer overwrites |
3.) Noise layer set to Add |
4.) Transparency of both |
| 1. | A Cellular procedural layer applied as a displacement map. |
| 2. | In the Shader Tree, a Noise layer is added above it the Cellular layer and set as displacement, superseding the lower layer in the tree (image 1). |
| 3. | To produce a combination of both, the Noise layer's Blend Mode is set to Add, but this produces the clipped values shown in image 3. This is because the math produces values beyond 100% (75% + 75% = 150%), but there is no value higher than 100% (meaning all the way displaced), so that value is truncated to 100. |
| 4. | By changing the Opacity value of both layers to 50%, each layer now contributes equally to the displacement. |
This can be biased in either direction by adjusting the Opacity values. As long as the sum is equal to 100%, you won't produce any clipped values (although, that may be the look you are going for). In some instances, certain effects can be driven higher than 100%, but in those cases it won't be necessary to adjust the transparency.
TIP: A single Material item produces values for multiple effects, such as diffuse color and amount, reflection, transparency, and so on. Single texture layers in the Shader Tree can effectively blend with the values produced by the material item without the need for an additional matching layer.