Add User Channels
User-created channels are useful when animating. You may want to create controllers for an animation rig. (A rig takes a complex action and creates a simplified control for it.) By having user channels, you can add additional channels to an item (such as to a locator).
For example, if a machine had several gears that needed to synchronize with each other, you could add a user channel, called gear spin, to the locator. Then you could link the channel to all the gears in such a way that the gears would spin in proper relation to one another. You could animate the single channel of the locator to simplify the overall process and make it easy to find the item that is needed to control the gears.
There are a several ways you can add custom channels to an item.
• You can drag and drop channels onto mesh items in the viewport or on mesh items in the Items list to turn them into users channels. For more information, see Drag and Drop Workflow.
• With the target item selected in the Items list, use Animate > Channels > Add User Channel.
• In the Setup layout, open the Modifiers sub-tab of the toolbox, and click Add User Channel.
• In the Channels Viewport, select an mesh item in the list, and click Add Channel to Schematic.
Drag and Drop Workflow
In the following example, we will demonstrate creating a user channel and changing the color of a mesh item.
To drag-and-drop a user channel:
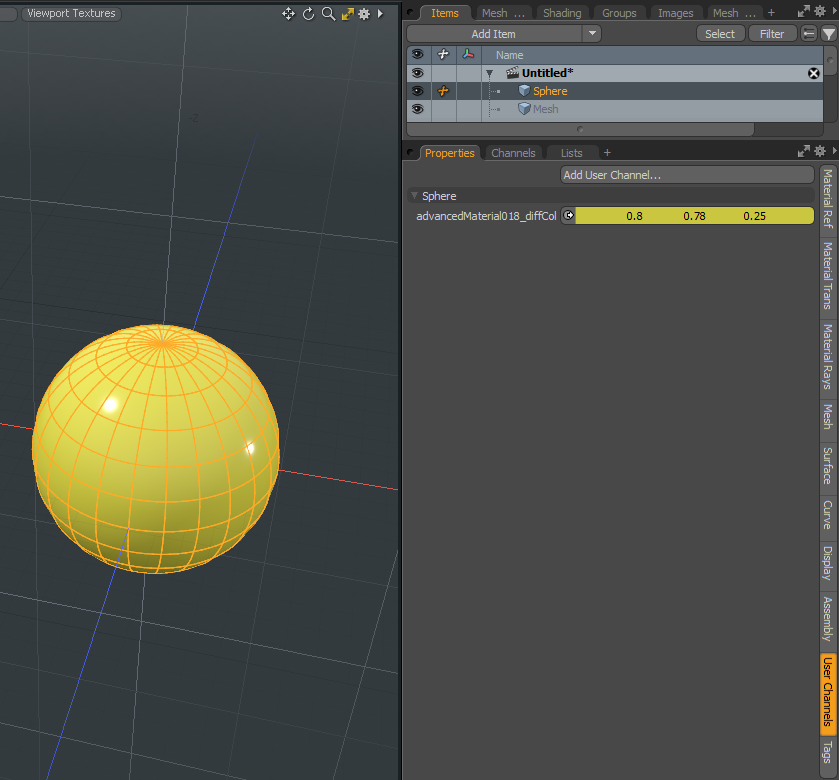
| 1. | Add a Sphere to your scene. In Model layout, on the Basics tab in the Toolbar, hold Shift and click Sphere. |
The Sphere displays in the center of the scene.
| 2. | Open the Shading tab and select the Base Material item. |
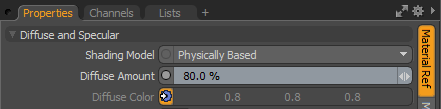
| 3. | On the right panel in the Properties panel, open the Material Ref tab. |
| 4. | Click on the text Diffuse Color. |
The channel state is activated and the button turns orange.
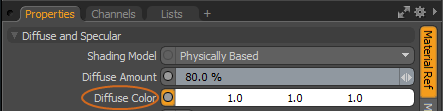
| 5. | Click-and-drag the Diffuse Color text onto the Sphere in the viewport. |
Tip: Alternatively, you can drag the Diffuse Color text onto a mesh item in your Items list.
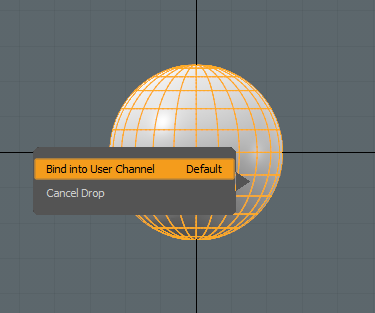
A menu is displayed.
| 6. | Click Bind into User Channel. |
This is the default. To cancel, select Cancel Drop.
| 7. | RGB dialog displays in the viewport. Click on a value to change the color. |
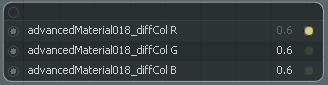
Alternatively, on the right panel, open the User Channels tab.
An advanced material is listed.
| 8. | Click on the color field to open the Color Picker, select a new color, and press Esc to close the window. |
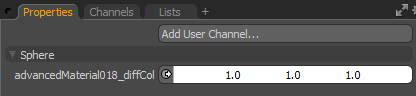
| 9. | Open the Properties tab and Material Ref tab. |
Notice, the Diffused Color channel is disabled and button color is updated to blue (Driven). This channel is driven by a Modifier and cannot be edited. It can only be edited in the User Channels tab.
| 10. | Open the User Channels tab and change the color. |
The 3D Viewport displays the updated color on the mesh.
Tip: Best practices: Give your user channel a meaningful name. Right-click on the user channel and select Edit User Channel. In the Name field, type a new name.
Create User Channel Options
This following options are available:
|
Option |
Description |
|---|---|
|
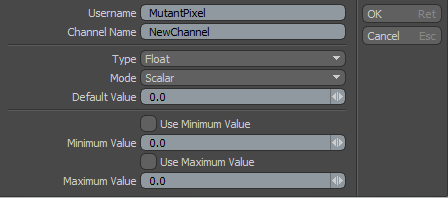
Username |
This is an optional identifier when creating channel sets. If you do not define a username, Modo displays the internal name. |
|
Channel Name |
Defines a name that identifies the new channel. |
|
Type |
Channels are places to store values. Depending on their use, the values in a channel determine how they're used. For example, an Angle channel is appropriate for rotations and a Distance channel is necessary for transform info. The channel Type defines what format the values take. The available options are: • Float - Produces a floating point value (a decimal typically between 0 and 1). • Distance - Produces a distance output value. • Angle - Produces an angle output value in degrees. • Percentage - Produces a percentage value (0% - 100%). • Light Intensity - Produces standard units of Watts per volumetric meter. • Time - Produces time values. (The default is in frames.) • Speed - Produces speed values in meters per second (m/s). • Force - Produces force values in newtons (N). • Mass - Produces mass values in kilograms. • Acceleration - Produces acceleration values in meters per second squared. • Pixel (integer) - Produces whole pixel values. • Pixel (fractional) - Produces sub-pixel values that are fractions of pixels. • Integer - Produces a whole number value (not a fraction, for example, 1,2, or 3). • Boolean - Produces only a True or False value. • String - Stores multiple values as a string of characters. • Matrix - Stores multiple values as a matrix. • Quaternion - Stores a single rotation around a specific axis in 3D space. • Divider - Creates a named, collapsible divider in the Properties panel. It is useful as an organizational device when dealing with multiple channels. These can be moved and renamed but have no value. • Axis - Creates an Axis channel. • Focal Length - Creates a Focal Length channel. • Int Range - Creates an integer range channel. • Pattern - Creates a pattern channel, which takes the values 'True' and 'False'. • Gradient - Creates a gradient channel. |
|
Mode |
By default, Modo creates a single channel with the given name, but you can also have Modo create multiple channels by using the Mode options: • Scalar- Creates a single channel (such as MyChannel). • Vector XY- Creates two channels (such as MyChannel.X and MyChannel.Y). • Vector XYZ- Creates 3 channels (such as MyChannel.X, MyChannel.Y, and MyChannel.Z). • Vector RGB- Creates 3 channels (such as MyChannel.R, MyChannel.G, and MyChannel.B). • Vector RGBA- Creates 4 channels (such as MyChannel.R, MyChannel.G, MyChannel.B and MyChannel.A). • Vector UV - Creates U and V channels. • Vector UVW - Creates U, V, and W channels. |
|
Default Value |
Use to specify the default value for the channel. |
|
Use Minimum Value |
Use to specify a minimum value. |
|
Use Maximum Value |
Use to specify a maximum value. |