Working with Morph Containers
A Morph Container is an item that allows you to store morph information separate from a mesh. It works the same way as a Weight Container, but instead of storing Weight Map information, it stores Morph Map information. Morph containers can also handle more than one morph map at a time.
Normally, when working with a rig using a Morph Influence, you have to add the required meshes to your scene and set them up with the same Morph Map, then set the Morph Influence to use that Morph Map. Morph Containers allow for morph relationships to be created without any meshes in the scene, making rigging more modular and portable.
Note: For more information on Weight Containers, see Working with Weight Maps.
Note: For more information on Morph Maps, see Morph Maps.
Creating a Morph Container
To create a Morph Container:
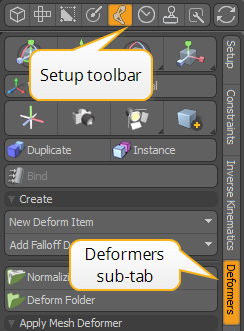
| 1. | Click the Setup toolbar button, then click the Deformers sub-tab. |
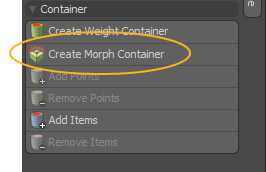
| 2. | Click the Create Morph Container button. |
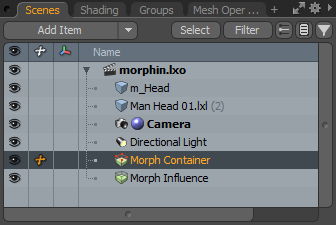
A Morph Container item is added to the Item List on the right.
You can also add a Morph Container in the Item List: click Add Item, then in the Add Item dialog, under Items > Deformers, double-click Morph Container.
Adding Points and Items
You can add points and items to your Morph Container in the Setup toolbar.
To add points to a Morph Container:
| 1. | In Vertices selection mode, select the required vertices on your mesh. |
| 2. | With the vertices selected, click the Morph Container item in the Item List. |
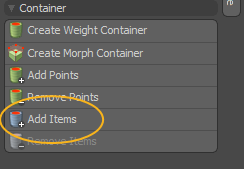
| 3. | In the Setup toolbar, click Add Points. |
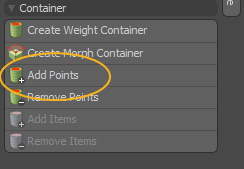
The selected points are added to the Morph Container.
To remove points from a Morph Container, select the vertices in the 3D viewport, then in the Setup toolbar, click Remove Points.
To add items:
| 1. | Select the new item and the Morph Container in the Item List. |
| 2. | In the Setup toolbar, click Add Items. |
The selected item is added to the Morph Container.
To remove items from a Morph Container, select the item, then in the Setup toolbar, click Remove Items.
Manipulating the Morph Container
When you're done with setting up the Morph Container, you can edit the vertices added to it. To manipulate the morph container:
| 1. | Select the Morph Container in the Item List. |
| 2. | In Vertices selection mode, select the vertices in the 3D viewport and transform them as needed, for instance, move them. |
The transform is applied to the vertices within the Morph Container, but when you de-select it and select the mesh instead, the vertices return to their original positions.
Click the thumbnail below to see how to add points to a Morph Container and manipulate them:
Using the Morph Container with a Morph Influence
To use a Morph Influence to drive the Morph Maps in the Morph Container, add a Morph Influence and connect it to your Morph Container. The easiest way to do this is in the Schematic viewport.
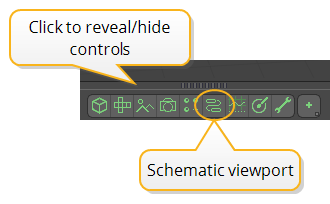
To open the Schematic viewport:
• In the Modo layout, click the thin gray line below the 3D viewport, and click the Schematic viewport ![]() button.
button.
>
MadCap:conditions="Default.NoTranslate">OR
• Switch to the Setup layout from the menu bar by clicking Layout > Layouts > Setup.
| 1. | In the Schematic, click Add..., and under Deformers > Influences, double-click Morph Influence. |
A Morph Influence is added to the scene.
| 2. | Connect the Morph Container node to the Morph Influence node's Geometry input. |
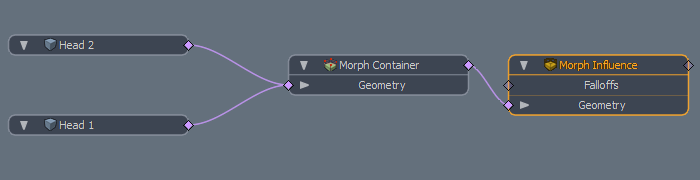
| 3. | Select the Morph Influence node to open its properties in the lower-right panel. |
Edit the Strength value to adjust the effect of the Morph Influence.
For more information on working with the Morph Influence, see Morph Influence.