Mesh Roles and Relationships
Modeling with MeshFusion is slightly different than modeling with other boolean modeling applications. You can create unions, subtractions, and intersections by using simple commands. When modeling with MeshFusion, there are two things you need to define for each mesh you add to your scene, its role and its relationship to other meshes.
Mesh Roles
Meshes fall into two main categories: Primaries and Trims. Primaries are additive meshes, while Trims are subtractive. You can create a subtraction or an intersection using Trims.
Primaries
Primaries are positive meshes, which provide the base geometry of your scene. You can create unions by combining Primaries or trim them using other meshes to create new shapes.
All Primary meshes are unioned by default.
When you set the role of a mesh to Primary, it is drawn in green wireframe in the 3D viewport, and highlighted with green in the Item List.
Trims
Trims are meshes you use to create subtractions from Primaries. You can create two types: Subtractive and Intersection Trims.
When you apply a Subtractive Trim to a Primary, the overlapping area of the two meshes is removed. Trims are highlighted with a magenta color in the viewport and the Item List.
Intersections are Trims that preserve only the part of the Primary that overlaps with the Trim. When you set the role of a mesh to intersection, it is highlighted with purple in the 3D viewport and the Item List.
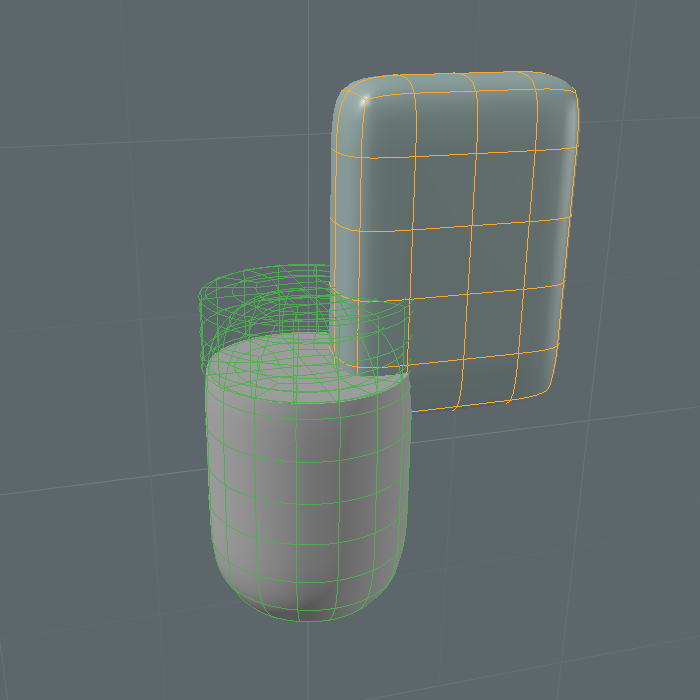
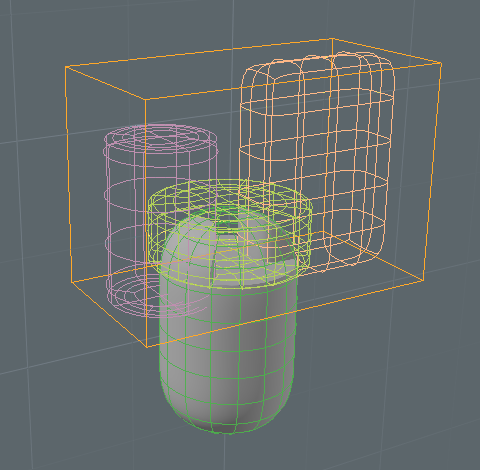
The image below shows how different meshes are colored in the 3D viewport and in the Item List. Click the image to enlarge it.

Assigning Mesh Roles
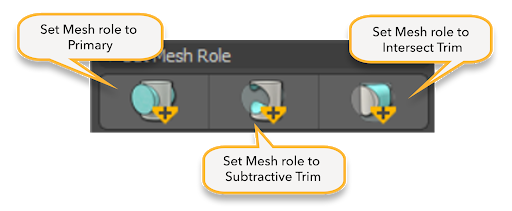
You can set the mesh roles in the Fusion tab.
Under Set Mesh Role, press Alt and click the appropriate button.
The mesh is color-coded in the 3D viewport and the Item List, indicating its new role.
Note: You can adjust the wireframe's opacity in the Defaults Preferences, under Procedural Modeling > MeshFusion > MeshFusion Wire Opacity. For more information, see Procedural Modeling.
Changing or Deleting Mesh Roles
You can also change or delete the role of a mesh anytime. Select your mesh and click the button of the role you want to assign.
To delete the role of a mesh, click the Clear Mesh Role button:
![]()
Specifying Relationships
Once you've assigned a role to a mesh, you have to define its relationship to other meshes. For instance, when you set a mesh to be a Trim, it doesn't automatically trim any Primary geometry, because you haven't yet specified what to trim.
To set up a mesh's relationship to another mesh:
| 1. | Select the Trim mesh and the Primary mesh in the 3D viewport or the Item List. |
| 2. | In the Fusion sub-tab on the left, under Set Mesh Roles, click the Trim button. |

The Trim is applied to the selected Primary mesh.
Tip: You can also drag and drop a mesh on a Fusion Item to assign a role to it and trim or untrim the Fusion Item.
Using Compound Trims
You can create more unique trimming shapes by combining multiple meshes to create Compound Trims. Here's how to do this:
| 1. | Add the new MeshFusion trimming mesh to your scene. The example below uses the Fusion-Ready Presets assets available in the Fusion tab of the modeling toolbox, under Fusion-Ready Presets. |
Note: If you need more information on the basics of modeling with MeshFusion, see Fusion Example.
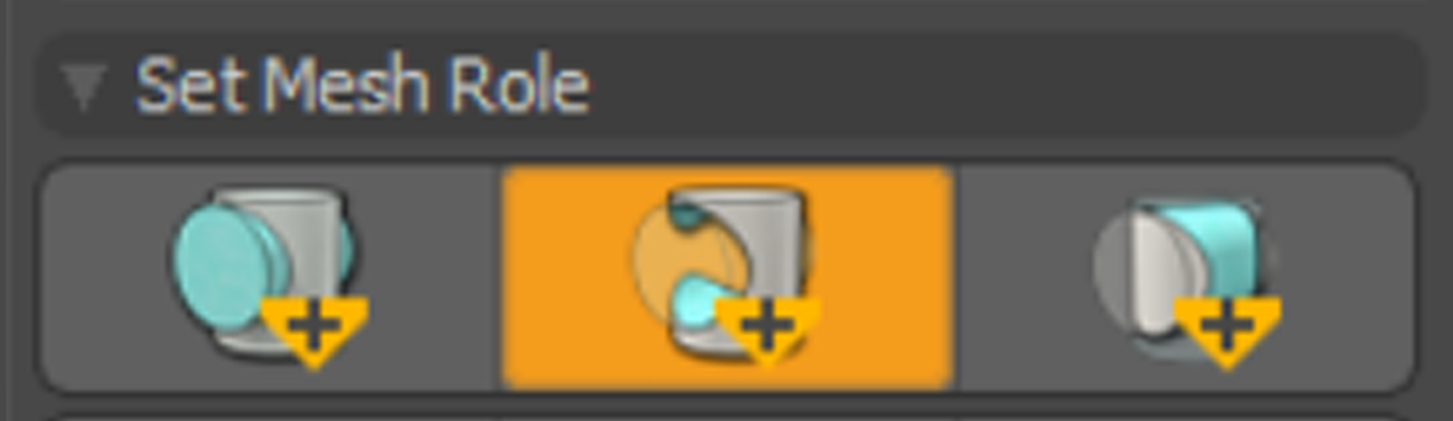
| 2. | Select your Trim mesh and the new mesh you want to combine it with. |
| 3. | In the Fusion sub-tab of the modeling toolbox, under Set Mesh Role, click the button for Subtractive Trims. |
A Locator item is created, containing your trimming meshes. If you expand the Locator item in the Item List, you can see the Trims included in the compound.

In the 3D viewport, a bounding box is created around your trimming meshes.
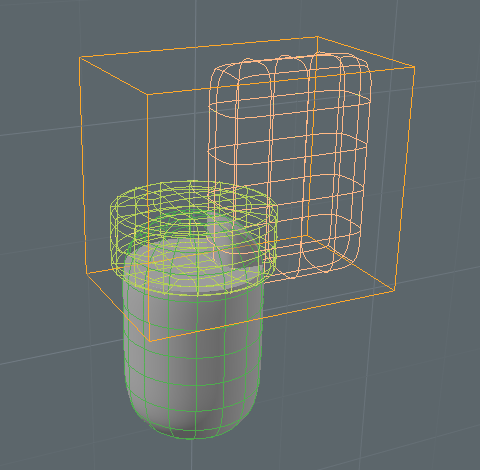
The Compound Trim behaves as a single element. You can move, scale, and rotate it as one unit, or transform each of its meshes individually.
Note: When you select either of the meshes, the whole Locator item is selected. To select just one of the meshes, click the mesh again.
You can further trim the Compound Trim the same way: select the new mesh and the Compound Trim, then in the Set Mesh Roles section, click the ![]() (Apply Subtractive Trim) button. The new mesh becomes part of the Compound Trim, and you can see the Primary affected by the new Trim.
(Apply Subtractive Trim) button. The new mesh becomes part of the Compound Trim, and you can see the Primary affected by the new Trim.
If you want to add additional Primaries to the Compound Trim, you need to convert it into a Fusion Item first. Here's how to do this:
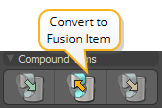
| 1. | Select your Compound Trim in the 3D viewport or in the Item List. |
| 2. | In the Compound Boolean section found under the Fusion Utilities menu in the Fusion tab, click the |
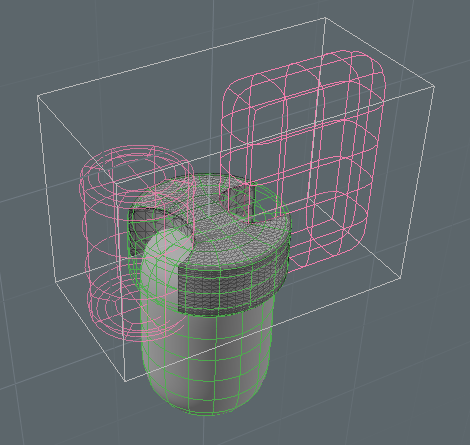
The Trim is transformed into a Fusion Item.
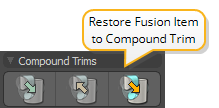
To convert the Fusion Item back to a Trim, click the ![]() (Restore Fusion Item to Compound Boolean) button.
(Restore Fusion Item to Compound Boolean) button.
Duplicating Meshes
You can duplicate a mesh using the controls in the Fusion Utilities menu in Fusion sub-tab. Select your mesh and click the appropriate button to duplicate it.
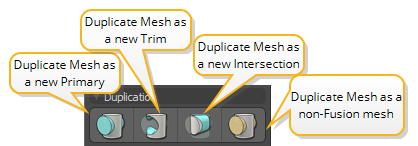
Note: When duplicating Trims or Intersections, the duplicate mesh doesn't yet affect any Primaries. For that you need to specify what mesh to trim.