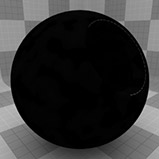
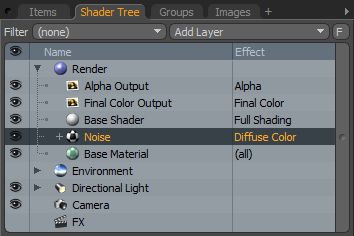
Noise Procedural

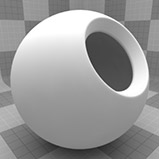
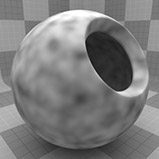
The Noise texture is one of the procedurally generated textures provided with Modo. Procedural textures are mathematically created at render-time and so have no fixed resolution. They can be magnified almost infinitely with no visual loss in detail. The Noise texture has two zones: Color 1/Value 1 and Color 2/Value 2. The texture modulates from one zone to the other based on the algorithm and your settings. Essentially, Modo creates pseudo-random points in 3D space, and the texture blends from one value to the next based on the proximity of one sample point to the next.
Each zone can have either a Value or a Color and Alpha. The applied zone is dependent on the Layer Effects to which the texture is applied. For example, if you apply the texture as a Displacement, then Modo uses the Value settings, but if you set the texture effect to Luminous Color , Modo uses the Color and Alpha settings for the Color 1 and Color 2.
Note: For information about adding and working with Shader Tree item layers, see the Shader Tree topic.
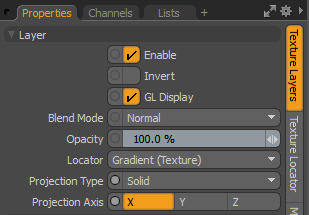
Layer Properties
>
|
Enable |
Toggles the effect of the layer on and off. This duplicates the functionality of toggling visibility in the Shader Tree. When disabled, the layer has no effect on the shading of the scene. However, Modo saves disabled layers with the scene, and they are persistent across Modo sessions. |
|
Invert |
Inverts the colors (RGB values) for the layer to produce a negative effect. |
|
Blend Mode |
Affects the blending between different layers of the same effect type. With this, you can stack several layers for different effects. For more about blending, see Layer Blend Modes. |
|
Opacity |
Changes the transparency of the current layer. If there are layers below this layer in the Shader Tree, reducing this value increasingly reveals the lower layers. Reducing the value always dims the effect of the layer. |
|
Locator |
Sets the association for the Texture Locator. Most texture layers have a Texture Locator that Modo automatically creates in the Item List. This defines the mapping of the texture (how Modo applies the texture) to the surface. You can specify alternate locators, but this is normally not required. Although you may want multiple texture items to share a single locator. |
|
Projection Type |
Defines how a texture/material is applied to a 3D surface. Types vary significantly in their effects. For a guide to each Projection Type see Projection Type Samples. |
|
Projection Axis |
The texture/material is projected down this axis. This applies to Planar, Cylindrical, Spherical, Cubic, Box, and, Light Probe projection types. |
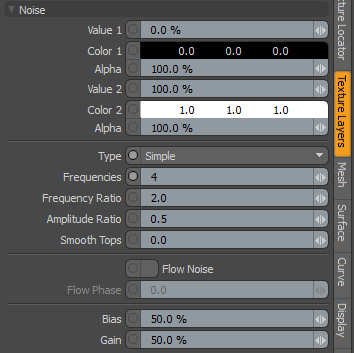
Noise Properties
|
Noise |
|
|
Value 1 |
Determines the magnitude of the texture at the center of each sample location. Modo blends this value into Value 2 based on proximity to surrounding sample points. Note: You would normally use the Value 1 option when you set the texture layer to an effect that does not require color, such as Bump or Displacement. In this case, the value would affect the height at the center of each sample location. |
|
Color 1 |
Sets the color that Modo uses at the center of each sample location. Modo blends this color into Color 2 based on proximity to the surrounding sample points. You only use the Color 1 option when you set the texture layer to an effect that requires color. |
|
Alpha |
Determines how transparent the Color 1 zone is. You only use the dedicated Alpha option for Color 1 when you set the texture layer to an effect that requires color. Note: You can adjust the Alpha value using the Color Picker. |
|
Value 2 |
Determines the magnitude of the texture at the center of each secondary sample location. Modo blends this value into Value 1 based on proximity to surrounding sample points. Note: You would normally use the Value 1 option when you set the texture layer to an effect that does not require color, such as Bump or Displacement. In this case, the value would affect the height at the center of each secondary sample location. |
|
Color 2 |
Sets the color that Modo uses at the center of each secondary sample location. Modo blends this color into Color 1 based on proximity to the surrounding sample points. You only use the Color 2 option when you set the texture layer to an effect that requires color. |
|
Alpha |
Determines how transparent the Color 2 zone is. You only use the dedicated Alpha option for Color 2 when you set the texture layer to an effect that requires color. |
|
Type |
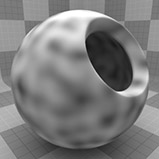
Specifies the style of the Noise texture. You can layer all noise-style procedurals to create a fractal effect. The traditional style of creating fractal effects includes layering a noise pattern multiple times with each new layer increasing in frequency (with smaller details and more of them) and fading in opacity. When you add a Cellular or Noise texture in Modo, the default settings (with the Simple type) are not "fractal" in that they only use a Frequencies value of 1 and, therefore, only a single application of the procedural effect. Adding multiple frequencies creates a more fractal look to the texture and activates the Frequency Ratio and Amplitude Ratio controls. Click to view examples of the various Type options.
• Simple- Modulates between Color 1 (or Value 1) and Color 2 (or Value 2). With this Noise style, you cannot add additional frequencies (a Frequencies value greater than 1) and, therefore, cannot use for a fractal look.
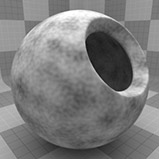
• Fractal- Allows for a Frequencies setting greater than 1; otherwise, this is the same as the Simple type. Once you indicate additional frequencies for a noise (or cellular) pattern, they then become fractal. Modo layers each additional frequency of the texture over the previous layer. The Frequency Ratio and Amplitude Ratio values modulate the relative detail and amplitude of the additional frequencies.
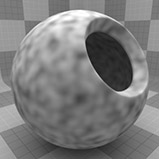
• Turbulence- Modulates the gradient ramp between the two colors (or values) up and down rather than with a straight ramp. Otherwise, the Turbulence type is very similar to the Fractal type. |
|
Frequencies |
Determines the number of layers used by the Noise texture. When set to 1, the Frequency Ratio and Amplitude Ratio are disabled. Adding more than one frequency increases the detail in the procedural texture, which increases computation times. Click to view examples of various Frequencies settings. |
|
Frequency Ratio |
Determines how much detail to add into each additional application of the Noise texture when the Frequencies value is greater than 1. The default value of 2 results in the second frequency of the texture being twice as high as the first. Visually this pattern seems to be half as large but with twice as many occurrences. With more than 2 frequencies each additional layer of the noise has twice the frequency of the last. Click to view examples of various Frequency Ratio settings. |
|
Amplitude Ratio |
Determines the strength of each additional layer of noise when the Frequencies value is greater than 1. By default, the setting is .5, which yields an effect where each additional set of frequencies has half the value of the previous. Click to view examples of various Amplitude Ratio settings. |
|
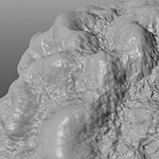
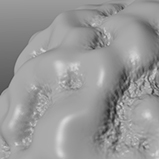
Smooth Tops |
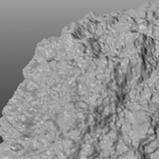
Varies the noise amplitude depending on the texture value. If you applied the Noise texture to a surface as a displacement, this produces a surface that looks like mountains with a smooth top and ragged valleys. (The noise amplitude increases as you go down.) If you invert the texture, the mountains look ragged and the valleys are smooth (more as they appear in nature). Click to view examples of various Smooth Tops settings. |
|
Flow Noise |
When enabled, animates the noise field without you having to physically translate (or move) the noise across the surface it is shading, which may look artificial. Flow Noise is a Perlin noise type that simulates advection. (The movement of something from one place to another — especially when they are different temperatures, such as cream into coffee.) The results could be described as turbulence or boiling depending on how this is used. You may find this setting useful when animating volumetrics to produce the time-lapse-clouds look that is difficult to create otherwise. After you enable Flow Noise, then specify a Flow Phase value for the animation. Click to view an example animation from enabling Flow Noise and setting a Flow Phase value. |
|
Flow Phase |
Produces a flowing type of animation to the noise that looks far more realistic than simply translating (moving) the noise across the surface or volume after enabling Flow Noise. To apply a continuously moving phase, set a keyframe at frame 0 and then another value somewhere else (such as 1). If the animation graph is set to Linear and the Post Behavior is set to Linear as well, Flow Phase continuously animates the length of the sequence. You can then adjust the second keyframe's value up and down to control the speed of the Flow Phase. Click to view an example animation from enabling Flow Noise and setting a Flow Phase value. |
|
Bias |
Determines whether the texture favors Color 1 (or Value 1) over Color 2 (or Value 2). Increasing this value causes the texture to favor Color 1 (or Value 1) over Color 2 (or Value 2). Decreasing the value causes the texture to favor Color 2 (or Value 2). Click to view examples of various Bias settings. |
|
Gain |
Affects the falloff of the gradient ramp between Color 1 (or Value 1) and Color 2 (or Value 2). Setting the Gain to 100% creates a very sharp contrast. Setting this value to 0% reduces the contrast between the two to an almost imperceptible amount. Click to view examples of various Gain settings. |
|
|
|
|
|
Simple |
Fractal |
Turbulence |
|
|
|
|
|
Frequency 1 |
Frequency 3 |
Frequency 5 |
|
|
|
|
|
Frequency Ratio 1 |
Frequency Ratio 3 |
Frequency Ratio 5 |
|
|
|
|
|
Amplitude Ratio 0.5 |
Amplitude Ratio 1.5 |
Amplitude Ratio 2.5 |
|
|
|
|
| Smooth Tops 0.0 | Smooth Tops 0.2 | Smooth Tops 0.8 |
|
|
|
|
|
Bias 0% |
Bias 50% | Bias 100% |
|
|
|
|
|
Gain 0% |
Gain 50% | Gain 100% |