Linear Falloff
The Linear Falloff produces an attenuation along its length (range) that moves outward toward infinity and parallel to its axis. It has options for you to adjust the axis, range, and transition of the falloff itself.
To activate the Linear Falloff tool:
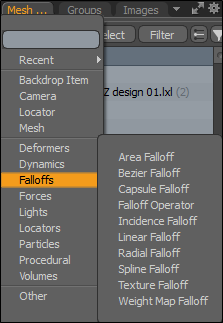
• Open the Model layout, under the layout menu, click  , and select Linear.
• Alternatively, open the Setup layout, on the bottom panel, click Add, and select Mesh Operations > Tool Pipe > Falloffs > Linear Falloff.
Adding a Linear Falloff
A Linear Falloff can be used with Deforms or a Mesh Operations item. You can use the Model layout or the Setup layout to add a Linear Falloff.
For more information, see Applying Deformers and Adding Falloffs in Procedural Modeling.
| 1. | In Model layout, select a mesh item in the Items list. |
| 2. | With the Polygon Selection Mode enabled, select the polygons to apply the falloff to. |
| 3. | Under the layout menu, click  , and select Linear. , and select Linear. |
Alternatively, on the right panel, open the Mesh Ops tab, and click the down arrow beside Add Item and select Falloff > Linear Falloff.
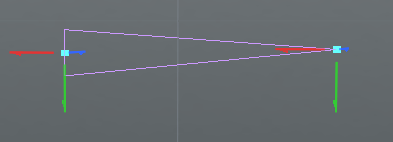
By default, the falloff aligns to the selection bounding box.
| 4. | Click and drag from right to left in the viewport to position the falloff. |
The small end of the falloff is the front and the large end is the back.
| 5. | On the left panel, select a tool to apply the falloff to. For example, open the Basic tab and click Bevel (Polygon Bevel) and apply the tool. |
| 6. | Click + drag the Polygon Bevel handles to change the shape of the selected polygons. |
Note: The backside of the selected polygons move more than the front. This is based on the position of the falloff.
| 7. | Click and drag on the end and start falloff handles to change how the falloff is applied. |
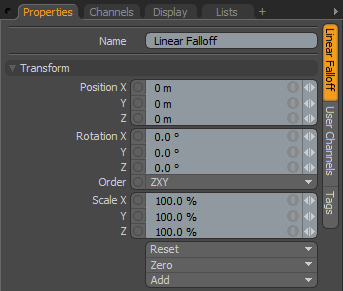
Transform Properties
|
Name |
This displays the current item's name. You may change it by clicking the current name and typing a new name. |
|
Position XYZ |
Specify to position the item numerically in XYZ space. Position transforms originate from the Center position. |
|
Rotation XYZ |
Specify to set the rotation of the item numerically. Rotation transforms originate from the Center position. |
|
Order |
Sets the order that Modo applies rotations to the falloff item. By changing the order that Modo applies rotations you can sometimes reduce or eliminate gimbal lock. |
|
Scale XYZ |
Sets the size of the item numerically. Scale transforms originate from the Center position. |
|
Reset |
Resets the selected transform values to (0,0,0) and returns the items back to their default state. |
|
Zero |
Resets the selected transform property value to 0 and leaves the Center position and Item position intact. |
|
Add |
Use to add the selected set of transforms to the Channel list while keeping the default 0,0,0 values. (Keeping the default values is necessary for Referencing. To be able to override a channel, it must first exist.) Note: Transform items are the channel groups associated with an item that store its transform values. These transform values control an item's position, rotation, or scale. By default, new items do not have any transform items associated with them (although they are visible within the Properties panel). Add only the necessary transforms on an as-needed basis to reduce scene overhead. If you don't use the Add function (as given here), you can transform the target item with one of the various transform tools (or by editing the values). When you do so, Modo automatically adds the transform item to the Channels viewport list. |
Linear Falloff Properties
|
Falloff Enable |
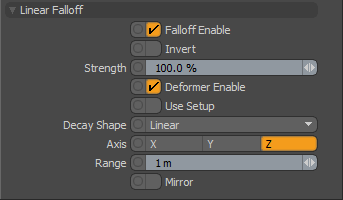
Toggles the influence of the falloff on or off. When disabled, the falloff has no effect on its target. However, Modo saves disabled layers with the scene, and the values persist across Modo sessions. |
|
Invert |
When enabled, reverses the influence area of the falloff. |
|
Strength |
Controls the maximum amount of influence the falloff has on its target. At a value of 50%, even areas that are affected fully by the falloff are only influenced half as much. |
|
Deformer Enable |
When enabled, you can connect the falloff to a mesh and use it as a mesh deformer. For more information, see Applying Deformers. |
|
Use Setup |
Determines how the Deformer Enable option affects the target. When using the falloff as a Deformer, use the Use Setup determines the undeformed position for the falloff by using the Setup state. You enter the Setup state and position the falloff where you want the Deformation to originate from. Once you exit Setup, moving the falloff deforms only those vertices within its area of influence from the Setup position. When you disable Use Setup and animate the falloff or mesh, the vertices within its influence are affected, but they slide through the area of influence instead of being affected by it directly. |
|
Decay Shape |
Controls the rate of attenuation across the falloff with four possible choices. • Linear: This gives a straight attenuation of the falloff influence across its total range. • Ease In: This gives a smooth attenuation with greater influence toward the start of the falloff's range. • Ease Out: This gives a smooth attenuation with greater influence toward the end of the falloff's range. • Smooth: This gives a smooth attenuation with a slightly greater influence in the middle of the falloff's range.
|
|
Axis |
Determines the initial axis direction of the Linear Falloff's shape. |
|
Range |
Determines the overall extent of the falloff's influence as a length originating from the falloff's center. |
|
Mirror |
Produces an inverted duplicate of the falloff's influence across its origin and axis. |
Easing Properties
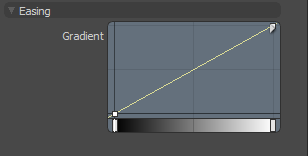
| Gradient |
Allows you to re-map the weight of a falloff by creating a new custom falloff shape. In the Graph Editor, press Ctrl/Cmd + Alt and click on the graph line to add a new key point. Move the key points to create custom falloff shape. For more information, see Key Creation. Watch this video for an overview: Gradient Editor. |
