Pen Generator
The Pen Generator tool allows an existing polyline to provide a path for other tools to walk and evaluate. This can be useful for things like extruding or transforming shapes along a polyline and controlling positions of elements along a polyline.
Note: The difference between the Pen Generator and the Path and Path Segment Generator tools is that the Pen Generator tool provides both the path and the particles to place along the path.
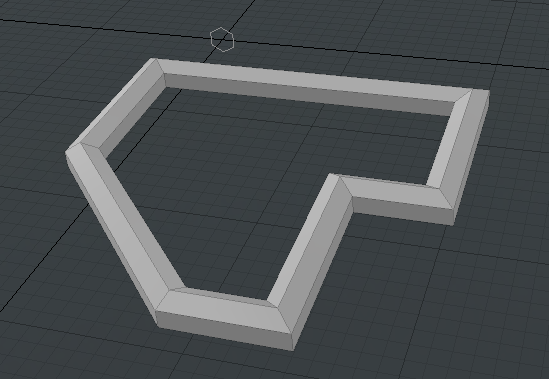
The Pen Generator has a single input for a mesh item containing a polyline to use as a path. The Pen Generator must be added to a Sweep Effector, which draws the resulting geometry. The Sweep Effector has an input for the mesh that is to be drawn along the polyline. This source mesh can be of any type.
The screen capture below shows the Mesh Ops tab for the image above. In this case, the swept mesh is a hexagon (made using the N-Sided primitive).
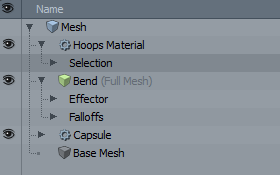
Using the Pen Generator
The following steps show how to use the Mesh Operations List to use the Pen Generator. In this example, the polyline is drawn using the Pen tool in a new mesh. The steps below start from scratch and build the mesh pictured above
Note: If you already have a mesh in the stack to use as an input to the Sweep Effector, skip to step 3.
| 1. | Add a procedural mesh to the stack. In this case, let's add an N-Sided primitive by clicking Add Operator in the Mesh Operations List, and double-clicking N-Sided under Mesh Operations > Create > Curves. |
| 2. | In the Properties panel, set Sides to 6 to make a hexagon. |
| 3. | Click Add Operator again to open the Preset Browser. |
| 4. | Under Mesh Operations > Duplicate, double-click Sweep Effector. This adds a Sweep Effector to the stack. |

| 5. | In the stack, expand Sweep Effector to reveal the Tool Pipe, and click (Add Tool Pipe). |
| 6. | Double-click on Pen Generator to add it the Sweep Effector's tool pipe. |
| 7. | In the stack, expand Pen Generator and expand Polyline, click (Add Polyline). |
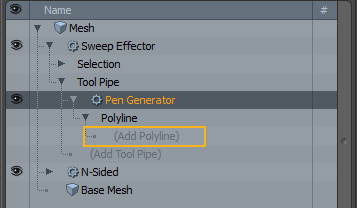
This opens the Preset Browser.
| 8. | Let's add a new mesh to hold the polyline. In the Preset Browser, ensure the New category is selected, and double-click on Mesh in the right-hand column. |
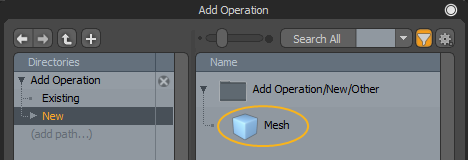
| 9. | You can now draw the polyline in the new mesh. Select the Pen |
Note: This Pen Generator will not work if you do not set the Pen tool type to Polyline.
| 10. | Draw the polyline by clicking in the 3D viewport. The source polygon is swept along the path. |
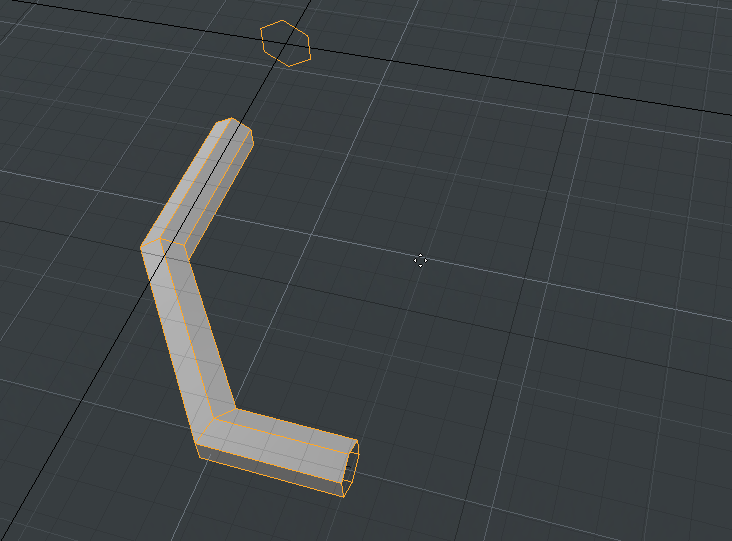
Tip: If you want to draw along the ground plane, it helps to set the view to Top in the viewport.
Pen Generator Properties
You can customize the behavior of the Pen Generator using the properties below.
|
Pen Generator |
|
|---|---|
|
Polyline Index |
Selects a polyline to use as a path from the input mesh, using its index value. |
|
Align to Path |
When enabled, Modo rotates the particle angle to align it with the path's directional vector. (An effector tool rotates the objects to match the direction of the path at the particle's position.) |
|
Align to Normal |
When enabled, Modo tries to align the direction of the source objects to a straight up position before generating the particle orientation. |
|
Start at Source |
When enabled, Modo positions particles based on their center point. When disabled, Modo attempts to place the base of the target geometry at each path point. |
|
Corner Scale |
When enabled, Modo scales corners automatically so that the path has a constant thickness. |
Pen Generator Procedural
The Pen Generator has the following procedural sub-tool:
• Polyline - This references a mesh containing a polyline that is used to describe the path.
Pen Generator Schematic
The image below shows an example of the Pen Generator when used with a Sweep Effector.

