UV Box Transform Tool
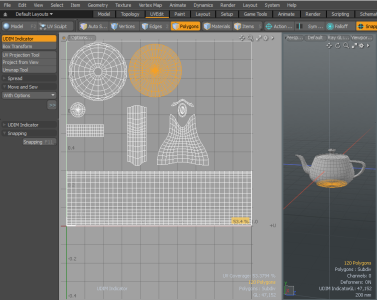
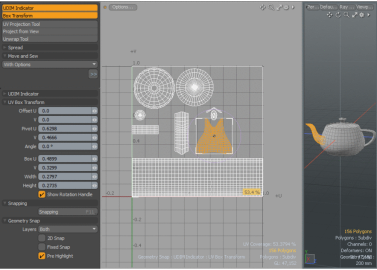
The UV Box Transform tool allows you to quickly move groups of polygons in the UV space. This tool, while active, draws a rectangular bounding box around the component selected in the UV space, to which you can apply transform actions.
Applying UV Box Transform
In this example, add the Teapot model to your scene, and use the UV Box Transform tool to transform a group of polygons in the UV space.
Adding a Primitive to your Scene:
| 1. | Open the UVEdit layout. |
| 2. | Below the interface layout tabs, click Polygons to enable the Polygon Selection Mode. |
| 3. | In the menu bar, click Geometry > Primitive Tools > Teapot. |
| 4. | In the Toolbox on the left pane, under the Teapot properties, click Apply. |
The Teapot primitive displays in the viewport.
Selecting a Group of Polygons to Move in the UV Space:
• In the UV window, double-click on a group of polygons.
The group of polygons is selected and highlighted.
Activating the UV Box Transform Tool:
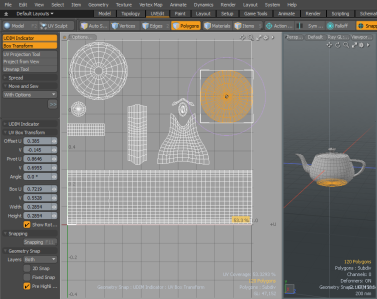
• On the left pane, in the Toolbox, click UV box transform tool.
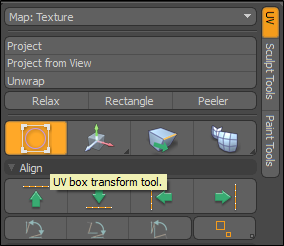
A rectangular bounding box displays around the selected item.
Moving a Group of Polygons:
| 1. | Click inside the UV bounding box of the selection of polygons and drag it to a new position in the UV space. |
A rectangular bounding box displays around the selected item and the pivot does not change position when moving the selection.
Tip: Press and hold the Ctrl key to constrain to the axis (U and V).
Hold the Shift key to snap the UV bounding box corners to the major axis lines.
Rotating and Repositioning a Group of Polygons:
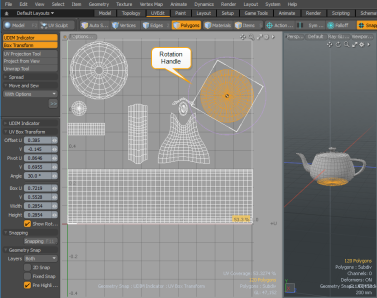
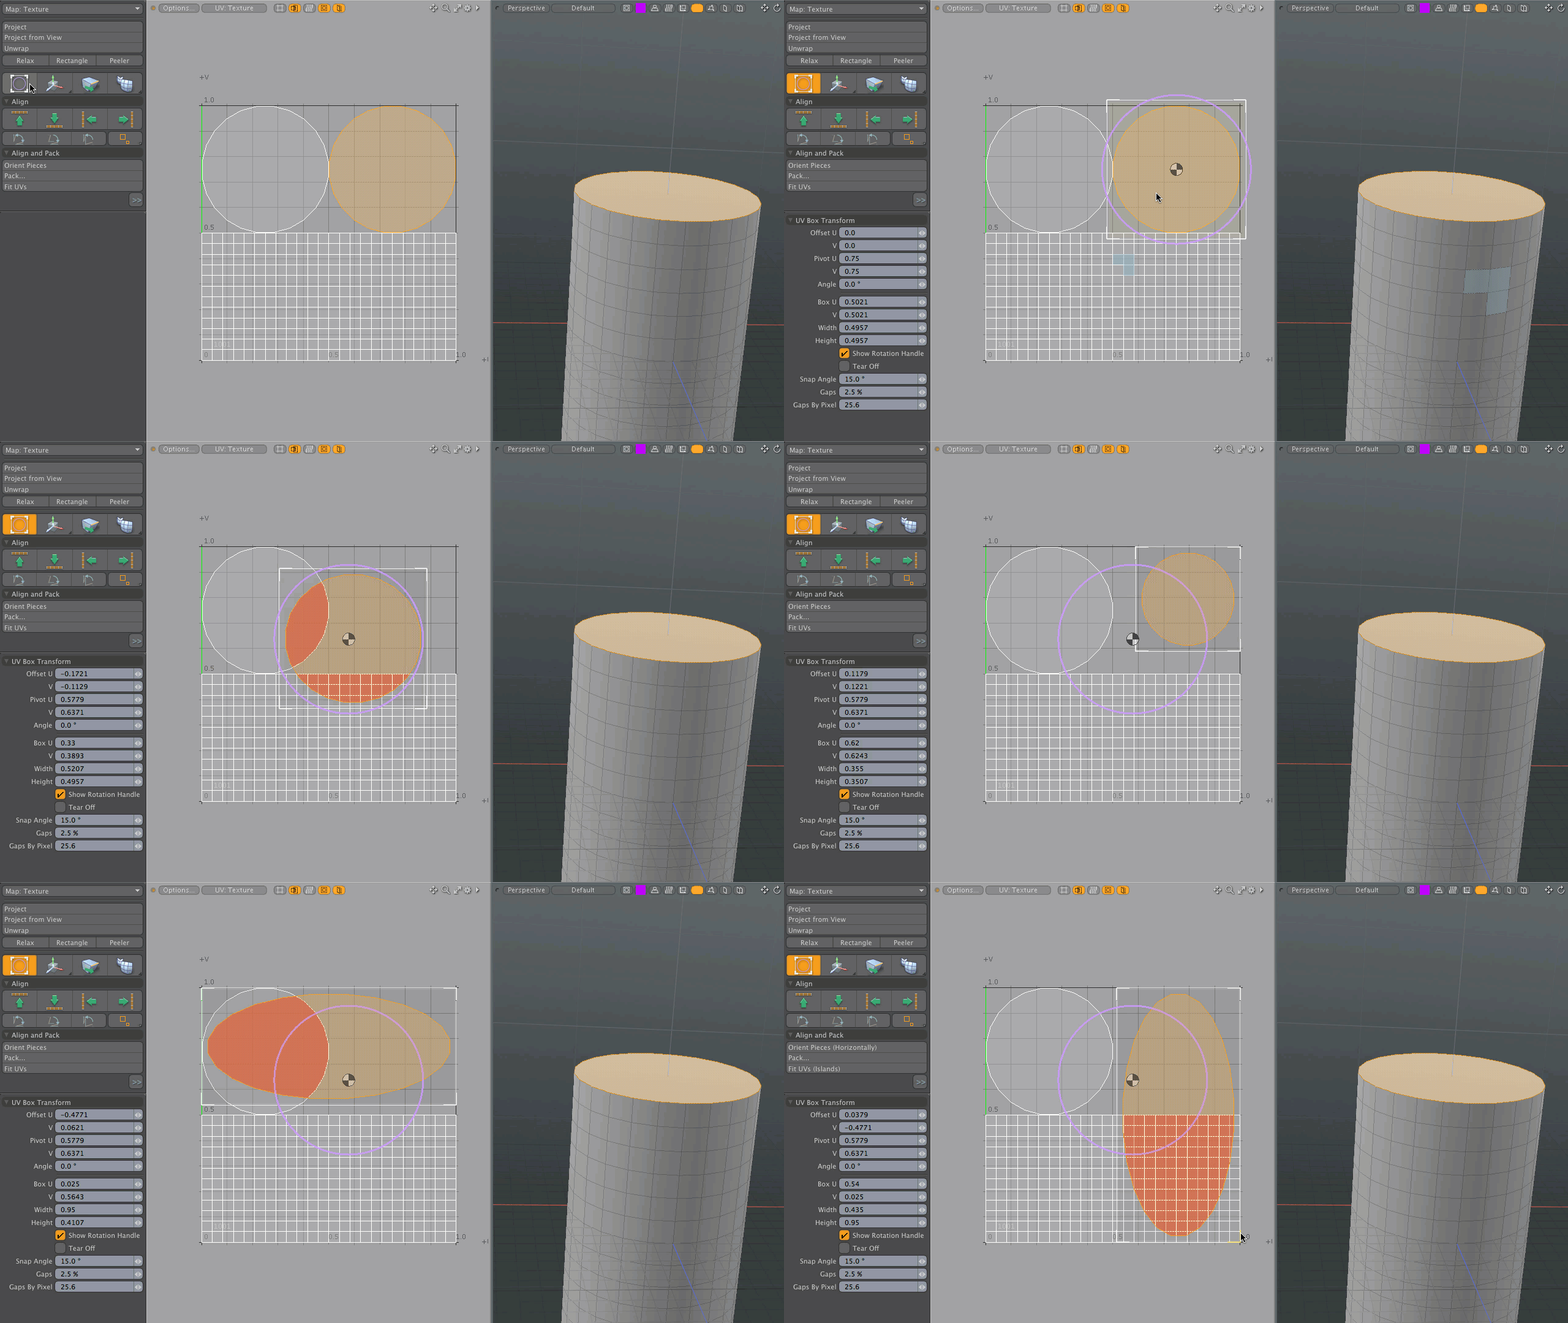
| 1. | Press the Ctrl key and then click and drag the rotation handle to constrain the rotation to fixed 15° intervals. |
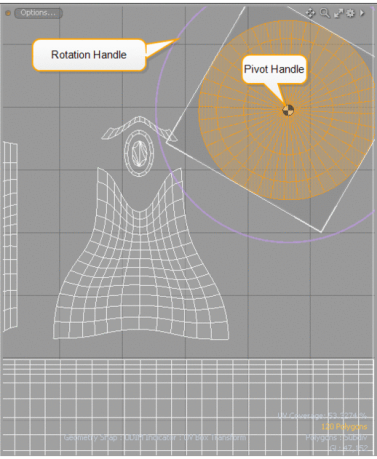
| 2. | Click and drag on the pivot handle to move the pivot position to the side of the UV bounding box. |
The pivot snaps to the side edge of the UV bounding box.
| 3. | Click and drag the polygon selection to reposition the group of polygons. |
| 4. | Click and drag the rotation handle to rotate the group of polygons. |
The center of rotation is based on the new position of the pivot. Polygons that overlap on other polygons in the UV space are displayed in red.
Click the thumbnail below to view the animation.
Scaling a Selection of Polygons:
• With a group of polygons selected, right-click and drag a side of the bounding box.
The group of polygons is scaled from the opposite edge, not from the pivot point. Dragging on a corner scales a group of selected polygons uniformly.
Tip: Dragging on a corner scales the selection uniformly.
Click on the image below to view the animation.
UV Box Transform Properties
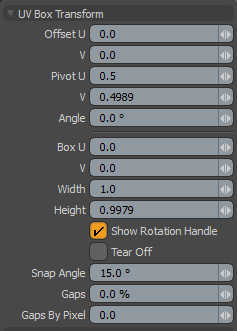
|
Offset U and V |
Set the offset amount to translate selected UV polygons along the U or V direction. |
|
Pivot U and V |
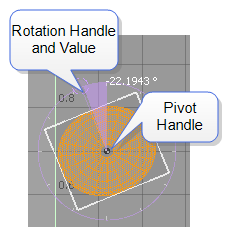
Position the pivot for the center of rotation. When adjusting an object interactively in the 3D viewport, the Pivot U and V fields display the current offset distance values applied. To view the pivot, enable the Show Rotation Handle option. • In the UV viewport, click and drag the pivot handle to move it to a side or to a corner of the UV bounding box. The pivot handle snaps into place. |
|
Angle |
Set the angle to rotate the selected UV polygons at the pivot position. The pivot does not move from its position. When adjusting an object interactively in the viewport, and when the Show Rotation Handle option is enabled, the angle value is displayed and updates while dragging the rotation handle. Tip: Holding the Shift key snaps the UV bounding box corners to major axis positions (constraining the rotation to fixed 15° intervals). |
|
Box U and V |
Set the UV bounding box position at left-bottom of the box. When adjusting an object interactively in the viewport, the Box U and V fields display the current position. |
|
Width |
Set the width of the UV bounding box. When adjusting an object interactively in the viewport, the Width field displays the current UV bounding box size. In the viewport you can do the following: • Adjust the Width value only of the UV bounding box by right-clicking and dragging on a side of the UV bounding box. • Adjust both the Width and Height of the UV bounding box at once by right-clicking and dragging a corner of the UV bounding box. • Scale the selected polygon group within the UV bounding box by right-clicking and dragging a top or bottom of the bounding box. The polygon group is scaled from the opposite edge of the bounding box, not from the pivot point. |
|
Height |
Set the height of the bounding box. When adjusting an object interactively in the viewport, the Height field displays the current UV bounding box size. In the viewport you can do the following: • Adjust the Height value only of the UV bounding box by right-clicking and dragging on a side of the UV bounding box. • Adjust both the Width and Height of the UV bounding box at once by right-clicking and dragging a corner of the UV bounding box. • Scale the selected polygon group within the UV bounding box by right-clicking and dragging a top or bottom of the bounding box. The polygon group is scaled from the opposite edge of the bounding box, not from the pivot point. |
|
Show Rotation Handle |
Toggle the visibility of Rotation and Pivot handles. When adjusting an object interactively in the viewport, the rotation handle displays the angle value and the pivot handle displays and remains in its position.
|
|
Tear Off |
Splits transforming polygons. |
|
Snap Angle |
Sets the delta rotation angle for rotation tools. |
|
Gaps |
Adds border padding to the UV map. By default the UV map is drawn up to the edge of the UV space, which may cause problems with pixel blending. Entering a percentage gap value corrects this type of problem. The Gaps by Pixel value is automatically calculated.
|
|
Gaps By Pixel |
Sets the padding to an image pixel unit. This option automatically updates the Gaps value. |
Related Videos
Introduction to the UV Box Transform tool
Courtesy William Vaughan
UV Box Transform Tool - Gaps
Courtesy William Vaughan
