Creating Geometry
To wrap up this section of the guide, let’s look at using the Cube Primitive Tool.
Primitives
Primitive items, such as the cube we created earlier in this section, as well as spheres, cylinders, and cones are great foundational forms. They can then be edited, added to, modified, and molded into the form you want, using any of the deform or mesh editing tools.
For example, I start 98% of all models I create from a default cube primitive. Activate the Cube Tool by clicking on the Cube Icon in the Model Toolbar.
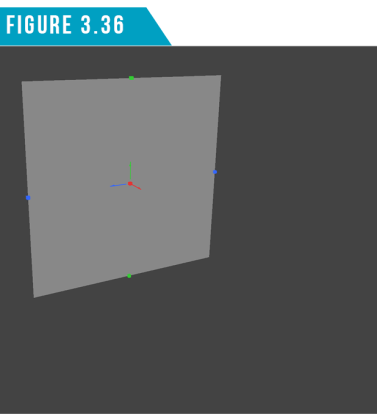
Next, left-click and drag in the 3D Viewport to create a single plane as seen in (Figure 3.36).
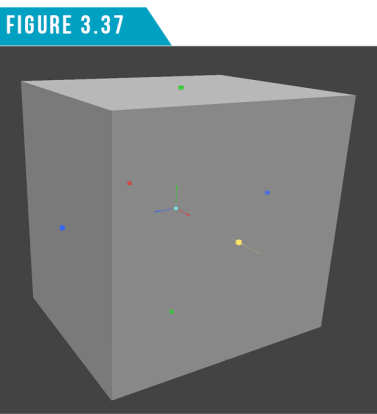
Left-click and drag the center box handle to give dimension to the plane (Figure 3.37).
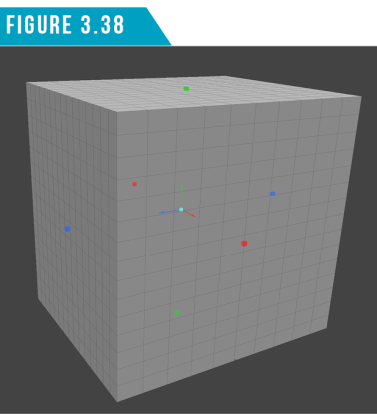
Right-click and drag up and down and left to right to add segments to the cube (Figure 3.38). Of course, you can also add segments by adjusting the X, Y and Z Segments attributes in the Tool Properties Panel, but I find it quicker to do it interactively in the viewport. Figure
In the Tool Properties Panel, increase the Radius attribute to your liking using the minislider. (Figure 3.39) shows the results after I adjusted the Radius attribute.

Use the Red, Green and Blue arrow handles to position the cube, and the red, green and blue box handles to change the cube’s dimensions. When you’re happy with the look of your cube, press (Q) to commit.
It’s important to understand that once you drop the tool, you’ve committed to those settings and cannot return to adjust those attributes. We’ll discuss this further in the next section that explains the difference between Direct and Procedural modeling.