Search Tips
Nuke Stage Spherical Mapping project node graph rundown
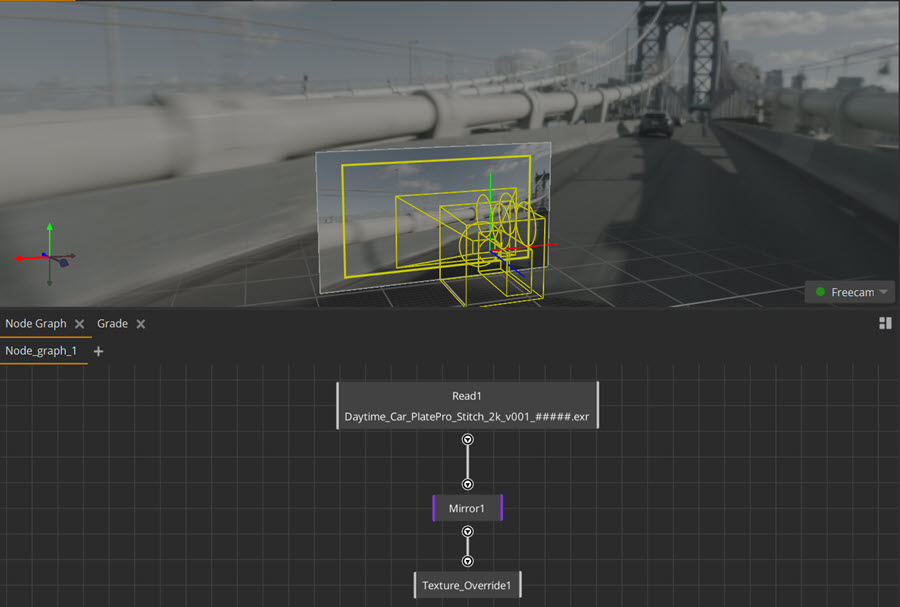
This scene’s Node Graph has been created using aTexture Overrides to project the image sequence onto a spherical mesh. When you create a texture override in Nuke Stage, it automatically creates a node graph (labeled Node_graph_1) with a Read node and a Texture Override node to input the image sequence into.
How node graphs work
• Each node has a different purpose, like a building block for creating effects and manipulating images in your scene.
• They are connected via pipe connectors (visualized as lines between nodes). You can build node sets up like layers via these connectors. You start (normally at the top) with a node that reads the image or texture you want to edit, and each subsequent node builds onto the subset you already have. This way you can build up effects in your node graph.
• Edit node values by selecting the node in the Node Graph, and changing the properties of the node in the Properties panel.
All nodes found in Nuke Stage can be found at Nodes.
Node graph rundown
• The Read node contains the file path to the three image sequences that are projected on the wall.
• The Mirror node flips the input image from the Read node. In this instance, the Mirror node is flipping the image sequence horizontally.
• The Texture override node defines the output that will be projected onto the spherical mesh that is in the Scene Graph. The entire upstream of nodes (in this case, the Read and Mirror nodes) will be applied to the final output.
Experiment: Add a HueShift node to alter the color settings of the input image. Create the node by clicking Tab in the Node Graph and using the search bar to find the node. Add it to the existing node graph by hovering it over a connector in your node graph. When the connector goes orange, let go of the node and it will snap into the node set. Now, any changes you make in the Hue Shift node's Properties panel will appear in the final output of the node set.
Nodes used in this project
• Read
• Mirror