Search Tips
Feed Mapping
The Feed Map panel is a canvas view for display overrides. It will represent your displays in a 2D space.
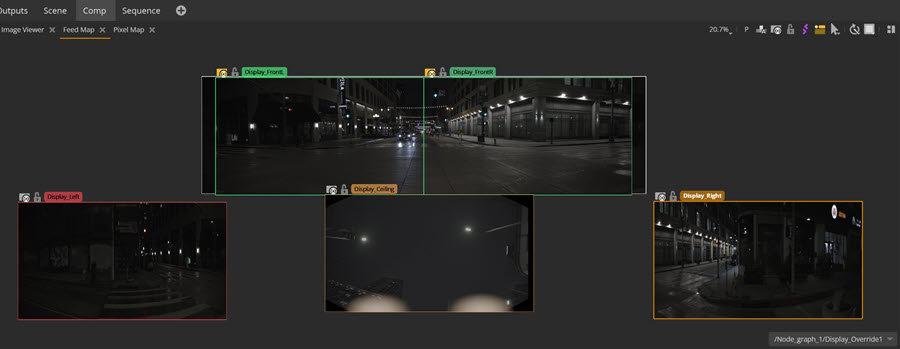
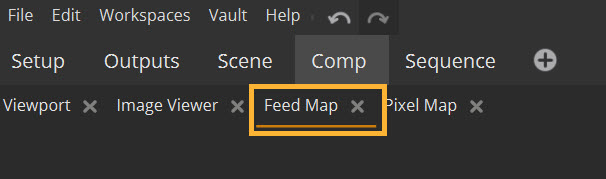
Accessing the Feed Map panel
To access the Feed Map panel go to the Comp > Feed Map.
Feed map toolbar and controls
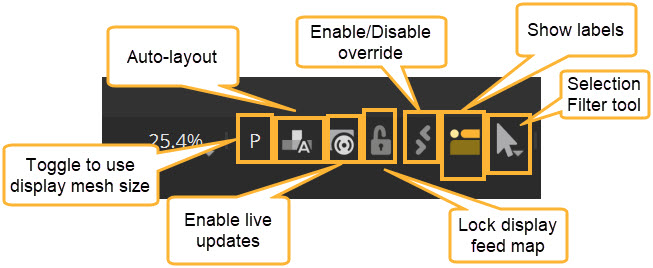
• Use display mesh size - Toggles between using a display size approximated from the mesh ( ), and one taken from the display resolution (
 ).
• Auto-layout - auto layouts the displays in a 2D approximation of 3D space. See more at the Display Placement section of this page.
• Enable live updates - when enabled on a display, the display receives active feed map updates. See more at the Feed mapping images onto Displays section of this page.
• Lock display feed map - locks the display so it can no longer receive live updates or be moved in the Feed map panel. See more at the Locking your displays section of this page.
• Enable/disable overrides - toggle to fully enable/disable an override from a display. See more at the Feed mapping overrides over a USD scene section of this page.
• Show labels - toggles whether to show the display labels in the Feed map panel.
• Selection filter tool - defines what you can select within the Feed map panel. See more at Selection Filter tool for moving panels.
Selection Filter tool for moving panels
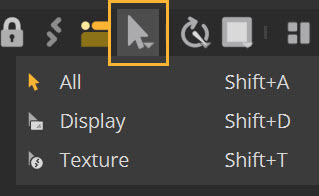
The Selection Filter tool gives you control on what you are able to select and move within the Feed Map panel, ensuring that you don’t accidentally move a texture when trying to select a display, and vice versa.
| 1. | All - both displays and textures can be selected and moved in the panel |
| 2. | Display - only displays can be moved in the panel. This is different from locking a display. See more at the Display Placement section of this page. |
| 3. | Texture - only the output texture can be moved. |
Using the Feed Map panel
To use the Feed Map panel to map your imagery onto your displays, first create your Outputs and Displays in the Output Map panel (or Project Graph > Hardware) and set up the output mapping for each display. For more information, go to Creating Displays and Viewports.
Note: Feed mapping will only work if you have an Output connected to the Display. You can check you have Outputs connected to Displays at Project Graph > Displays > Viewports > Output.
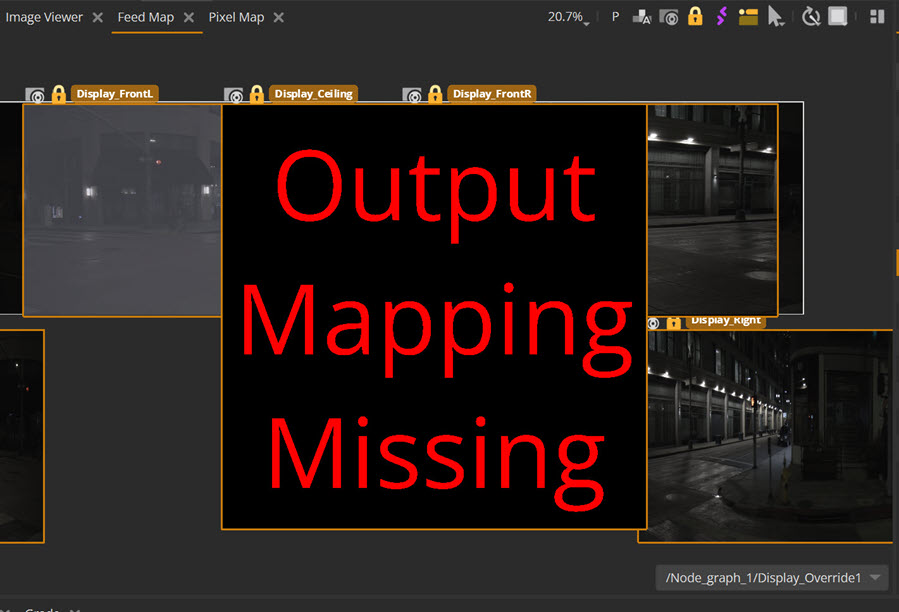
Feed Mapping panel with no output connected to the display.
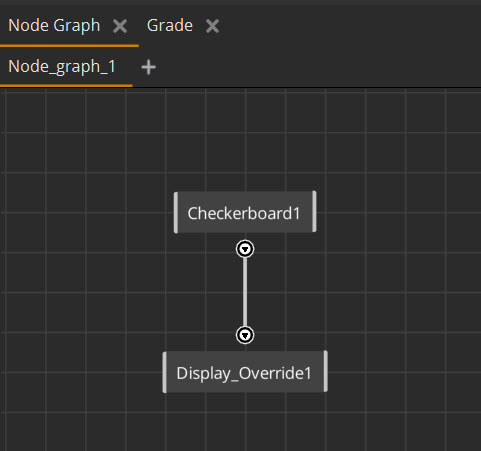
Add the content you want to display to your Node Graph and attach it to a Display Override node.
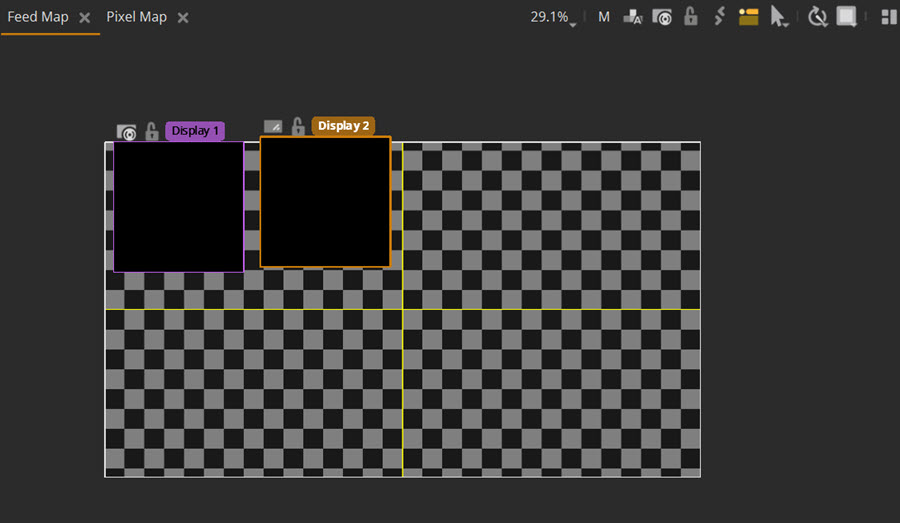
Open a Feed Mapping panel to see your displays and the output image.
Display Placement
You can move the displays within the Feed Mapping panel by left-clicking and dragging the displays. This will not affect the placement of your displays in the Hardware setup and Viewport. The currently-selected Display will be highlighted orange.
To get an approximate 2D view of your 3D display layout, select the displays you want to organize visually and use the Auto-layout tool. This can be accessed through the button on the Feed Mapping toolbar ( ) or through the right-click context menu in the Feed Mapping panel. The keyboard shortcut for this action is L.
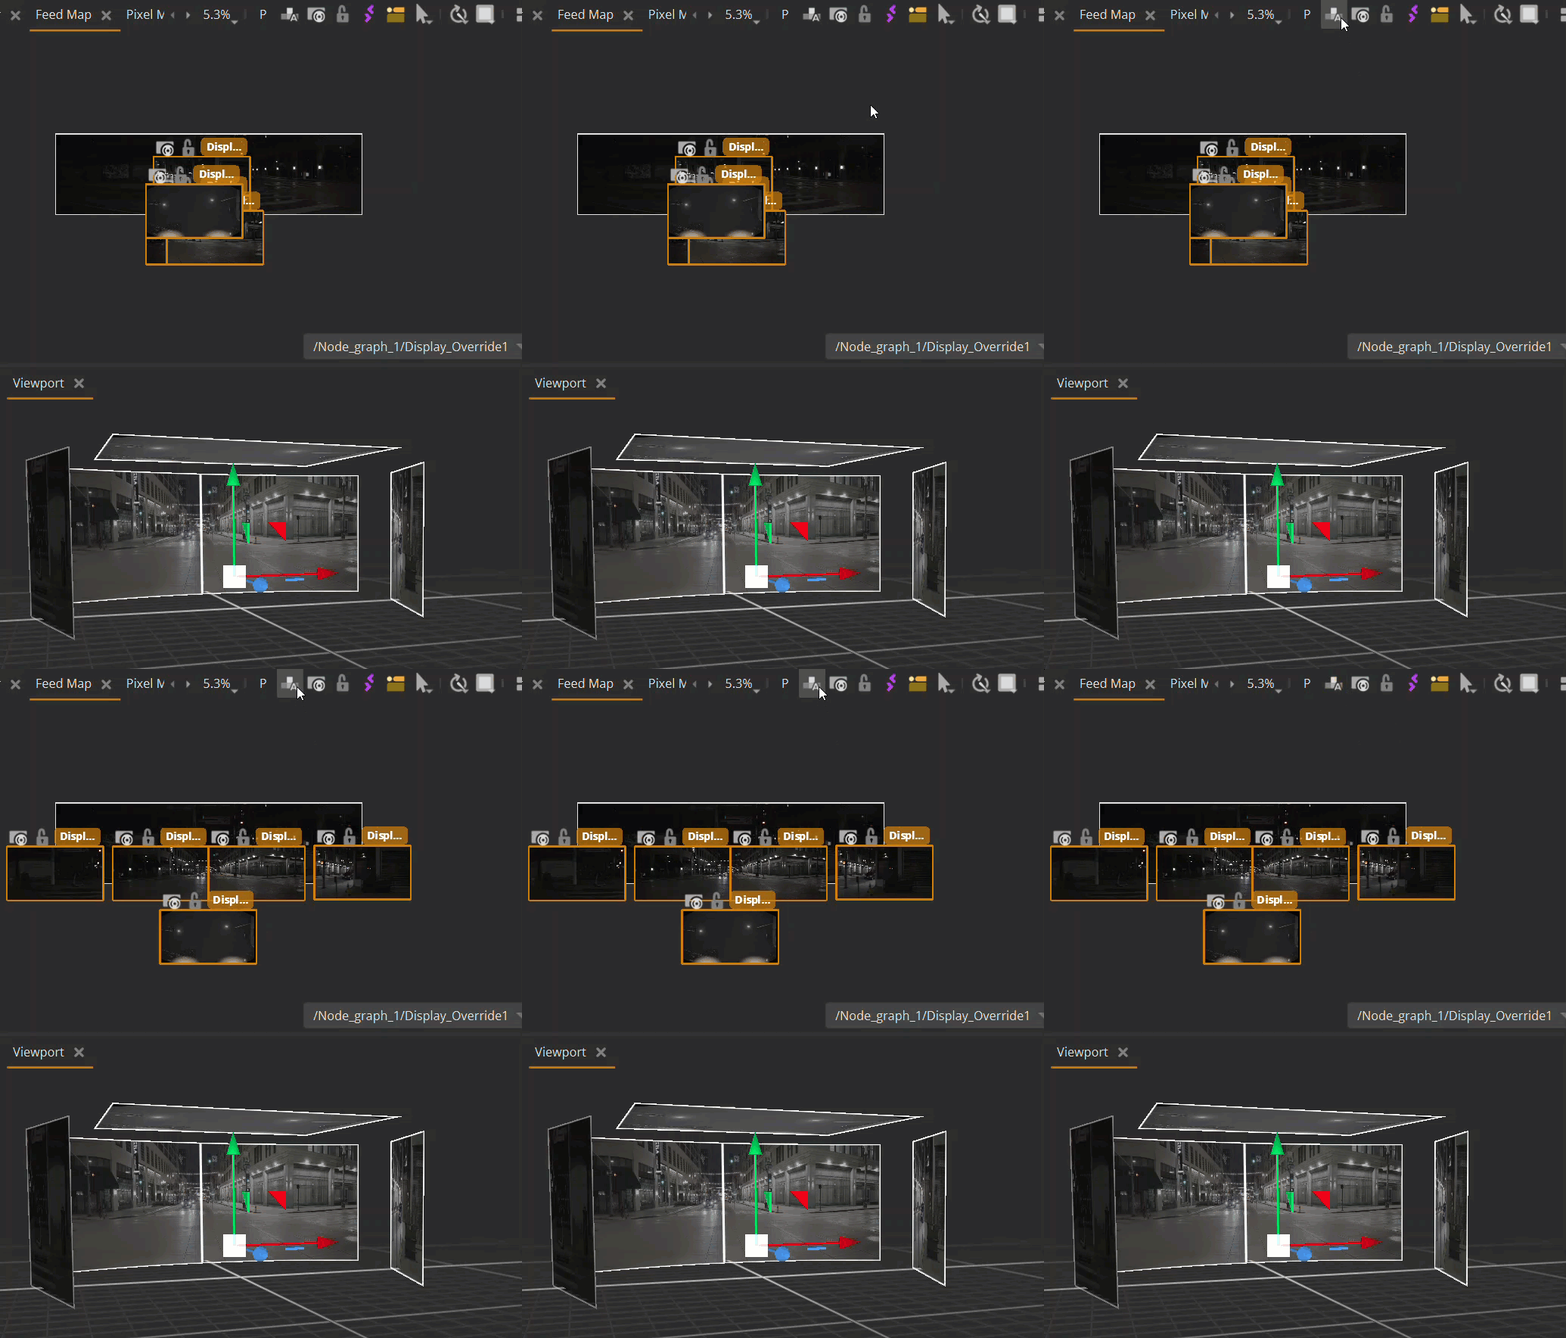
If you move a display in the hardware setup it will move in the canvas view when you next use the auto-layout tool, so you can maintain the approximation of the display layout in the canvas view.
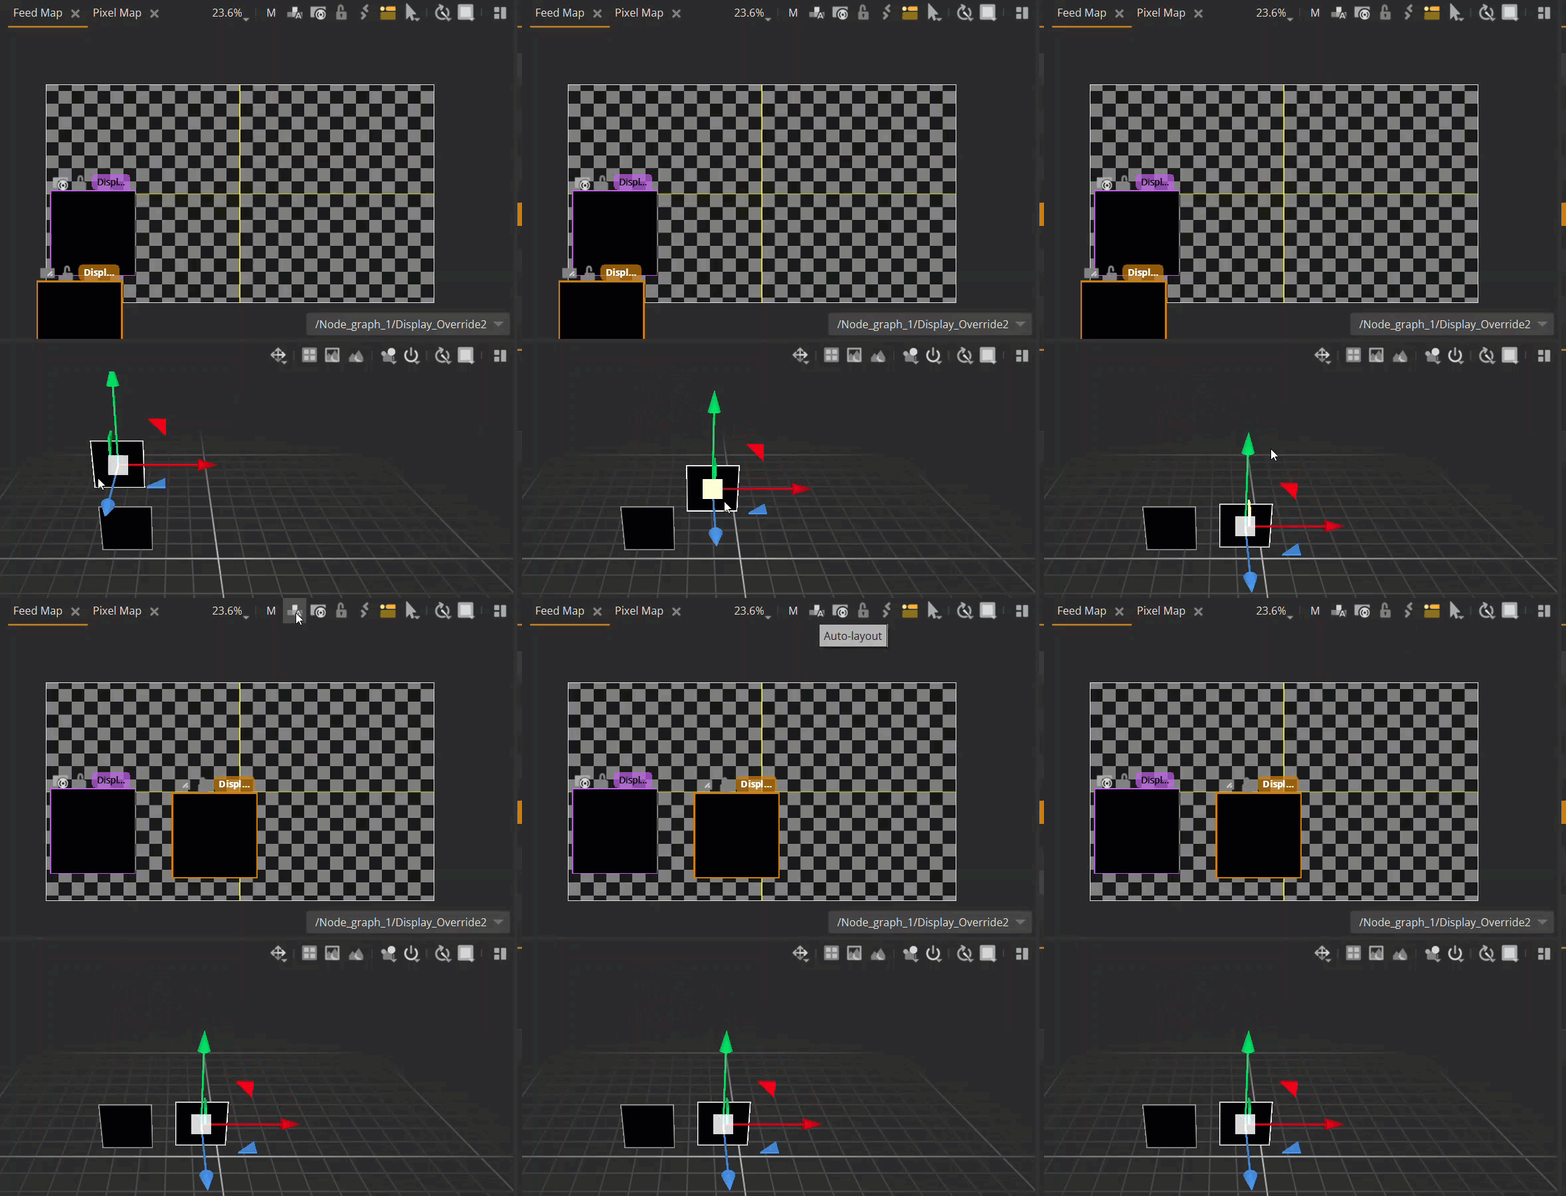
Output image placement
Choose which output image you want to map onto your displays using the dropdown options on the bottom right of the Feed Map panel.
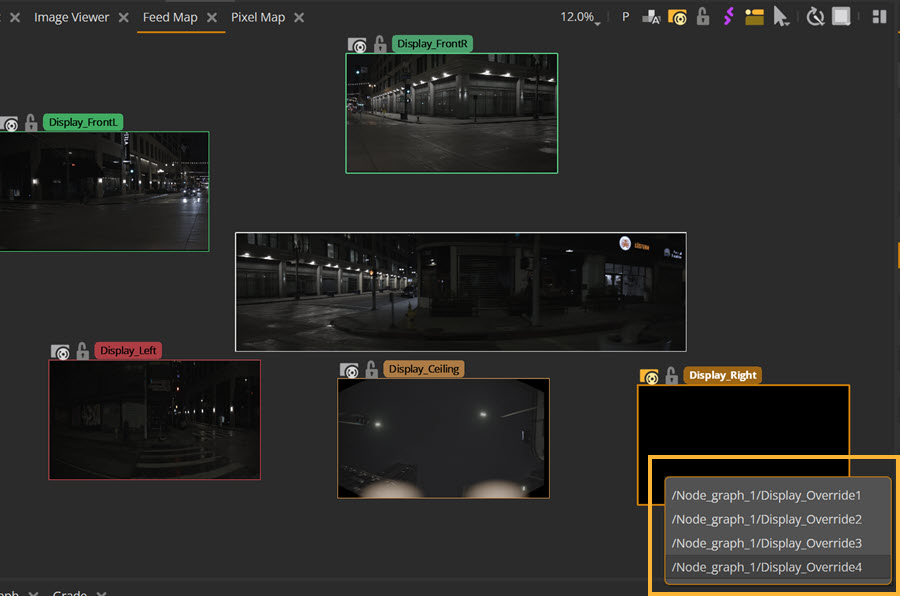
You can move the output image freely around the layout by left-clicking and dragging it across the panel. You can also scale the output image by clicking on the border of the image and dragging it.
Feed mapping images onto Displays
To update the image on a display using feed mapping, select the display you want to map your image onto.
The display has an Enable live updates icon ( ) on top of it, which indicates whether the display is currently receiving live updates from the Feed Map panel.
• The gray icon means that override is not receiving live updates.
• The bright orange icon means that the display is receiving live updates.
When the display is live, the output image of that display will update as you move the display over the output image, and will change if you select a different image to populate in the display.
To make a display live, use the Enable live updates button. Alternatively use the keyboard shortcut M, or the right-click context menu.
Note: In the Hardware > Displays > Display > Feedmapping properties, enable the FeedMap live feed property for the display to be automatically updated from the Feed Mapping view.
Once you are happy with the mapping of the display image, disable the Enable live updates button (so it is light gray). The display is now fixed with your output image. You can change the output image and work on different displays without affecting this display, as it is not receiving live updates.
Locking your displays
Once you have set up your displays’ position and mapping, you can use the lock function to prevent any further accidental movement of their position or feed mapping. To do this:
| 1. | Select the display(s) you want to lock into place. |
| 2. | Click the Lock icon in the Feed map toolbar ( ). |
| 3. | The Lock icon for the display(s) will turn yellow and lock. This means the display cannot be moved in the Feed map panel. You can also no longer Enable live updates for the locked display. |
Note: Note that the display can still have its position changed via the Viewport and the Properties panel.
| 4. | To unlock a display, select it and click the toolbar lock icon again. The display’s lock icon will turn gray and unlock. |
Feed mapping overrides over a USD scene
The Feed Map panel has an Enable Overrides icon ( ) that enables you to toggle between fully enabling and disabling a display override. This is useful for when you want to toggle an override over an existing 3D scene.
For example, if you need to apply a lightcard for a specific use case on your display, click the Display window on the Feed Map panel and select the Enable overrides icon.
Change the target to the display override you want to map, and that override will appear on the display.
To remove, simply click the overrides button to disable the override, and your 3D scene will be the display again.
Feed mapping panel keyboard shortcuts
• Auto-layout (L) - arranges the display overrides so their positioning is similar to the hardware setup.
• Toggle feed map (M) - toggles between a locked and live control. When locked, the output image will lock onto the display override
• Hide Labels (S) - hides the display override name and feed map toggle icon from the canvas view.
• Lock Position (Shift+L) - Lock the position of the display in the feed map panel.
• Enable override (D) - Fully enables/disables an override.