
Nuke Studio allows you to perform simple merges between tracks in the timeline, for example overlaying a logo on a track item, without heading into
NOTE: The Viewer currently treats all alpha channels as premultiplied, which can result in the Viewer background being “added” to the image.
You can add soft effects to blended tracks as normal (see Soft Effects for more information) and blended tracks are included along with the track item in Export operations, again using a Merge node set to over in Nuke's Node Graph. See Exporting from Nuke Studio and
To add a new blend track, do the following:
| 1. | Right-click in the timeline and select New Track > New Video Blend Track. |
A new track is added at the top of the track stack, colored blue to indicate that it's going to be blended over the track below.
| 2. | Add the required track item to the blend track as you would any other track item. See Adding Clips to the Timeline for more information. |
To designate an existing track as a blend track, do the following:
| 1. | Right-click in the header of the target track and select Editorial > Enable track blend. |
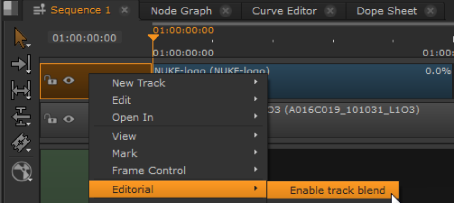
The selected track is converted into a blend track, colored blue to indicate that it's going to be blended over the track below.
| 2. | You can add track items to the blend track as you would any other track item. See Adding Clips to the Timeline for more information. |
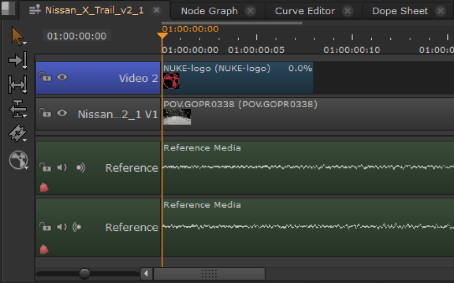
The Viewer displays the higher track blended over the track below.
|
|