Open topic with navigation
Viewing Multi-Format Timelines
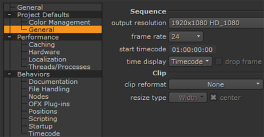
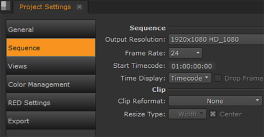
All sequences and clip instances added to them adopt the output resolution and clip reformat settings from the Preferences dialog under Project Defaults > General. You can override these settings on a per Project or per Sequence basis.
|
|
|
The Preferences dialog controls the default settings for new projects. Existing projects are unaffected by changes to the preferences.
|
|
|
|
The Project Settings control the default settings for new sequences and clip instances in the current project. Existing sequences and clip instances are unaffected.
Project Settings override Preference settings.
|
|
|
|
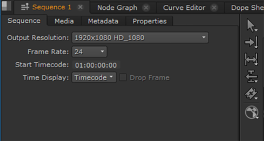
The Sequence settings control the current sequence.
Sequence settings override Project Settings and Preference settings for the current timeline.
|
|
|
|
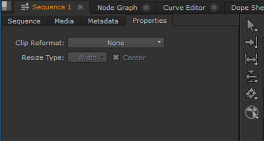
The Properties settings control clip instances in the current sequence.
Properties settings override Sequence settings, Project Settings, and Preference settings for clip instances on the current timeline.
|
Reformatting applied to clip instances on a timeline carry over into any export, including Create Comp. The reformat options in the Export dialog are applied after the transforms applied here. See Exporting from Nuke Studio for more information.
Setting the Sequence Format
The current sequence format is controlled by the Output Resolution dropdown in the timeline Sequence tab. The selected resolution is applied to all clip instances on the timeline, but by default, clip instances retain their native resolution. For example, setting the Output Resolution to 2k_DCP on a timeline containing HD_1080 clip instances results in the output resolution being larger than the clip instance.
TIP: Enabling the Custom Sequence Format guide at the top of the Viewer makes it easier to see differences between output resolution and clip instance format.
|

|

|
|
A 1920x1080 clip instance at native
resolution.
|
The same clip instance with Output
Resolution set to 2048x1080.
|
Similarly, setting the Output Resolution to a format smaller than the clip instance's native resolution results in the clip resolution being larger than the sequence resolution.
|
|

|
|
A 1920x1080 clip instance at native
resolution.
|
The same clip instance with Output
Resolution set to 720x486.
|
Clip instances with a higher resolution than the sequence format enable you to apply soft effects, such as Transform, more easily. See Soft Effects for more information.
Reformatting Clip Instances
Clip instances on the timeline retain the source clip's resolution by default. You can force clip instances to the sequence format using the timeline's Properties tab:
|
1.
|
Select the target clip instances on the timeline. |
|
2.
|
Click the Properties tab to display the clip instance options. |
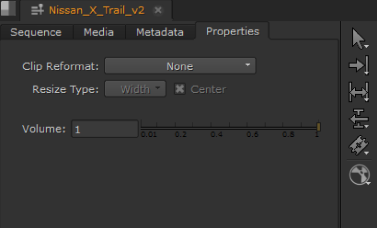
NOTE: The Volume control is only available when you have an audio clip instance selected.
|
3.
|
Click the Clip Reformat dropdown and selected To Sequence Resolution. |
|
4.
|
The clip instance is reformatted to the Output Resolution specified on the Sequence tab. |
|
5.
|
Depending on the source clip, you may need to change the Resize Type: |
• Width - scales the original until its width matches the format’s width. Height is then scaled to preserve the original aspect ratio.
• Height - scales the original until its height matches the format’s height. Width is then scaled to preserve the original aspect ratio.
• Fit - scales the original until its smallest side matches the format’s smallest side. The original’s longer side is then scaled to preserve original aspect ratio.
• Fill - scales the original until its longest side matches the format’s longest side. The input’s shorter side is then scaled to preserve original aspect ratio.
• Distort - scales the original until all its sides match the lengths specified by the format. This option does not preserve the original aspect ratio, so distortions may occur.
TIP: When Clip Reformat is To Sequence Resolution, disabling center places the clip at the bottom-left of the Output Resolution, rather than the center.
 Topics In This Section