Editing Shapes’ Display Characteristics
To edit shapes' display characteristics:
| 1. | If you created a lot of shapes, you may want to organize them into groups. Click the + button in the ModelBuilder properties to create a Group item and drag shapes inside it to move them into the group. |
| 2. | To rename shapes or groups, click on them in the Scene list and enter a new name. |
| 3. | If the Viewer seems too cluttered, you can toggle the visibility of both shapes or groups by clicking  in the Scene list. in the Scene list. |
Note that when an item is hidden, it doesn’t appear in the Viewer or renders.
| 4. | If you have connected geometry to the geo input but don’t currently need it as a reference, you can also uncheck Pass Through Geo. This tells ModelBuilder to not output that geometry. |
Note that when Pass Through Geo is enabled, the geometry appears both in the Viewer and renders.
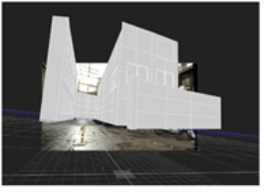
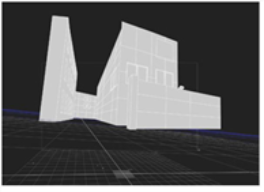
| 5. | By default, the src image is displayed in the 3D Viewer whenever the Viewer is locked to the input camera. If you don’t want this, uncheck Show Source Image. |
|
|
|
| Show Source Image enabled. | Show Source Image disabled. |
| 6. | Use the display and render controls to select how you want your shapes to appear in the Viewer and renders. These controls affect all the existing shapes. |
For example, you may want to set display to wireframe initially in order to better see what you are doing when positioning your shapes, but change it to textured to review the final result.
For more information on the available options, see Object Display Properties.
| 7. | If you set display to textured or textured+wireframe, you can also use the Texture control to select the frame used to texture the shapes: |
• Current frame - Project the current frame onto the shape.
• Locked frame - Project the frame specified in the field on the right onto the shape. This can help you line up the shape against your source footage.
• Frame difference - Subtract the frame specified in the field on the right from the current frame and project the resulting frame onto the shape. This can help you line up the shape against your source footage.
| 8. | If you want to disable shape selection in the Viewer, uncheck selectable. This only has an effect when the selection mode menu is set to Select nodes |
| 9. | If you don’t want the shapes to cast or receive shadows, uncheck cast shadow or receive shadow. |
For more information on shadows, see Casting Shadows.
| 10. | Proceed to Positioning Shapes below. |