Generating Motion Vectors
The SmartVector node generates motion vectors for use in the VectorDistort node. You can connect a SmartVector node directly to the VectorDistort or VectorCornerPin nodes or write motion vectors to the .exr format, which are then used to drive the warp nodes to reduce overheads later on.
To generate motion vectors:
| 1. | Read in your source sequence and then connect a SmartVector node to the Read node. |
| 2. | Double-click the SmartVector node to open its Properties panel, if it's not already open. |
| 3. | Set the Vector Detail control to the required detail level. The default value of 0.3 is sufficient for sequences with low detail and movement, but you may want to increase the detail to improve the vector quality in some cases. |
For example, if the area you're working on is relatively small, the default value of 0.3 might not capture movement properly. Try increasing the control to 1.0 to capture more detail.
Note: High detail vectors take longer to render, but can improve the results you get from the VectorDistort node.
| 4. | Set the Strength control to force pixel matching between frames. Higher values allow you to accurately match similar pixels in one image to another, concentrating on detail matching even if the resulting motion field is jagged. Lower values may miss local detail, but are less likely to provide you with the odd spurious vector, producing smoother results. |
Note: The default value works well for most sequences.
| 5. | If there is a lot of movement in the foreground, you might want to add a mask. See Masking Foreground and Background Areas for more information. |
Tip: You can examine the vectors produced by connecting a Viewer to the SmartVector node and switching the channels control above the Viewer to smartvector_<value>.
| 6. | If you want to write the vectors to disk, click Export Write to automatically add a Write node to the script. The Write node's controls are set to channels > all and .exr output automatically. |
You can only write motion vectors to the .exr format. Don't forget to add frame padding in the form of hashes or printf notation, depending on your Preferences > Behaviors > File Handling settings.
| 7. | Enter a file path in the Write node's controls and then click Render. |
Note: SmartVector does not currently output motion, forward, and backward channels by default. If you require these channels, add a VectorToMotion node after the SmartVector node. VectorToMotion converts the vectors to motion that can be used with VectorBlur to create motion blur, without using a VectorGenerator.
| 8. | Enable Advanced > Flicker Compensation to reduce variations in luminance and overall flickering, such as light reflecting from shiny surfaces, which can cause problems with your vector output. |
| 9. | Tolerances in the Advanced section allow you to tune the weight of each color channel when calculating the image luminance. |
These parameters rarely need tuning, but you may wish to increase the weighting on a particular color to allow the algorithm to concentrate on getting the motion for a certain object correct, at the cost of the rest of the items in a shot.
| 10. | Proceed to Adding Paint to the Source or Adding an Image to the Source. |
Masking Foreground and Background Areas
If your sequence is composed of a foreground object moving over a background, the motion estimation is likely to get confused at the edge between the two. To reduce artifacts, you can add an alpha mask to the Matte input.
To apply a mask to the sequence:
| 1. | Add a Roto node downstream of the source. |
| 2. | Draw a matte around the area you want to mark as foreground or background. |
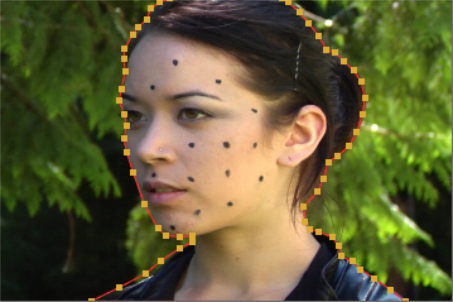
| 3. | Set the Matte Channel to Matte Alpha and the Output control to either Foreground or Background. |
|
|
|
|
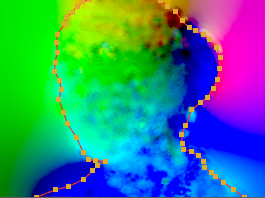
Foreground vectors |
Background vectors |
| 4. | If you're working with Background vectors, you can enable Inpaint Matte Region to automatically fill in the missing foreground vectors using the nearest available background vectors. The Matte Dilation slider controls amount of dilation applied to the matte before inpainting is applied. |
|
|
|
|
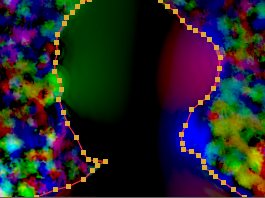
Background vectors |
Inpainted foreground |
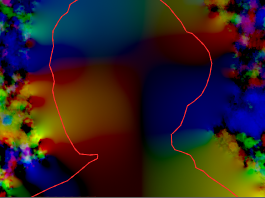
You can use inpainting to effectively ignore the foreground, allowing you to work with background vectors in the masked area.
| 5. | Generate the motion vectors as described in Generating Motion Vectors. |