Applying and Improving the Results
Video: Creating Mattes Using CopyCat in Nuke
Applying the Model to the Sequence
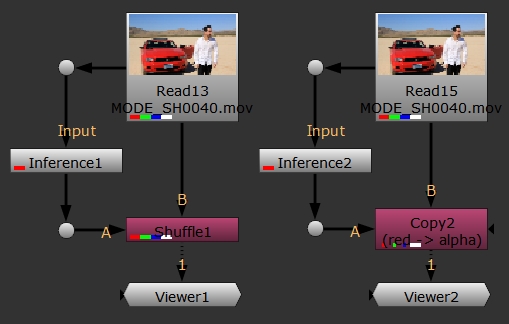
Trained networks are applied to sequences using the Inference node. The node reads in a .cat file and applies the effect learned from the data set to the whole sequence.
- Add an Inference node to the Node Graph or click the Create Inference button in CopyCat's Properties panel.
- Connect the Inference node to the source sequence Read node.
- In the Inference node's Properties panel, enter the file path of the .cat file in the Model File control or browse to its location on disk using the
 browse button.
 - Connect the Viewer to the Inference node to apply the effect to the current frame.
- Skip through the sequence to examine the results on different frames. Inference applies the model on each frame, so you may not be able to playback in real-time, depending on your machine's GPU and RAM specifications.
- If you're satisfied with the results, all you need to do is Shuffle or Copy the mask channel back into the source sequence and render the results.
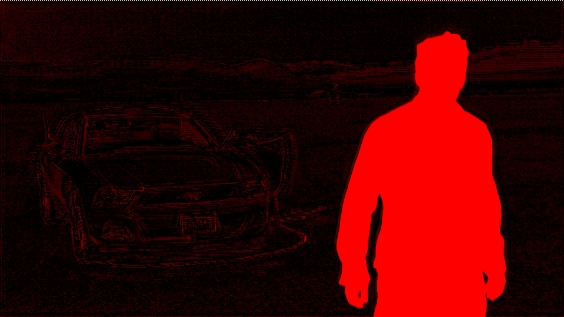
Inference times depend on your GPU's capabilities, but the results are displayed in the Viewer when complete.
Tip: You can enable Optimize for Speed and Memory in the Inference node's Properties panel to produce a faster result or process larger images, but this can result in artifacts with some trained networks.
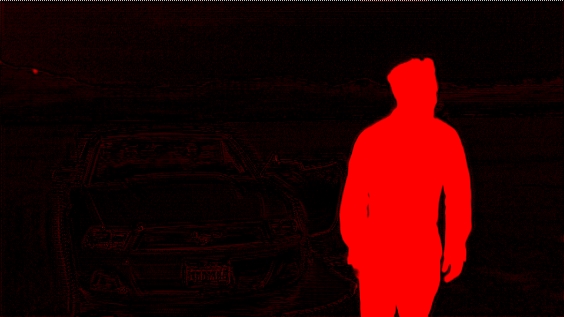
You can see from the example frame that a few artifacts remain in the areas outside the mask. Have a look at Improving the Result for more information about retraining and cleaning up your results.
Improving the Result
One of the simplest errors to correct is when you have connected the Input and Ground Truth images in a different order. You can look at the AppendClip nodes in the Node Graph to check the numbering, but this can be difficult if you have a large data set. An easy way to check is by connecting a Merge node in difference mode to compare the Input and Ground Truth images.
- Add a Merge node downstream of the Input and Ground Truth AppendClip nodes.
- In the Properties panel, set operation to difference.
- Check each frame in the data set for mismatches by skipping through the image pairs.
|
|
|
|
Image pair matching. |
Image pair mismatch. |


If the result still isn't what you expected, it could be that the image pairs in the data set don't contain enough diverse examples or that elements such as shadows and defocus are not represented in the data set.
Augmenting Image Pairs in the Data Set
You can fake the elements not represented in an existing data set, which requires less effort than creating brand new image pairs. This can work particularly well for shadow elements or areas where the matte passes over different backgrounds in the source sequence.
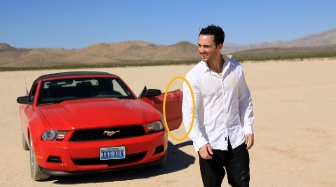
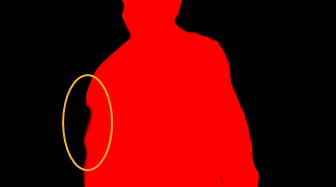
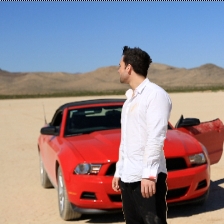
Playing through the example source sequence doesn't provide any examples of the where the actor passes directly over the car in the background, with the red color on either side of where the matte passes. This could cause problems for the neural network as it may only expect the actor against predominantly sand, mountains, and sky colors.
|
|
|
|
|
|
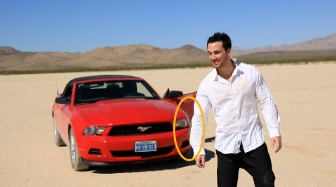
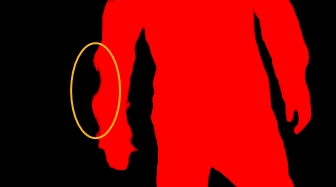
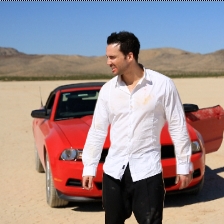
You can fake new foreground and background combinations by copying a Ground Truth matte into an Input image and then transforming the matte of the actor over the car body. You can also crop the new image pair to focus on just the areas where the actor and car overlap.
Tip: It's a good idea to add your additional image pairs using new AppendClip nodes. This way, you can easily isolate your original data set from faked image pairs if the new pairs aren't working to improve the output.
This simple example shows one possible workflow to produce any number of fake image pairs to add to the data set.
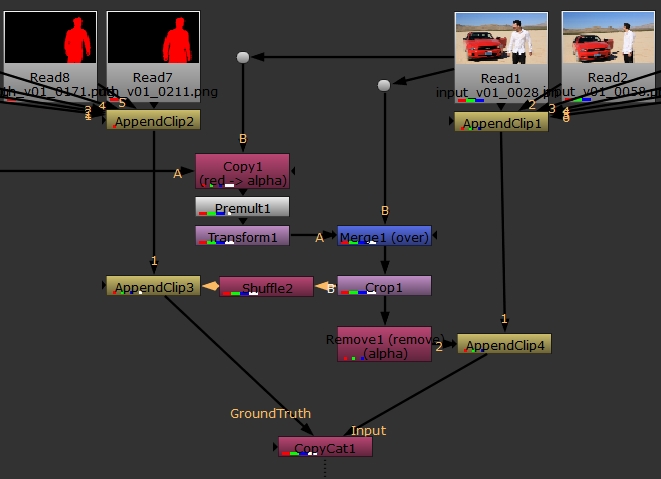
- Copy the alpha from your chosen Ground Truth image into the corresponding Input image using a Copy node.
- Add a Premultiply node to remove the background.
- Translate the matte over the car using a Transform node.
- Merge the result with the Input image using the over operation.
- Crop the new image to the combination of foreground and background elements you want.
- Shuffle the alpha back into the rgba.red channel for the Ground Truth image.
- Remove the alpha from the Input image using a Remove or Shuffle node.
- The two new images are then added to the data set using new AppendClip nodes.
- When you're happy with the augmented data set, restart training from a checkpoint by setting Initial Weights to Checkpoint and selecting a .cat file from the Data Directory.
- Click Resume Training to pick up from the selected checkpoint.
You can produce a lot of extra image pairs quickly using this method. Feel free to experiment with flipped and flopped mattes as well, any image with the correct combination of foreground and background elements is useful to train a network.
|
|
|
|

Choosing a checkpoint after fewer steps into the training can help to avoid sending the training down the wrong path, but you can also restart from the latest checkpoint by setting Initial Weights to None. Bear in mind that later checkpoints might contain bias towards an inferior result.
Adding Image Pairs to the Data Set
Adding new image pairs to the data set is another solution, but can be very time consuming. For example, the sequence shown in this topic contains a few frames where the actor crosses into the shadow of the car.
- Play through the source sequence and look for examples of where shadow, defocus, and so on are affecting the matte. In these example, the actor's arm strays into the shadow of the car, which is not represented in the initial data set.
- Roto the selected frames manually to create the Ground Truth mattes.
- Add the new image pairs to the data set. See Creating a Data Set for Training for more information.
- Click Resume Training to continue from the latest .cat file in the Data Directory.
|
|
|
|


You could also start a fresh run from a checkpoint early in the run by selecting Initial Weights > Checkpoint , entering the path to the .cat file in the Checkpoint File control, and then clicking Start Training. Using a checkpoint from earlier in the run speeds up the training process and can remove the risk of incorrect bias from later checkpoints.
Retraining Using Checkpoints and Weights
Training a network may not always produce the results you're looking for on the first run, so CopyCat allows you to resume training from the latest checkpoint in the Data Directory or restart from a previously trained model. You can select the required option from the Advanced > Initial Weights dropdown:
• Checkpoint - the training uses weighting from an existing .cat file. Enter the path to the .cat file in the Checkpoint File control or browse to its location.
• Deblur - the training starts, or resumes from the most recent .cat file, with a model weighted towards deblur effects, which can improve the training results for similar operations. For example, you could use the Deblur node on a sequence, and then try to improve the result on frames where it didn't work particularly well using Copycat.
• Upscale - the training starts, or resumes from the most recent .cat file, with a model weighted towards upscaling, which can improve the training results for similar operations. For example, you could use the Upscale node on a sequence, and then try to improve the result on frames where it didn't work particularly well using Copycat.
Thresholding and Filling the Matte
If there are still some artifacts in the background or holes in the foreground matte, you can use the Grade node or RotoPaint nodes to complete the matte. Thresholding refers to adjusting the black point and white point in the Grade node's controls to erode artifacts while leaving the edges of your matte intact. Filling describes manually filling holes in your matte using a RotoPaint node or similar.
In this exaggerated example, the background contains a lot of artifacts of the car and the mountains.
- Add a Grade node downstream of the Inference node applying the effect.
- In the Grade node's Properties, steadily increase the blackpoint to remove the background artifacts.
- Decrease the whitepoint to remove the foreground artifacts and replace eroded edges.
- Try to find the balance between the blackpoint and whitepoint that work best.
- You can cover holes or artifacts in the matte or replace eroded edges using the RotoPaint node. See Using the Brush tool for more information.
As the blackpoint increases, you may notice foreground artifacts on the matte or the edges of the matte may start to erode.
|
|
|
|
Low blackpoint values. |
High blackpoint values. |


As the whitepoint decreases, you may notice that the background artifacts return or the edges of the matte may start to dilate.
|
|
|
|
High whitepoint values. |
Low whitepoint values. |