Match-Moving Elements
Match-moving is the opposite of stabilization. The intent is to record and use the motion in an image and apply it to another element. In the following example, you’ll use the tracker to match-move and composite a mask image onto the performer in a background plate.
To Match-Move an Element
Note: This example uses auto-tracking, but the match-move principle is the same for keyframe tracking.
|
1.
|
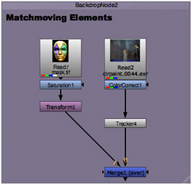
Find the node tree labeled Matchmoving Elements. |
|
2.
|
Drag the time slider to the beginning of the timeline. Select the ColorCorrect1 node and then choose Transform > Tracker. |
|
3.
|
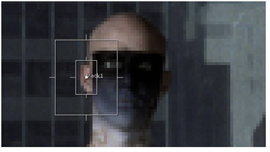
Attach a Viewer to the new Tracker4 node, create a tracking anchor, and position the track 1 anchor over the performer’s right ear. |
|
4.
|
Adjust the size of the pattern box and the search area as shown. |
|
5.
|
In the Properties panel, check the boxes for T (translate), R (rotate) and S (scale) for track 1. |
|
6.
|
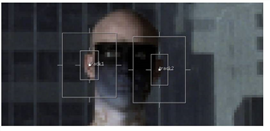
Adjust the size and position of the second tracking anchor, as shown below. |
|
7.
|
Create another tracking anchor, track 2, and check the boxes for T (translate), R (rotate) and S (scale) on this track. |
|
8.
|
Select both tracks in the Tracks list and click track forward at the top of the Viewer to generate the tracks. Edit the tracks as described in Tracking a Single Feature if necessary. |
|
9.
|
Once you have two solid tracks on the performer, make a copy of the Tracker4 node by selecting it and pressing Ctrl+C to copy it. |
|
10.
|
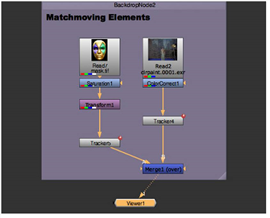
Select the Transform1 node and press Ctrl+V to paste the Tracker node copy (Tracker5). |
|
11.
|
Connect the Viewer to the Over node. Your node tree should now look similar to this: |
|
12.
|
In the Tracker5 Properties panel, click the Transform tab and choose match-move. Then close the Tracker5 Properties panel. |
|
13.
|
Click play in the Viewer or render a flipbook and you should see the Mardi Gras mask transform to match the movement of the performer. |
If you see jitter in the movement, you can edit the track data in the Curve Editor to smooth out the data. You can also add values to the smooth T, R, and S controls on the Transform tab to filter the tracks.