Removing Noise with Denoise
The Denoise node is an efficient tool for removing noise or grain from your footage. It uses spatial or temporal filtering to remove noise without losing image quality.
Quick Start
Here's a quick overview of the workflow:
| 1. | Connect Denoise to the footage from which you want to remove noise. |
See Connecting Denoise.
| 2. | Position the analysis box over a suitable analysis region. Denoise automatically analyzes the noise structure inside this region and removes noise from the footage. |
See Analyzing and Removing Noise.
| 3. | Review the results. |
| 4. | If you’re not happy with the results, you can fine tune them by adjusting the noise profile, frequencies, and channels. |
See Fine Tuning.
|
|
|
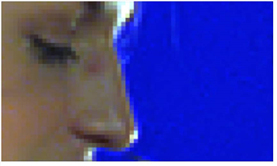
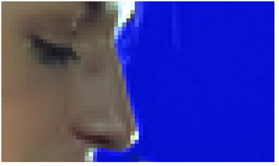
| Before Denoise. | After Denoise. |
Tip: You can check Use GPU if available to have the node run on the graphics processing unit (GPU) rather than the central processing unit (CPU).
For more information on the minimum requirements, please see Windows, macOS, or Linux or refer to the Nuke Release Notes available in Help > Release Notes.
You can select the GPU to use in the Preferences. Press Shift+S to open the Preferences dialog, make sure you’re viewing the Preferences > Performance > Hardware tab, and set default blink device to the device you want to use. You must restart Nuke for the change to take effect.
If you are using a render license of Nuke, you need to add --gpu on the command line.