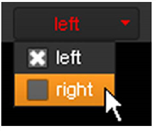
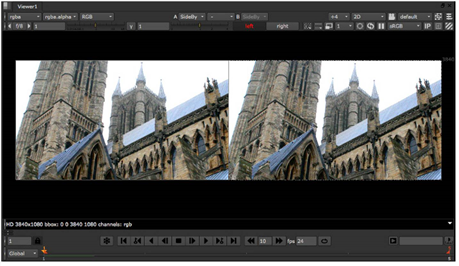
Displaying Views in the Viewer
You can only display the views that exist in your project settings. To see a list of these views, or to add or delete views, select Edit > Project Settings and go to the Views tab. For more information, see Setting Up Views for the Script.
To Display a Particular View
|
1.
|
Add a Viewer into your script if you haven’t already done so. |
|
2.
|
On top of the Viewer controls, do one of the following: |
• If you have checked View selection uses buttons? in the project settings, click the button of the view you want to display. For example, click the right button (assuming you have a view called right in your script).

• If you haven’t checked View selection uses buttons? in the project settings, select the view you want to display from the dropdown menu.

Note: Nuke lists the views in .exr files in the order they appear in the clip's header, so a view named 'left' may not always be the first view displayed above the Viewer.
If your views do not appear in the correct order, you can rearrange them in the Project Settings > Views tab. See Setting Up Views for the Script for more information.
Tip: You can also press the ; (semicolon) and ’ (forward single quote) keys to move between different views in the Viewer.
To Display Two Views Next to Each Other
|
1.
|
Add a Viewer into your script if you haven’t already done so. |
|
2.
|
If necessary, combine your views into a single output using the JoinViews node. For more information on how to do this, see Loading Multi-View Images. |
|
3.
|
Select Views > Stereo > SideBySide to insert a SideBySide node in an appropriate place in your script. |
|
4.
|
In the SideBySide node’s controls, select the two views you want to display from the view1 and view2 dropdown menus. View1 is displayed on the left and view2 on the right. |
|
5.
|
If you want to display one view on top of another rather than next to it, check vertical. View1 is displayed above view2. |
|
6.
|
If you want to swap the views around in the Viewer, click the swap button. |
The Viewer displays the two selected views simultaneously, so you can easily compare them.

To Display a Blend Between Two Views
|
1.
|
Add a Viewer into your script if you haven’t already done so. |
|
2.
|
If necessary, combine your views into a single output using the JoinViews node. For more information on how to do this, see Loading Multi-View Images. |
|
3.
|
Select Views > Stereo > MixViews to insert a MixViews node into your script. This node displays a blend between two views in the Viewer, allowing you to check how elements in these views are aligned. |
|
4.
|
In the MixViews controls, use the views buttons or dropdown menus to select the two views to blend between. |
|
5.
|
To control the blend between the views, adjust the mix slider. Setting the slider to 0 or 1 displays only one of the views. Values between 0 and 1 produce different blends between the views. |


