Viewing Track Data
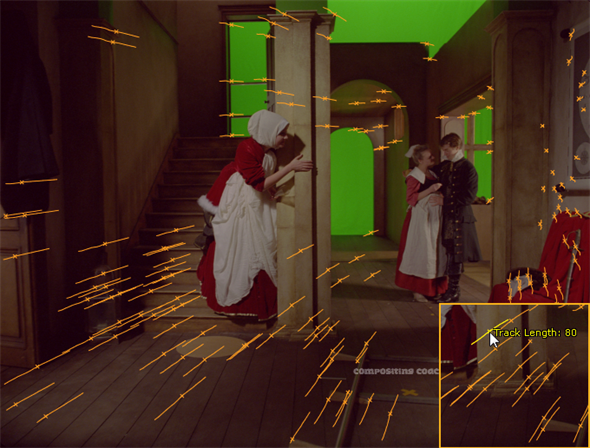
Once tracking is complete, scrub through the timeline to examine the tracked features. The points represent the features and the vectors the track length calculated for the associated feature. Hover over a point to display its length, in frames.

Consider masking out areas where tracks are consistently seeded and rejected, such as highly reflective surfaces, and adjusting the Settings tab Tracking controls to increase track reliability.
See Masking Out Regions of the Image and Troubleshooting Sequence Tracks for more information.
Reviewing AutoTracks Curves
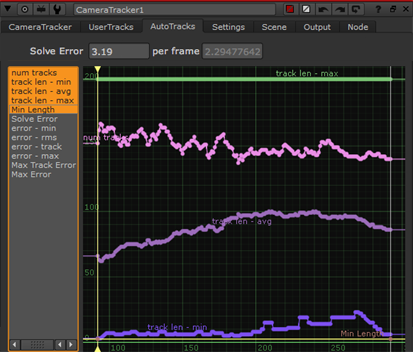
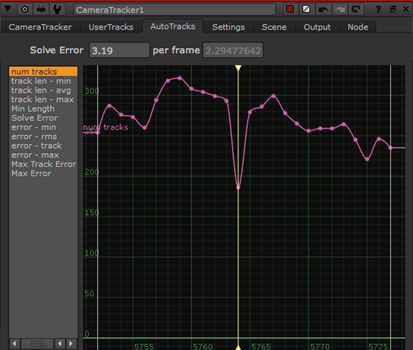
Detailed tracking information is displayed in curves in the properties panel on the AutoTracks tab. You can select all track curves at once or get a more detailed view of a single curve, such as num tracks.
Tip: Pressing F with focus on a curve maximizes the selected curve in the space available.
|
|
|
| Selecting all track curves. | Framing a single curve. |
Curves can indicate areas of the sequence where tracking encountered problems. For example, the number of tracks curve on the right shows a significant dip on the current frame, as indicated by the playhead position.
In this instance, you could try adjusting the Number of Features or Minimum Length and retracking. See Troubleshooting Sequence Tracks


