Basic Keying
The following section describes the parameters you need to do basic keying. This gives you enough to tackle most simple keys. A discussion of advanced parameters to fine tune keys and tackle complex keys can be found under Advanced Keying.
Picking the Screen Color
The screen color is probably the most important parameter and you should always pick the screen color before doing anything else. It should be set to the color of the green or blue curtain behind the foreground object. Pick the screen color directly from the image by Ctrl/Cmd+Shift+Alt dragging a rectangle over the blue pixels. The average value of the pixels selected is used.
Tip: If you press Alt when sampling a color, Nuke always samples the source image regardless of what you’re looking at. This means that you can pick the blue screen color even if you are viewing the matte, status, or composite.
Tip: You can discard sampled pixels by Ctrl/Cmd+right-clicking in the Viewer.
Tip: Picking different shades of blue from the screen color can give quite different results. It’s worth picking from different parts of the screen to get the best result.
Picking the ScreenColor creates the screen matte used to composite the foreground over the background. It also sets the ScreenBalance (if this has not already been set manually) and despills the foreground.
Screen Matte
Setting the screen color pulls a key, or in other words, creates a matte - the ScreenMatte. Setting the screen color also despills the foreground, although you can also use the DespillBias to remove more spill. In some cases this is enough to get a decent key. For more information on ScreenColor, see Screen Color.
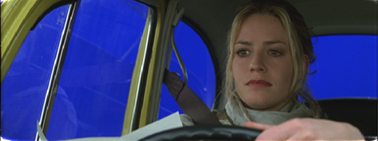
The image below shows a well-lit blue screen behind an actor.

You should note that repeatedly picking colors does not add to previous selections and key more of the image with each click. To key more of the image, try picking different shades of blue then use the screen strength parameter. See Keying More.
Viewing the Key
After picking the screen color, you have created a matte (the screen matte) and despilled the foreground. The result can be displayed in a number of different ways using the View control. You can output the final composite of the foreground over the background as an rgba, or you can output the premultiplied or unpremultiplied foreground for compositing elsewhere in the tree. The screen matte and the status view are the other two options which are useful in fine-tuning the key rather than as an output image in their own right.
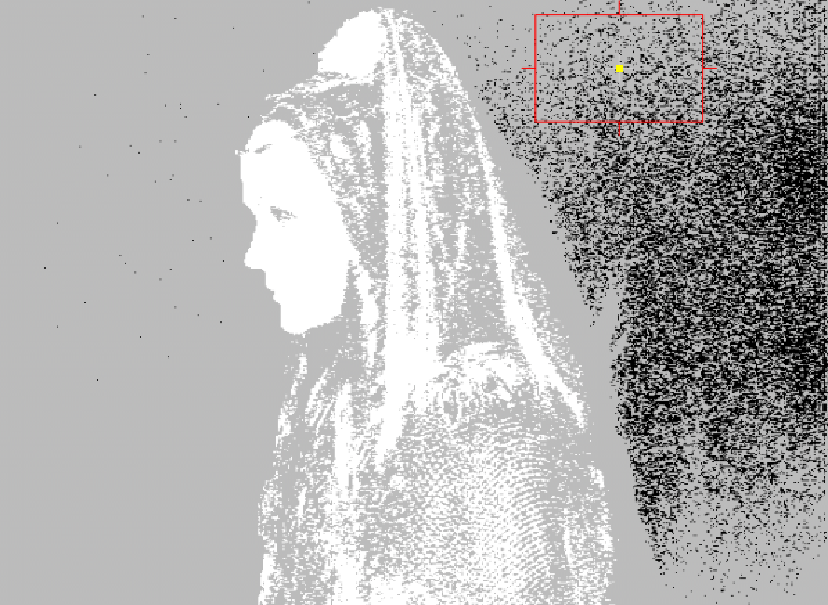
The Status is one of the options in the View dropdown menu and shows an exaggerated view of the key so that you can make a more informed decision when tuning the key. The image on the right shows the Status display after the screen color has been picked from the image on the left.
|
|
|
| Green screen. | Status. |
Three colors are displayed:
• Black pixels show areas that are pure background in the final composite.
• White pixels show areas that are pure foreground.
• Gray pixels are a blend of foreground and background pixels in the final composite. You need gray pixels around the edge of the foreground to get a good key at the foreground edge. Pixels that are a blend between the foreground and background are shown in just one shade of gray. This is done to highlight potential problems with the key. These gray pixels may represent a foreground/background blend of 50/50 or 99/1. No distinction is made as to this ratio.
You may occasionally see other colors in the Status view and these are covered under View.
Keying More
To improve the key by firming up the foreground so the background doesn’t show through, you should adjust the ClipWhite parameter. To key more of the foreground so that the background is clearer, you should use the ClipBlack parameter. Look at the ScreenMatte and the Composite while you’re doing this. Don’t overdo either of these or the edges between foreground and background become hard.


