Import or Create USD Objects in Your Scene
Using USD files in your pipeline allows you to organize large scenes more effectively and edit objects non-destructively, so you never lose upstream work. USD is also a versatile format that most VFX software packages support, making it easy to work between stages in production, from texture painting, through look development and into compositing.
Nuke imports the entire contents of your USD file using the GeoImport node, and depending on how many layers are inside the file, this can mean importing a large amount of data into your scene in one go. Or you can reference part of the file using the GeoReference node if you know the object's path you want to import.
Creating simple geometry such as cards, cubes, and spheres is the same as the classic 3D workflow. You add nodes, such as GeoCard or GeoCube, to the Node Graph from the left-hand toolbar or by pressing Tab in the Node Graph and typing the node name you need.
GeoImport vs. GeoReference: Which Node to Use?
GeoImport brings an entire scene into Nuke, including any lights, cameras, and materials in the scene. GeoImport does not allow you to change the object's path in the scene graph, so importing the same file more than once has no effect because the objects are overwritten with the same data.
If you want to import the same object multiple times, use the GeoReference node to create a reference to the required object or use GeoInstance to copy objects already in the scene graph.
See GeoInstance for more details on instancing objects.
Import an Entire Scene
GeoImport brings an entire scene into Nuke, including any lights, cameras, and materials in the scene. In Nuke's USD-based 3D system, importing the same file twice does not duplicate the objects inside because USD only allows objects with unique paths to exist in the scene.
For example, importing a .usd file containing an object described by the path /geom/char/Char/Ship/Ship_001/Ship_Mesh imports the ship mesh, but importing it again in another GeoImport node does not create another Ship_Mesh because the path already exists. For more information on paths and masks, see Using Paths and Masks to Control the Scene.
If you want to import another Ship_Mesh from the same file, use the GeoReference node. See Reference an Object Using a File Path or Prim Path for more information.
To import a USD file:
- In the top menu bar, click Workspace > 3D to switch to Nuke's dedicated 3D workspace.
- Create a GeoImport node by clicking 3D > Create > GeoImport in the left-hand toolbar,
- Enter the path on disk of the USD file you want to import. Nuke supports .usd and .usda files.
- Connect a Viewer to the GeoImport node to display the scene in the Viewer.
- Select an object in the scene graph to highlight the corresponding object in the 3D Viewer.
OR
Press Tab in the Node Graph to display the node selector, type GeoImport, and then press Enter.
A GeoImport node is added to the Node Graph and its Properties are displayed.
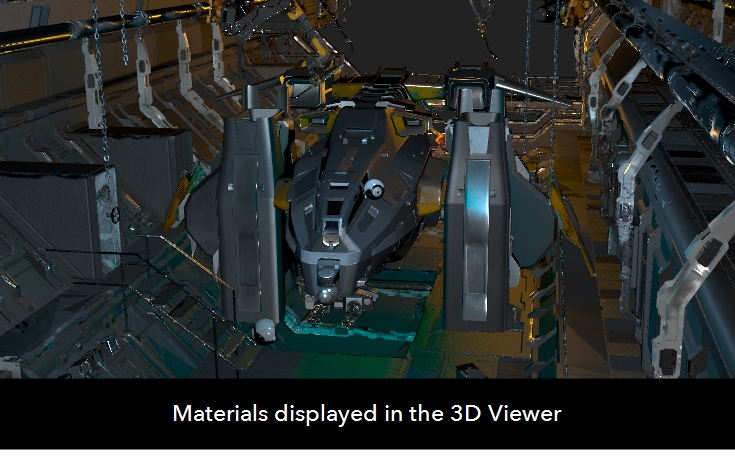
Note: Display Materials in the Properties is off by default so that scenes load more quickly. If you want to see the materials in the file applied to objects in the Viewer, turn on Display Materials.
In the Scene Graph tab to the left of the Viewer, you can see the entire scene including any lights, cameras, and materials.
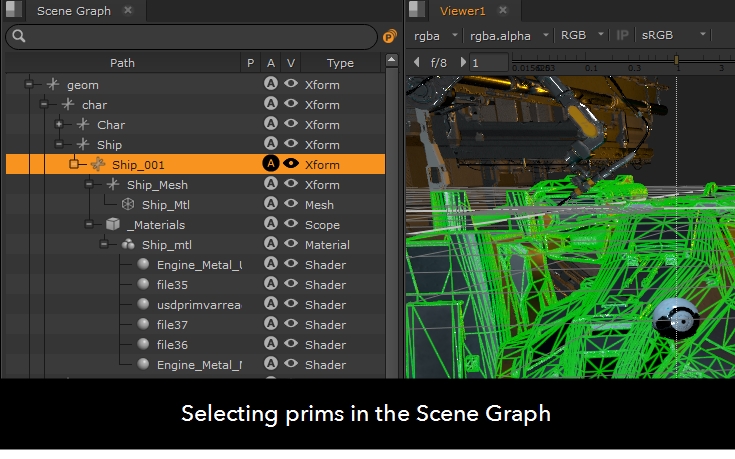
See Manage Your 3D Scene with the Scene Graph for more information on the scene graph.
Now that you have your USD objects in Nuke, you can work on the scene to achieve the final result you're aiming for using Nuke's 3D toolset.
Reference an Object Using a File Path or Prim Path
As mentioned previously, in Nuke's USD-based 3D system, importing the same file twice does not duplicate the objects inside because USD only allows objects with unique paths to exist in the scene. This is where the GeoReference node can help you because it allows you to change the path of an object when you bring it into Nuke.
GeoReference doesn't duplicate objects, it creates a light-weight reference to an object often referred to as an instance in other applications, such as Katana. You can use the File Path control to reference a file on disk or the Prim Path control to reference an object already in the scene graph:
- File Path references an object from an external file and you can give the object a different path so that you can import instances of the same object several times. If you use GeoImport, the path to the object can't be changed, so you would overwrite the object each time you import it.
- Prim Path creates an instance of an existing object in the scene and gives it a new path. This is an easy way to create instances of objects in the 3D system. Bear in mind that GeoReference also applies the transforms on the referenced object to the instance, so it appears in the scene in the same place as the original object.
Reference an Object Using a File Path
Referencing an object using a file path creates an instance from a specified USD file and gives it a new path, effectively duplicating the object. The object does not have to exist in the scene because you specify a file from which the object is referenced.
To reference an object using the File Path and Prim Path:
- Add a GeoReference node by clicking 3D > Create > GeoReference in the left-hand toolbar,
- Select the Reference Type you want to add:
- Enter the File Path to the USD file on disk that contains the object you want to reference. For example, E:/USD/hangar_asset/MAIN_STAGE.usda
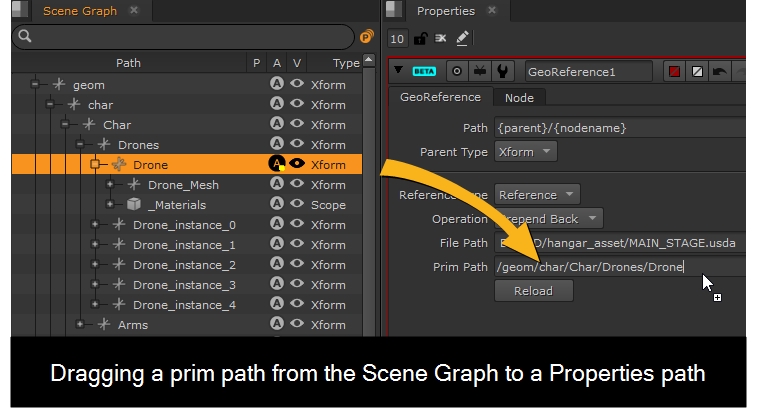
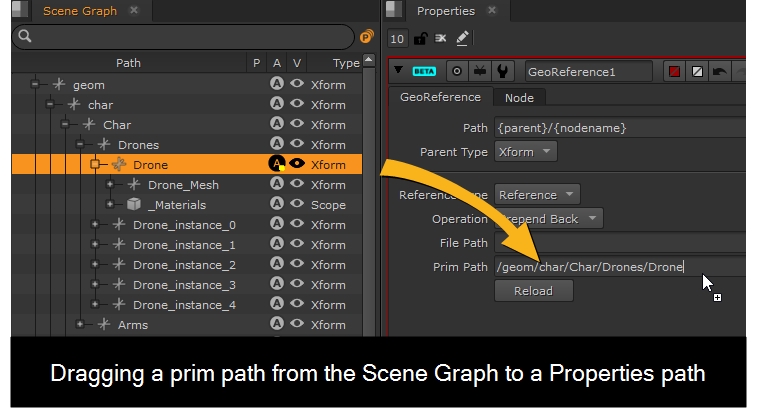
- Enter the Prim Path to the object you want to reference. You can enter the path manually or, if you're not sure what the path is, you can load the file using a GeoImport node and then locate the source object in the Scene Graph tab. Drag the location to the Prim Path control to add it automatically.
OR
Press Tab in the Node Graph to display the node selector, type GeoReference, and then press Enter.
A GeoReference node is added to the Node Graph and its Properties are displayed.
• Reference - load the object immediately.
• Payload - payloads can be delayed to stop heavy geometry loading until you're ready.
Note: Payloads are loaded by default and the payload icon  at the top of the Scene Graph tab is orange. If you want to defer any object set as payload, click the payload icon
  so that it turns gray.
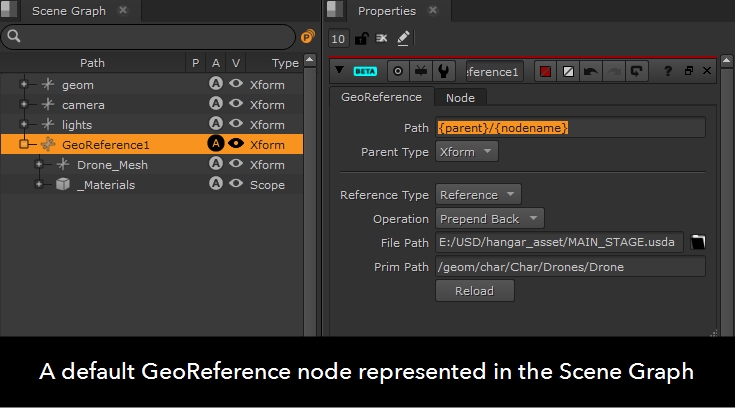
The new reference object is added to the bottom of the scene graph by default using the {parent}/{nodename} variable in the Path control. In this case, {parent} is the root of the scene and {nodename} is GeoReference1.
For more information on paths and masks, see Using Paths and Masks to Control the Scene.
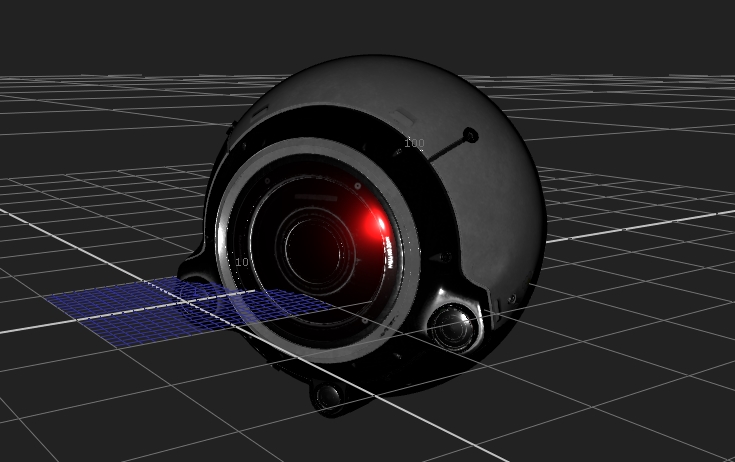
Now that you have your USD objects in Nuke, you can work on the scene to achieve the final result you're aiming for using Nuke's 3D toolset.
Reference an Object Using a Prim Path
Referencing an object using only a prim path creates an instance from an existing object and gives it a new path, effectively duplicating the object.
To reference an object using only the Prim Path:
- Add a GeoReference node downstream of an existing prim by clicking 3D > Create > GeoReference in the left-hand toolbar,
- Select the Reference Type you want to add:
- Enter the Prim Path to the object you want to reference. You can enter the path manually or, if you're not sure what the path is, you can locate the source object in the Scene Graph tab and drag the location to the Prim Path control to add it automatically.
- To see the referenced object in the Viewer, add a GeoTransform node downstream by clicking 3D > Modify > GeoTransform in the left-hand toolbar,
- Move the transform handle to reveal the referenced object.
OR
Press Tab in the Node Graph to display the node selector, type GeoReference, and then press Enter.
A GeoReference node is added to the Node Graph and its Properties are displayed. In this simple example, the GeoReference node is immediately downstream of the original GeoImport containing the prim we're going to reference. In reality the GeoReference node can be anywhere downstream of the prim it's referencing.
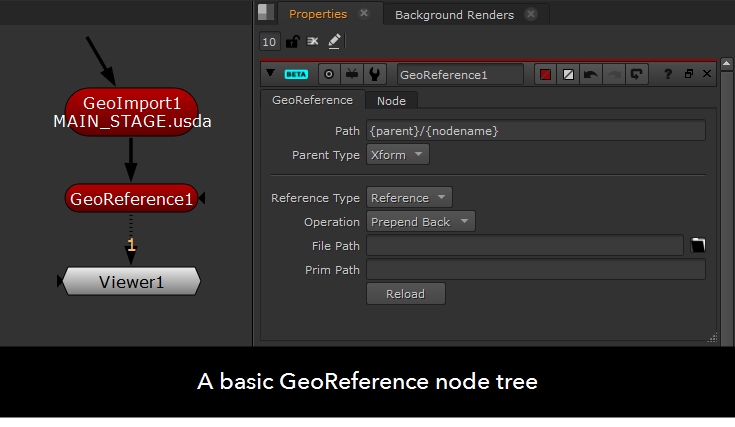
• Reference - load the object immediately.
• Payload - payloads can be delayed to stop heavy geometry loading until you're ready.
Note: Payloads are loaded by default and the payload icon  at the top of the Scene Graph tab is orange. If you want to defer any object set as payload, click the payload icon
  so that it turns gray.
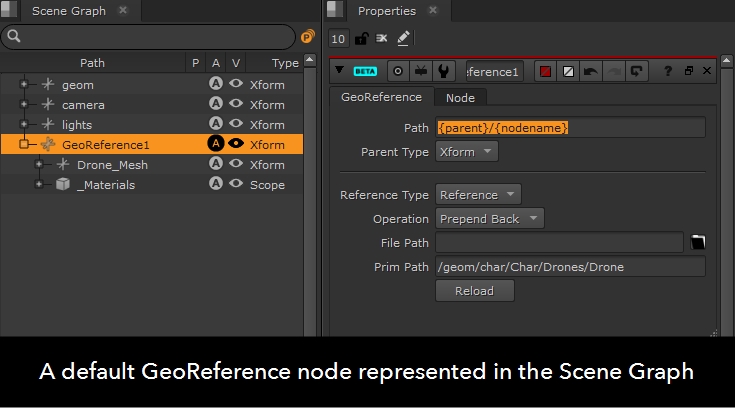
The new reference object is added to the bottom of the scene graph by default using the {parent}/{nodename} variable in the Path control. In this case, {parent} is the root of the scene and {nodename} is GeoReference1.
For more information on paths and masks, see Using Paths and Masks to Control the Scene.
Referencing an existing prim copies its transforms as well, so the referenced prim is rendered in exactly the same position as the source object.
OR
Press Tab in the Node Graph to display the node selector, type GeoTransform, and then press Enter.
A GeoTransform node is added to the Node Graph and its Properties are displayed. You'll also see a transform handle in the Viewer.
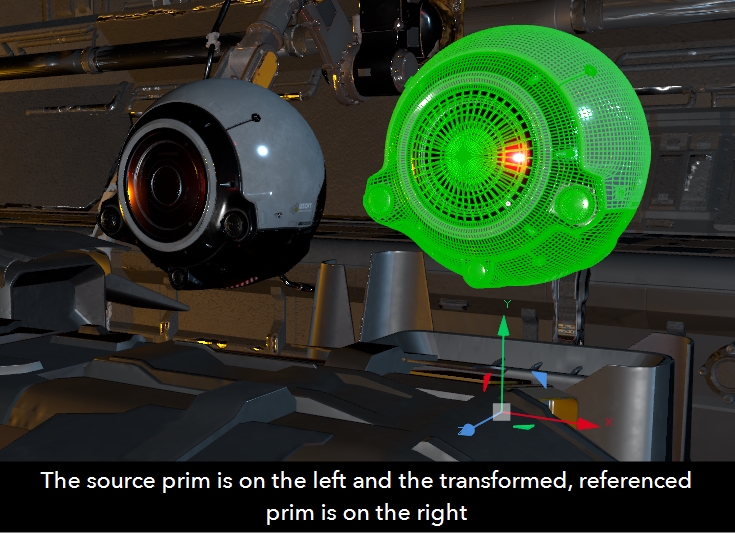
Now that you have your USD objects in Nuke, you can work on the scene to achieve the final result you're aiming for using Nuke's 3D toolset.
Create Primitive Geometry Using Nuke Nodes
Sometimes you just need simple reference geometry or a card for projection workflows and Nuke's USD-based 3D system ships with similar nodes to the classic 3D system for these tasks. Creating geometry such as cubes, spheres, and cards is the same as the classic 3D workflow. You add nodes, such as GeoCube or GeoCard, to the Node Graph from the left-hand toolbar or by pressing Tab in the Node Graph and typing the node name you need.
To create a Nuke primitive:
- In the top menu bar, click Workspace > 3D to switch to Nuke's dedicated 3D workspace.
- Click 3D > Create > GeoCard, GeoCube, GeoCylinder, or GeoSphere in the left-hand toolbar,
- Connect a Viewer to the Geo* node to display the scene in the Viewer.
- Use the controls in the Properties Geo* tab to control the geometry's attributes such as Kind, Display Color, and Subdivision. See the Import, Create, and Inspect Node Reference section for links to specific geometry nodes and their properties.
- Use the controls on the Transform tab to position your geometry in the scene. If you want to transform multiple objects simultaneously you should add a GeoTransform node instead. See GeoTransform for more information.
OR
Press Tab in the Node Graph to display the node selector, type Geo, select the required node, and then press Enter.
Note: The GeoRevolve node creates a cylinder or a sphere depending on the Shape selected in the Properties panel. Choosing GeoCylinder or GeoSphere from the menu adds a GeoRevolve and automatically changes the node name and Shape selection for you.
The specified node is added to the Node Graph and its Properties are displayed.
In the Scene Graph tab to the left of the Viewer, you can see the entire scene including any lights, cameras, and materials.
The new geometry is added to the bottom of the scene graph by default using the {parent}/{nodename} variable in the Path control. In this case, {parent} is the root of the scene and {nodename} is GeoReference1.
For more information on paths and masks, see Using Paths and Masks to Control the Scene.
Note: GeoCard nodes also include LensDistortion and Deform controls. See GeoCard for more information.
Import, Create, and Inspect Node Reference
Here's a handy reference guide to the nodes described in this topic. To help us develop the future of 3D compositing workflows in Nuke, visit https://community.foundry.com/discuss/nuke3d
Import USD or Alembic objects from external files into Nuke.
Creates a reference to another object in the scene.
Creates a card object in the scene.
Creates a cube object in the scene.
Creates instances of an object, allowing you to duplicate prims.
Creates a cylinder or sphere object in the scene.
Displays the stage passing through the node in read-only text form.
