Using Contact Sheet: Manual Pick Mode
To get started with Contact Sheet, you first have to open a sequence in the Timeline View. Only shots that are residing in a sequence can be used to populate the Contact Sheet view.
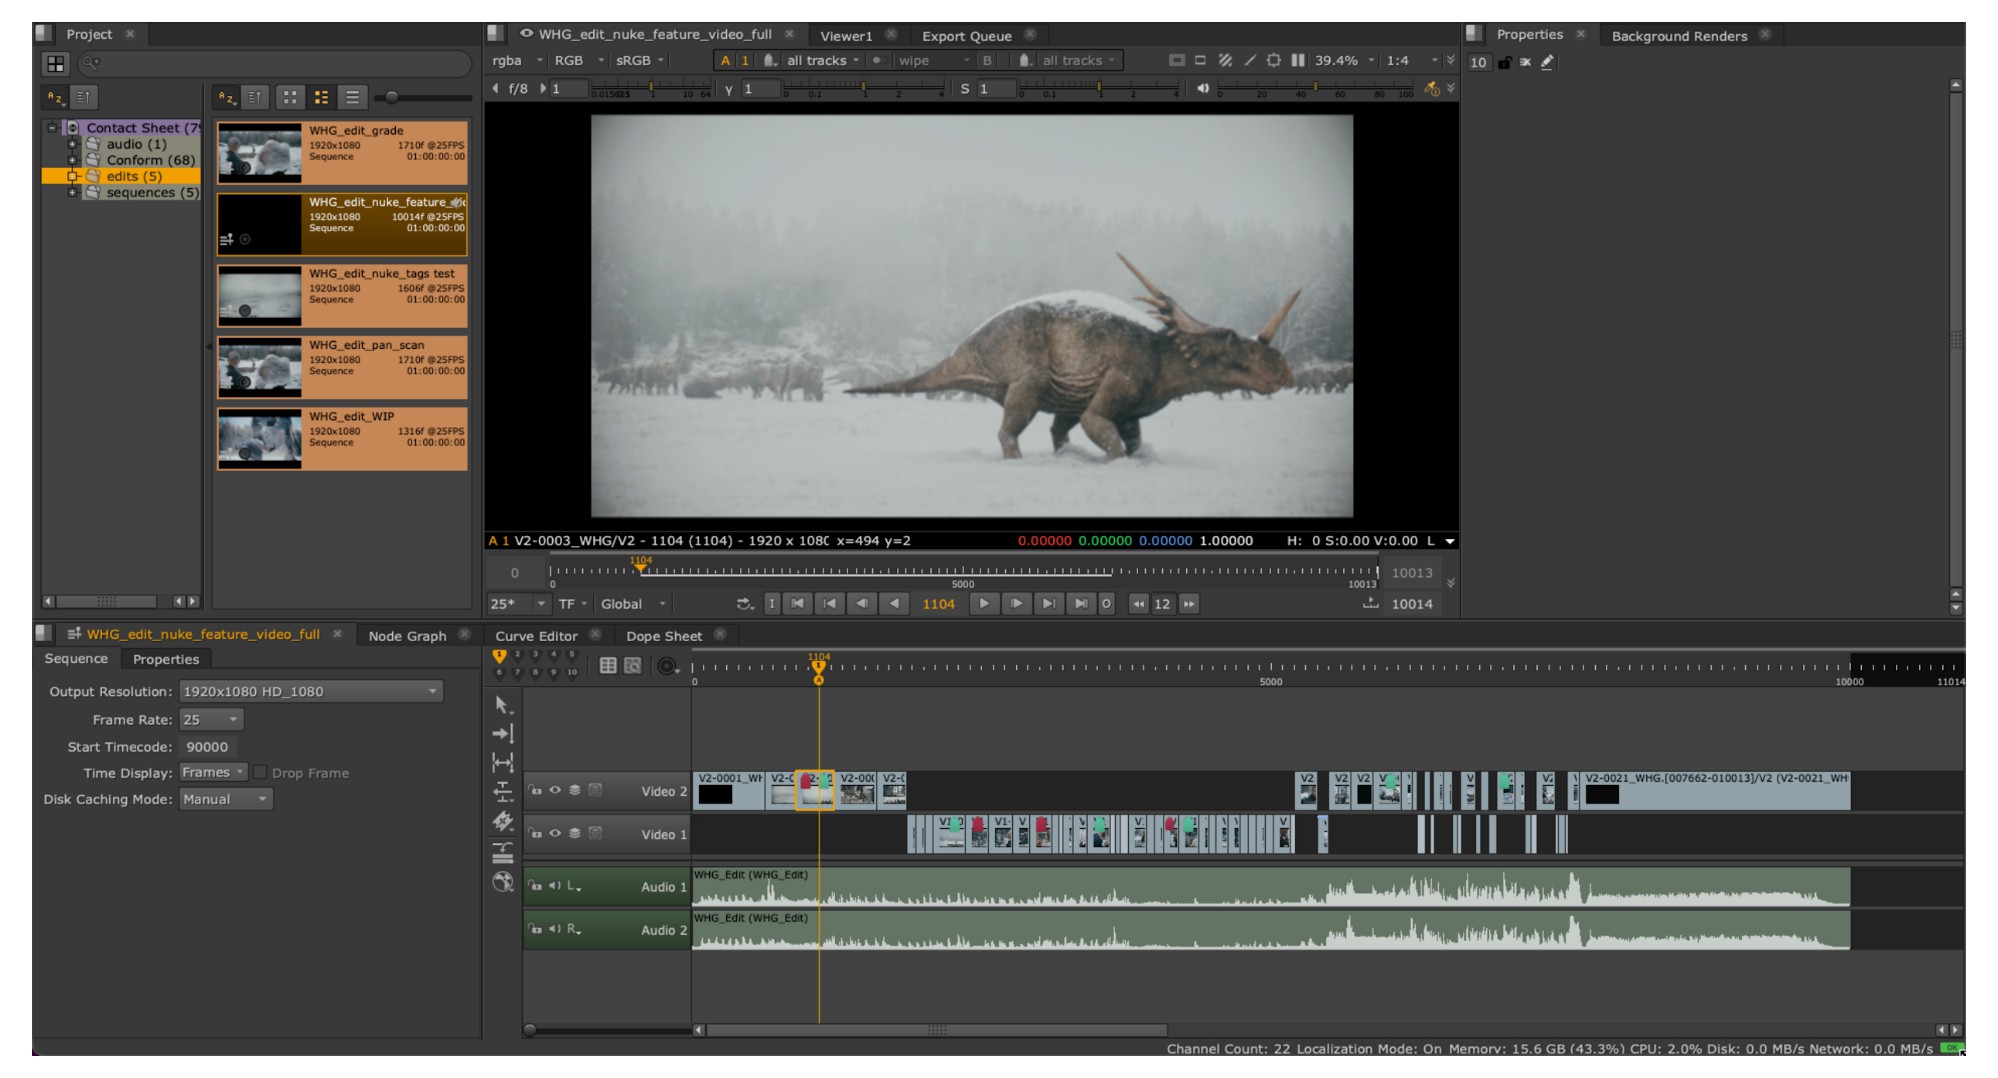
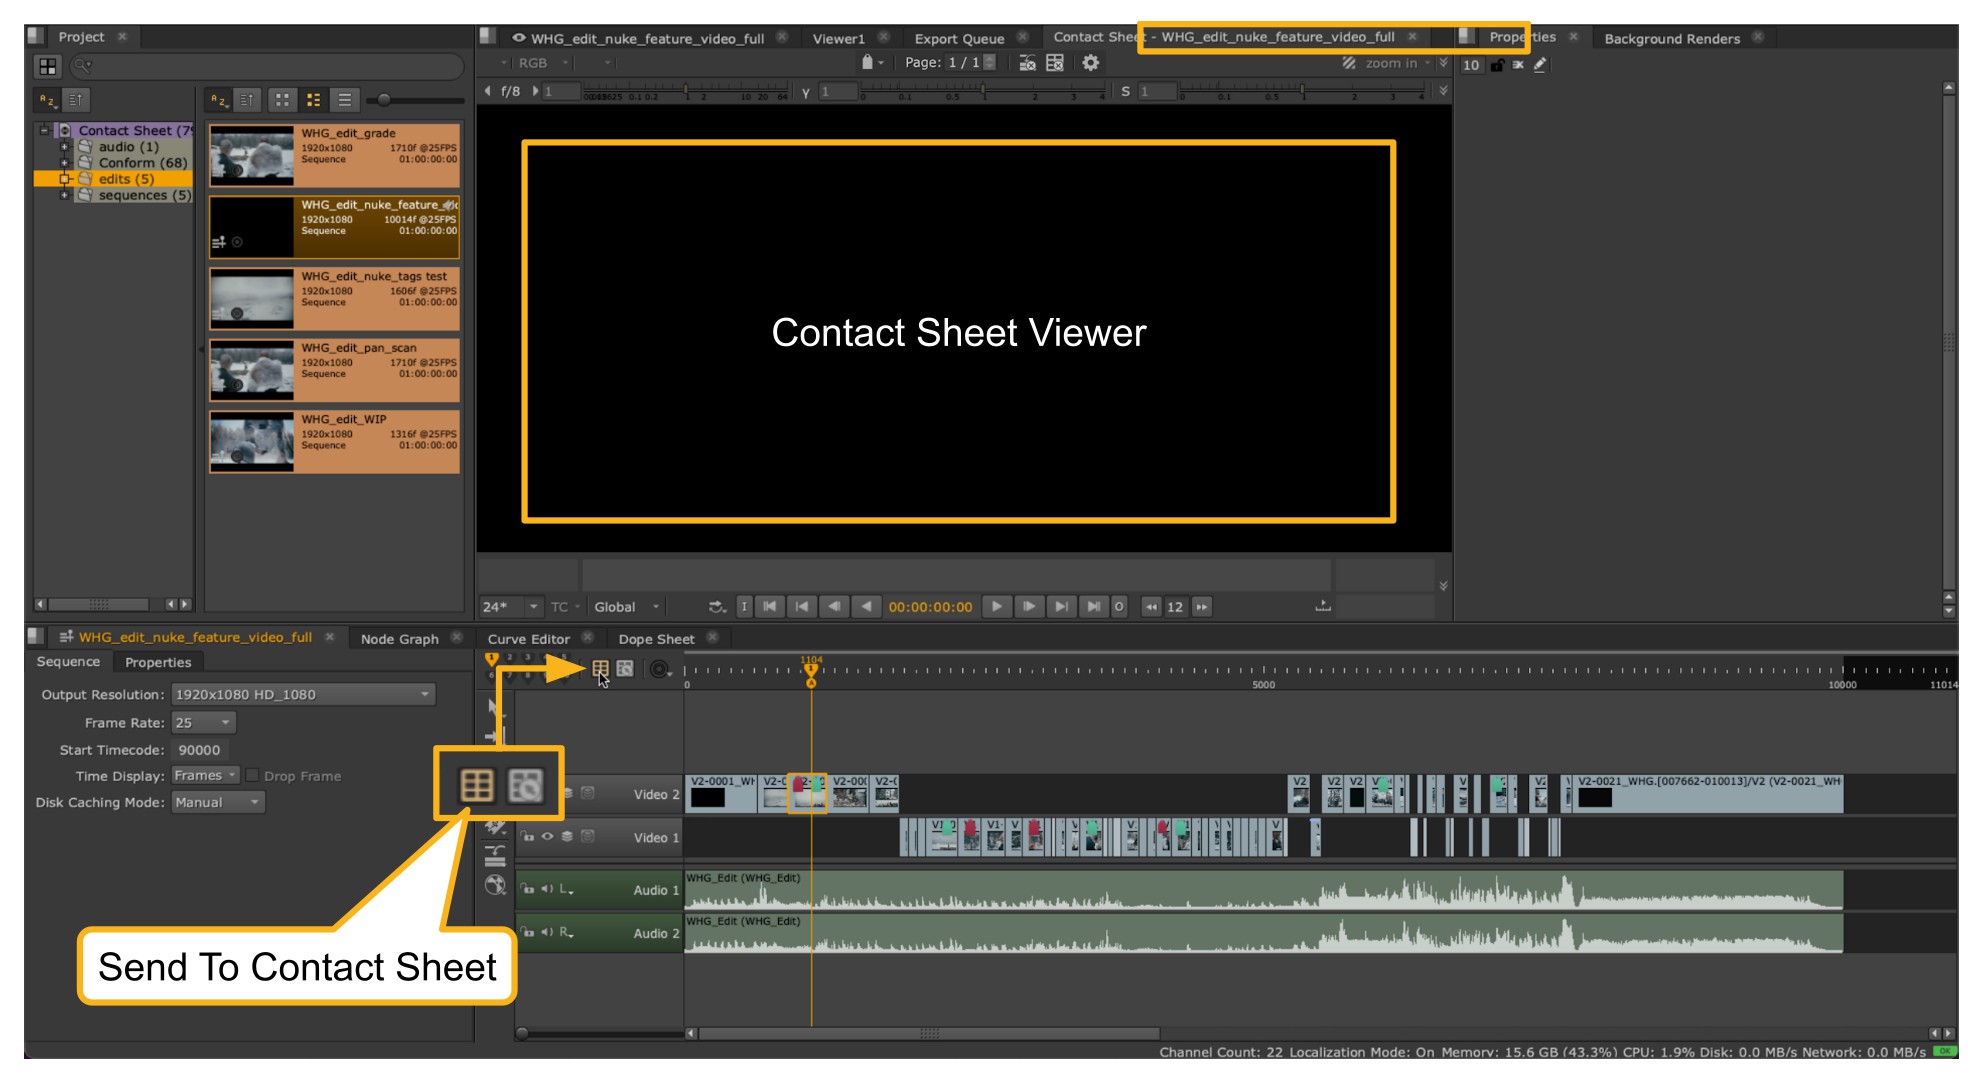
Here is an example of a project to use with Contact Sheet.
| 1. | The first step is to create a new Contact Sheet Viewer which can be populated with the shots you’d like to review. To do this, click the Send To Contact Sheet button in the Timeline View. Doing this will create a new Contact Sheet Viewer named after the sequence. |
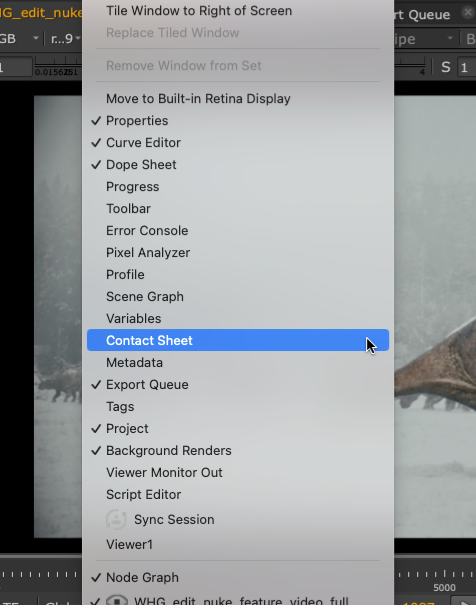
You can also use the Window drop down menu to create a new Contact Sheet Viewer as well.
If you have a second monitor you can drag the Contact Sheet Viewer to be displayed on the second screen or move it to a new pane alongside the standard Viewer.
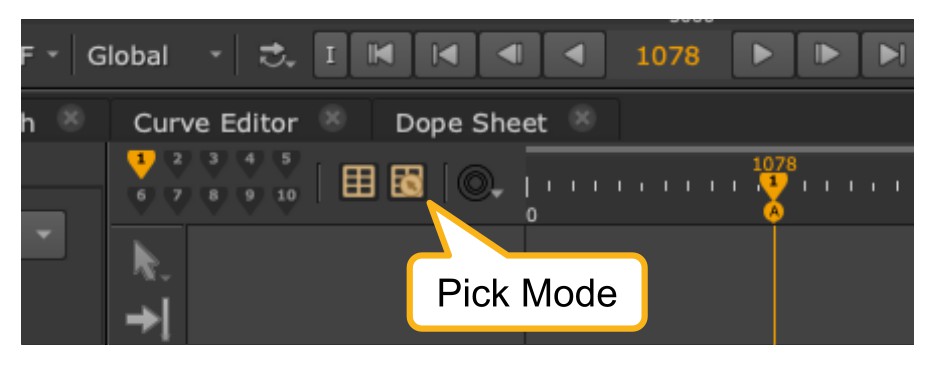
| 2. | You can now start to populate the Contact Sheet Viewer with clips from the sequence. You can do this by directly selecting the clips from the sequence. First go into the Pick Mode by using the button next to the Send To Contact Sheet button. |
| 3. | Once you are in Pick Mode you can select shots directly from the sequence view and they will dynamically populate the Contact Sheet Viewer. |
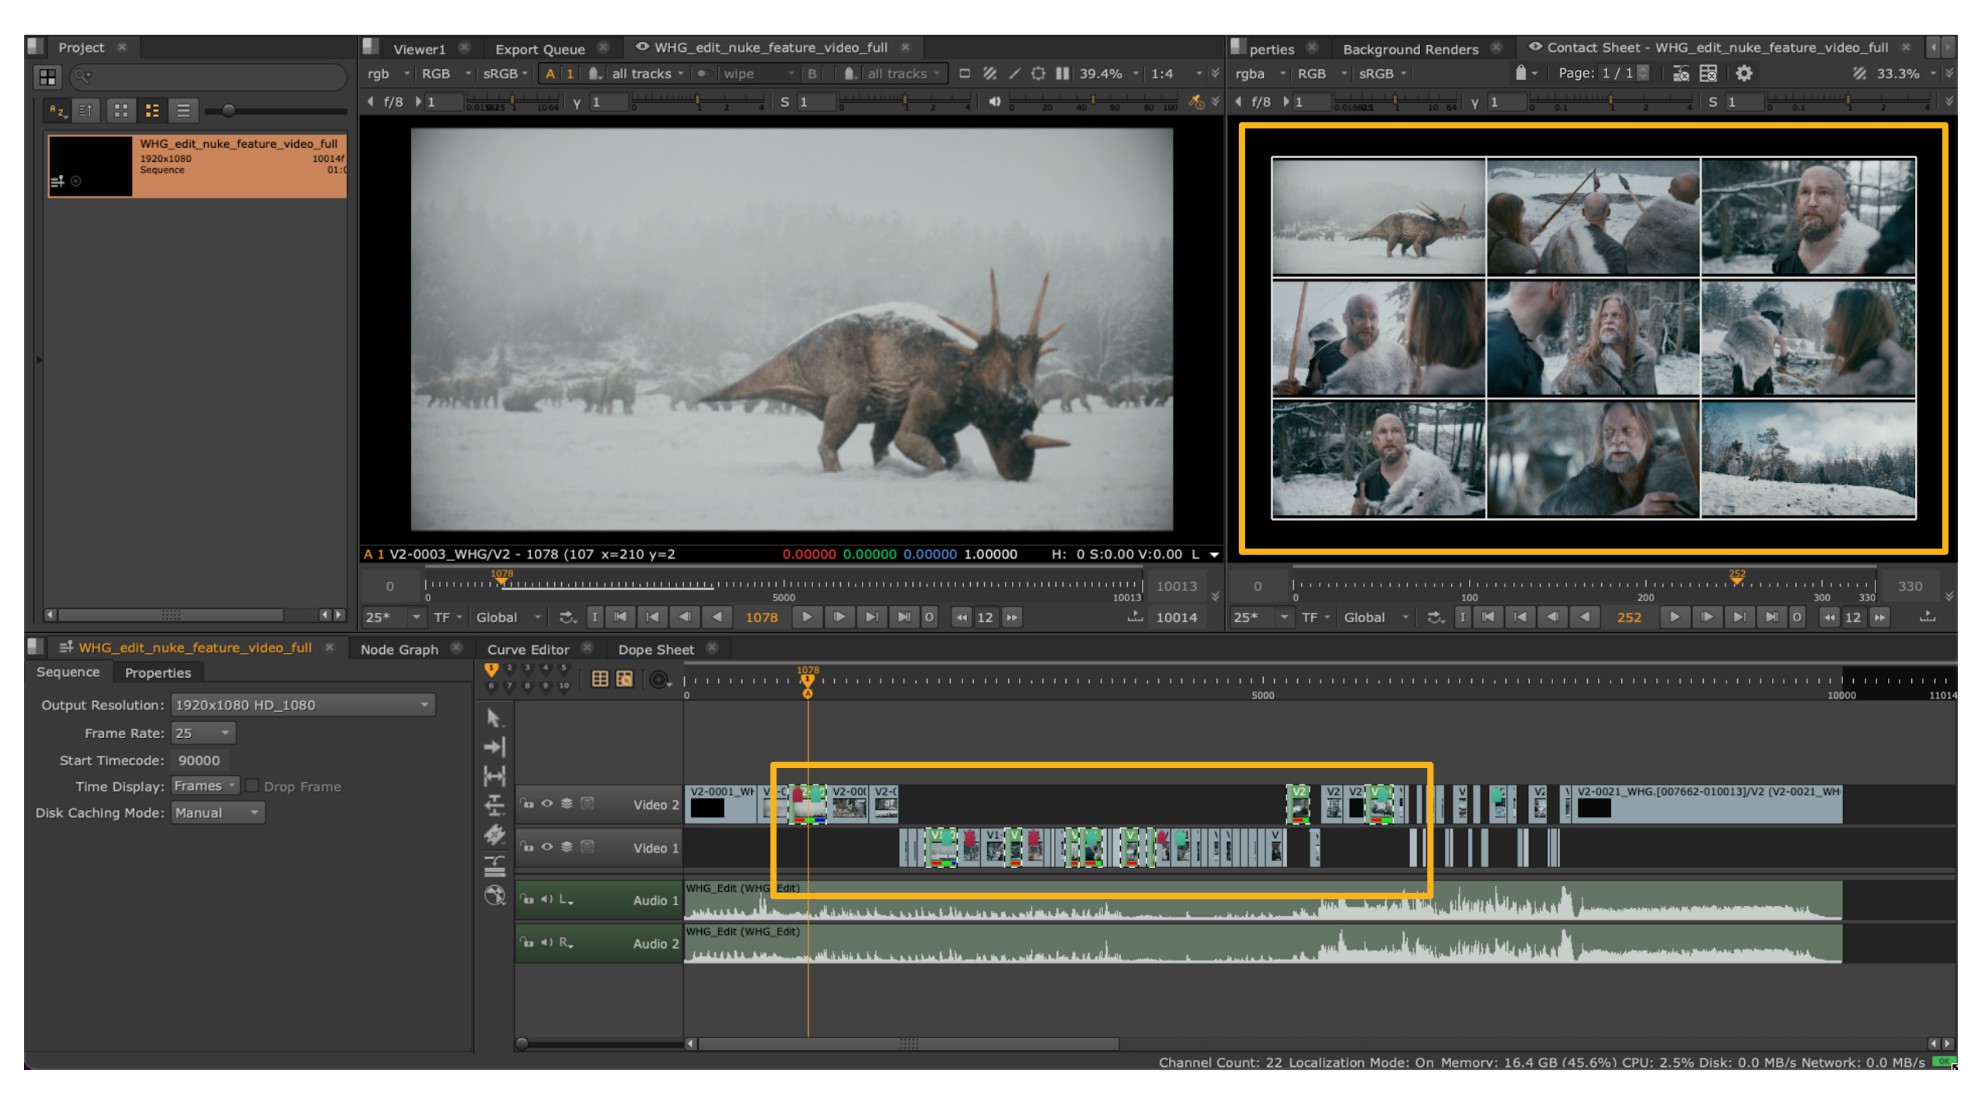
You can use all the standard selection methods like Ctrl+Left Click to select non contiguous clips, Left Click+Drag Marquee to select a range or Left Click on a clip and Shift+Left Click on a different clip to select all clips in between.
The Pick Mode works in the same fashion as Hard Selections; so if, for instance, you want to deselect all your currently selected clips being displayed in Contact Sheet simply make sure that you are in Pick Mode and tap down in an empty area in the sequence and your selection will be cleared.
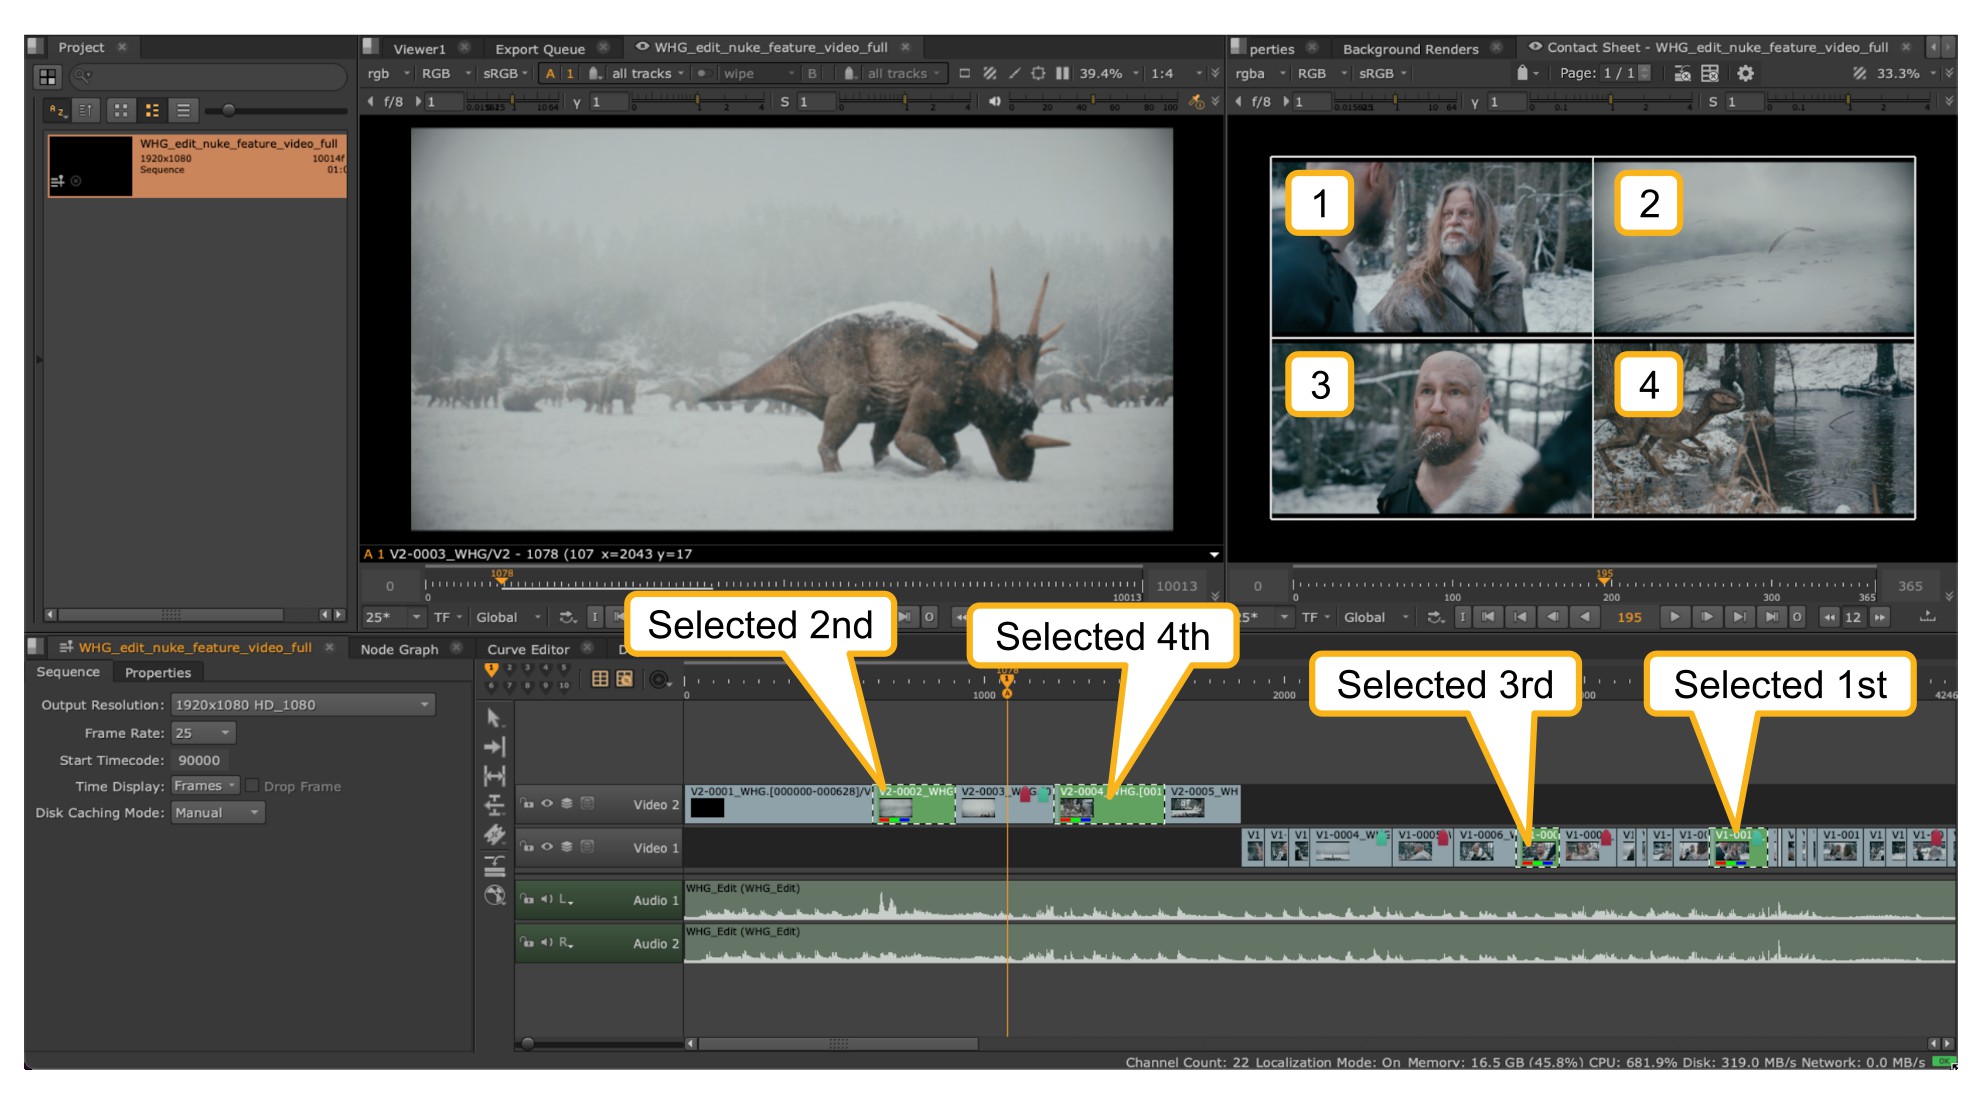
It's worth noting that when you are selecting non-contiguous clips using the Ctrl+Left Click method, the order you select the clips defines the order that they appear in the Contact Sheet Viewer, as shown in the example below.
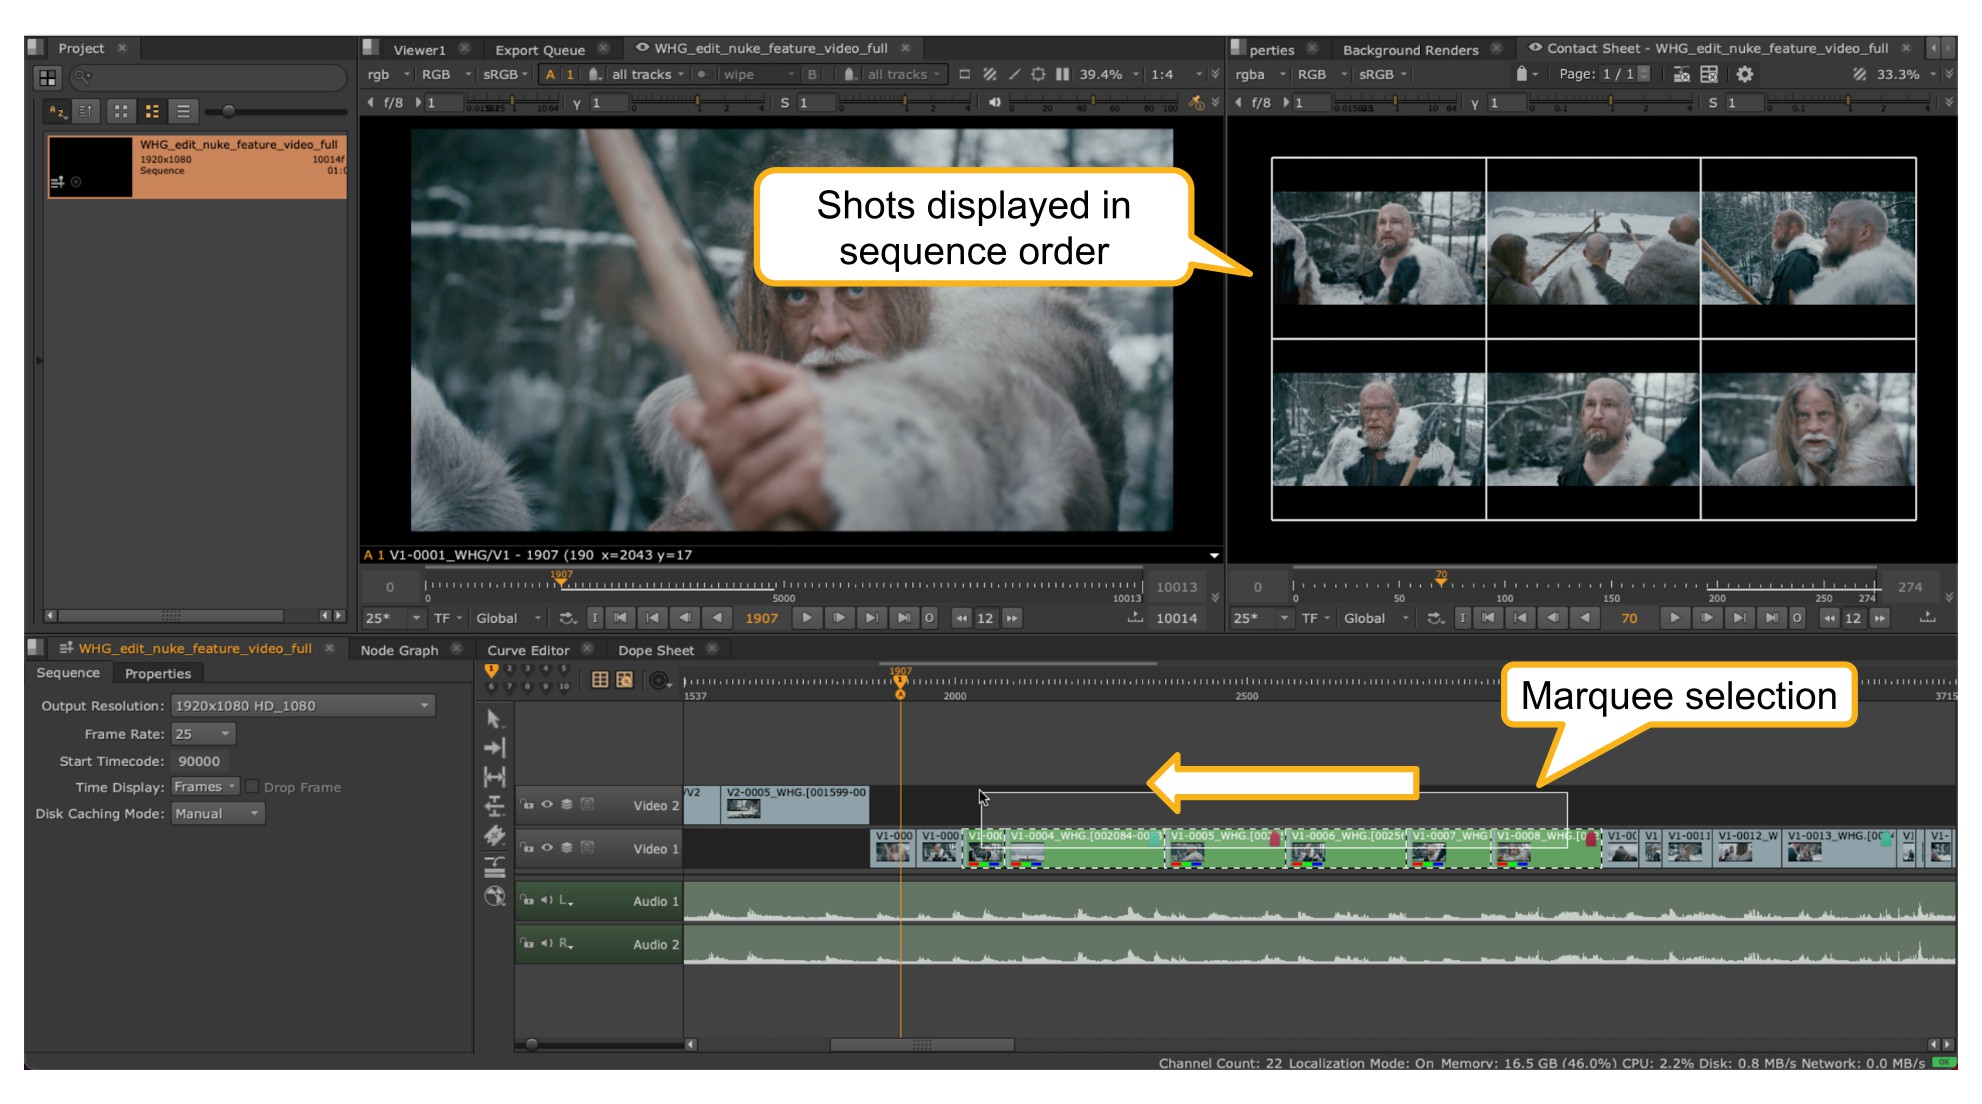
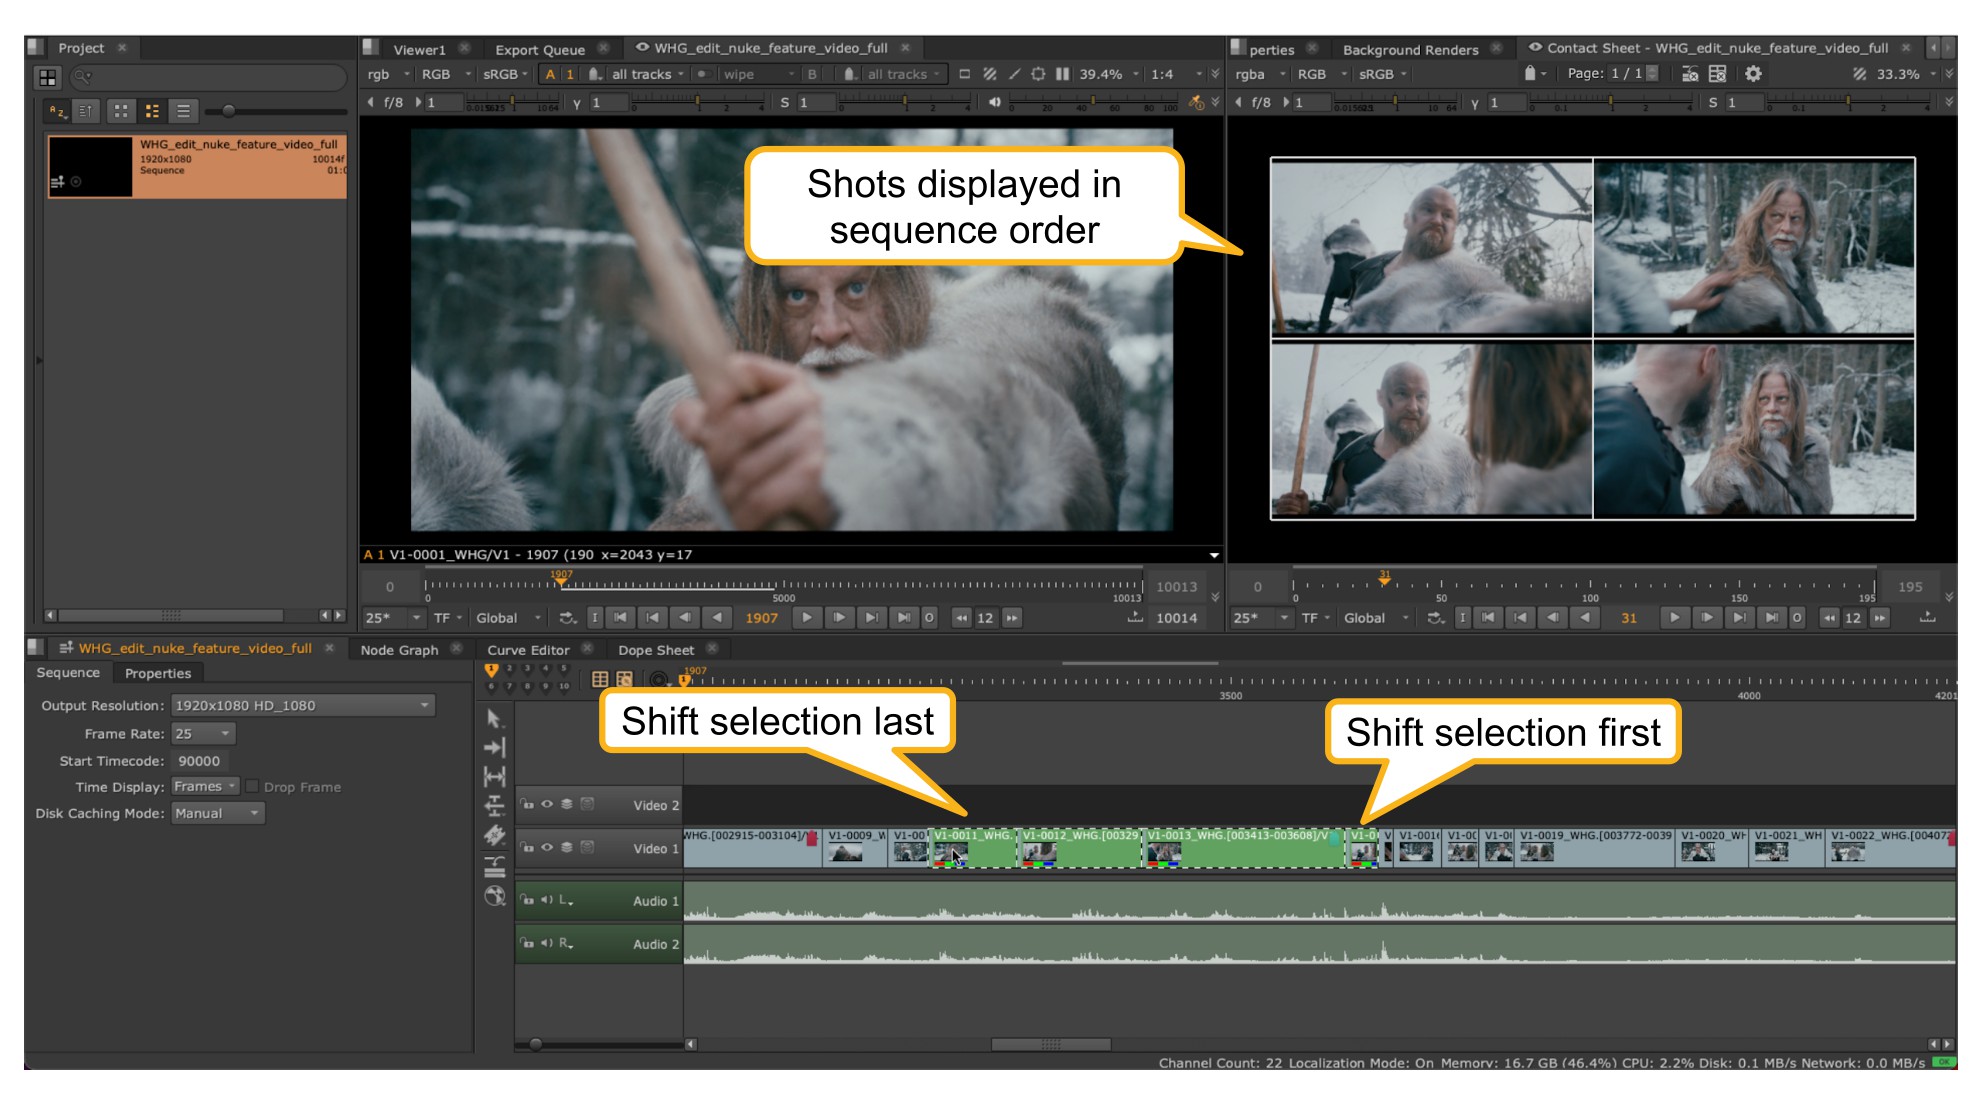
When selecting via either the Left Click+Drag Marquee or Shift+Left Click methods, the direction of the selection is ignored and clips are displayed in the Contact Sheet in the order they appear in the sequence.
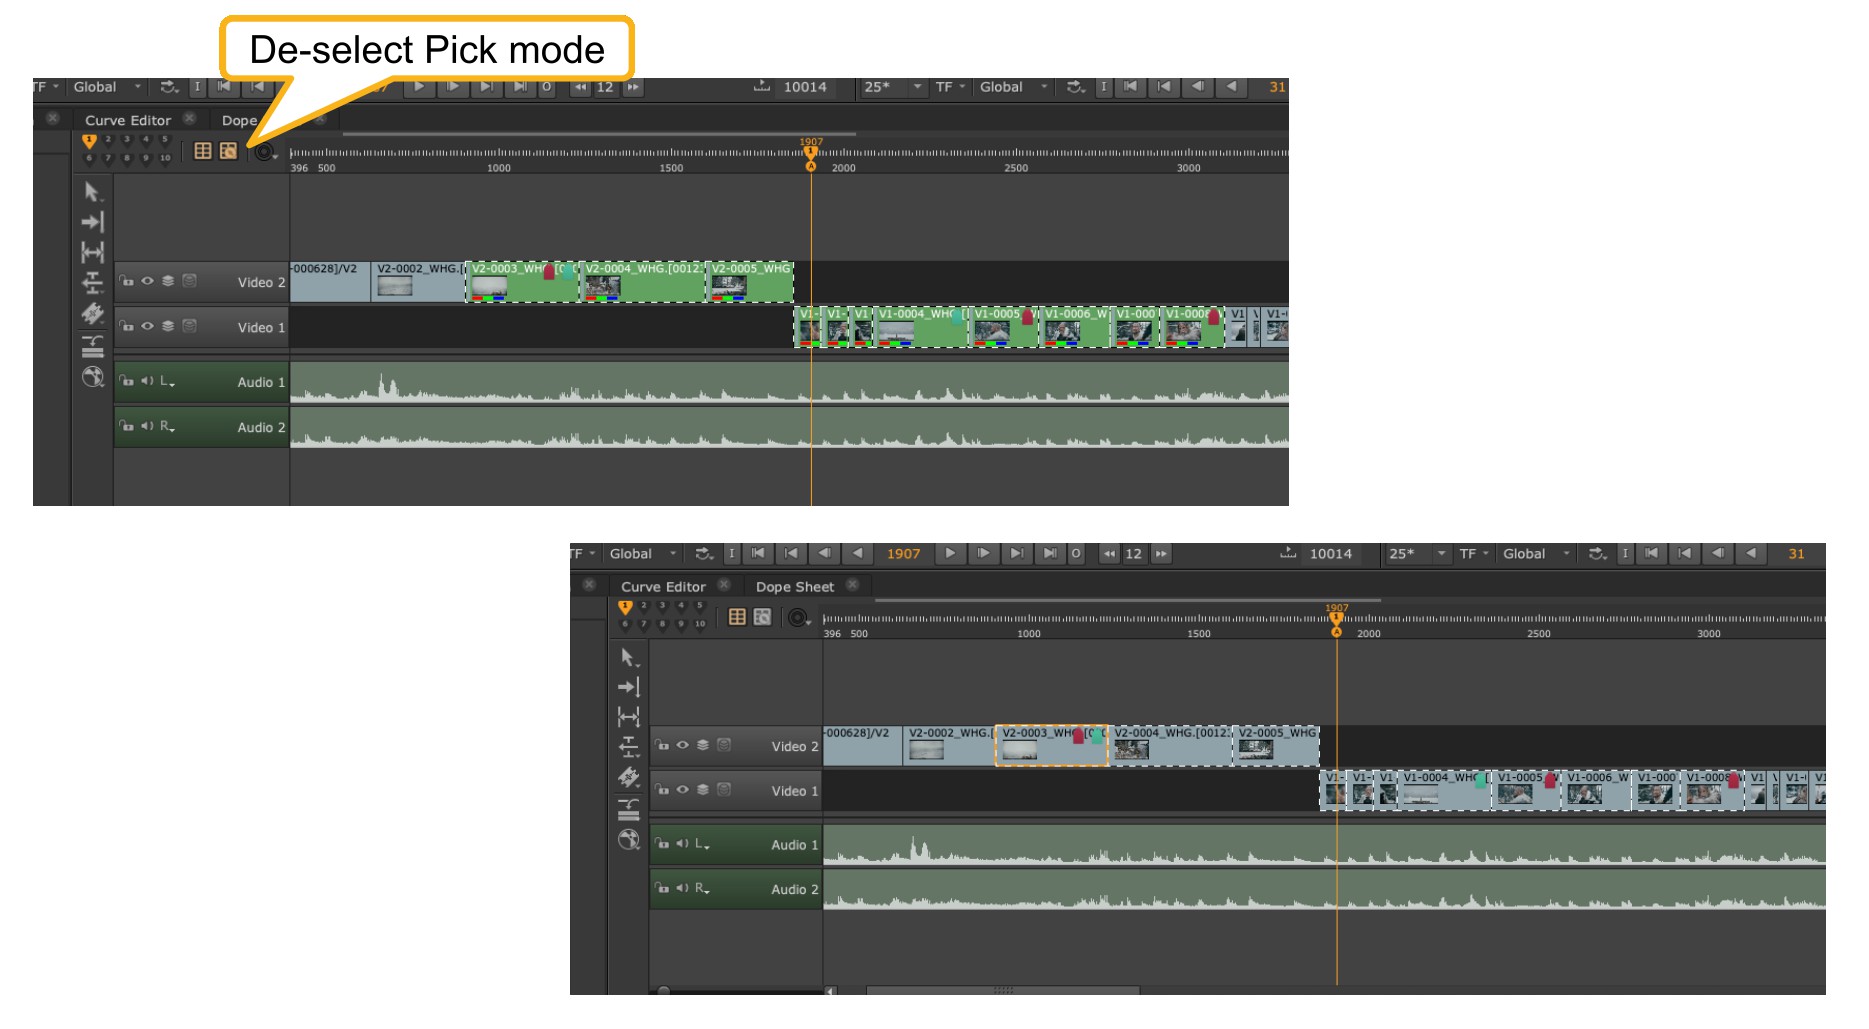
| 4. | Once you’ve finished adding the shots you want displayed in the Contact Sheet deactivate the Pick Mode button to return to normal editing and selection mode. You’ll note that when you do this that your chosen shots are highlighted with a dashed border so that you can visually keep track of what shots are being used in the Contact Sheet. In the normal editing mode you cannot affect the Contact Sheet selection and will need to go back into the Pick Mode if you want to add or remove shots. |
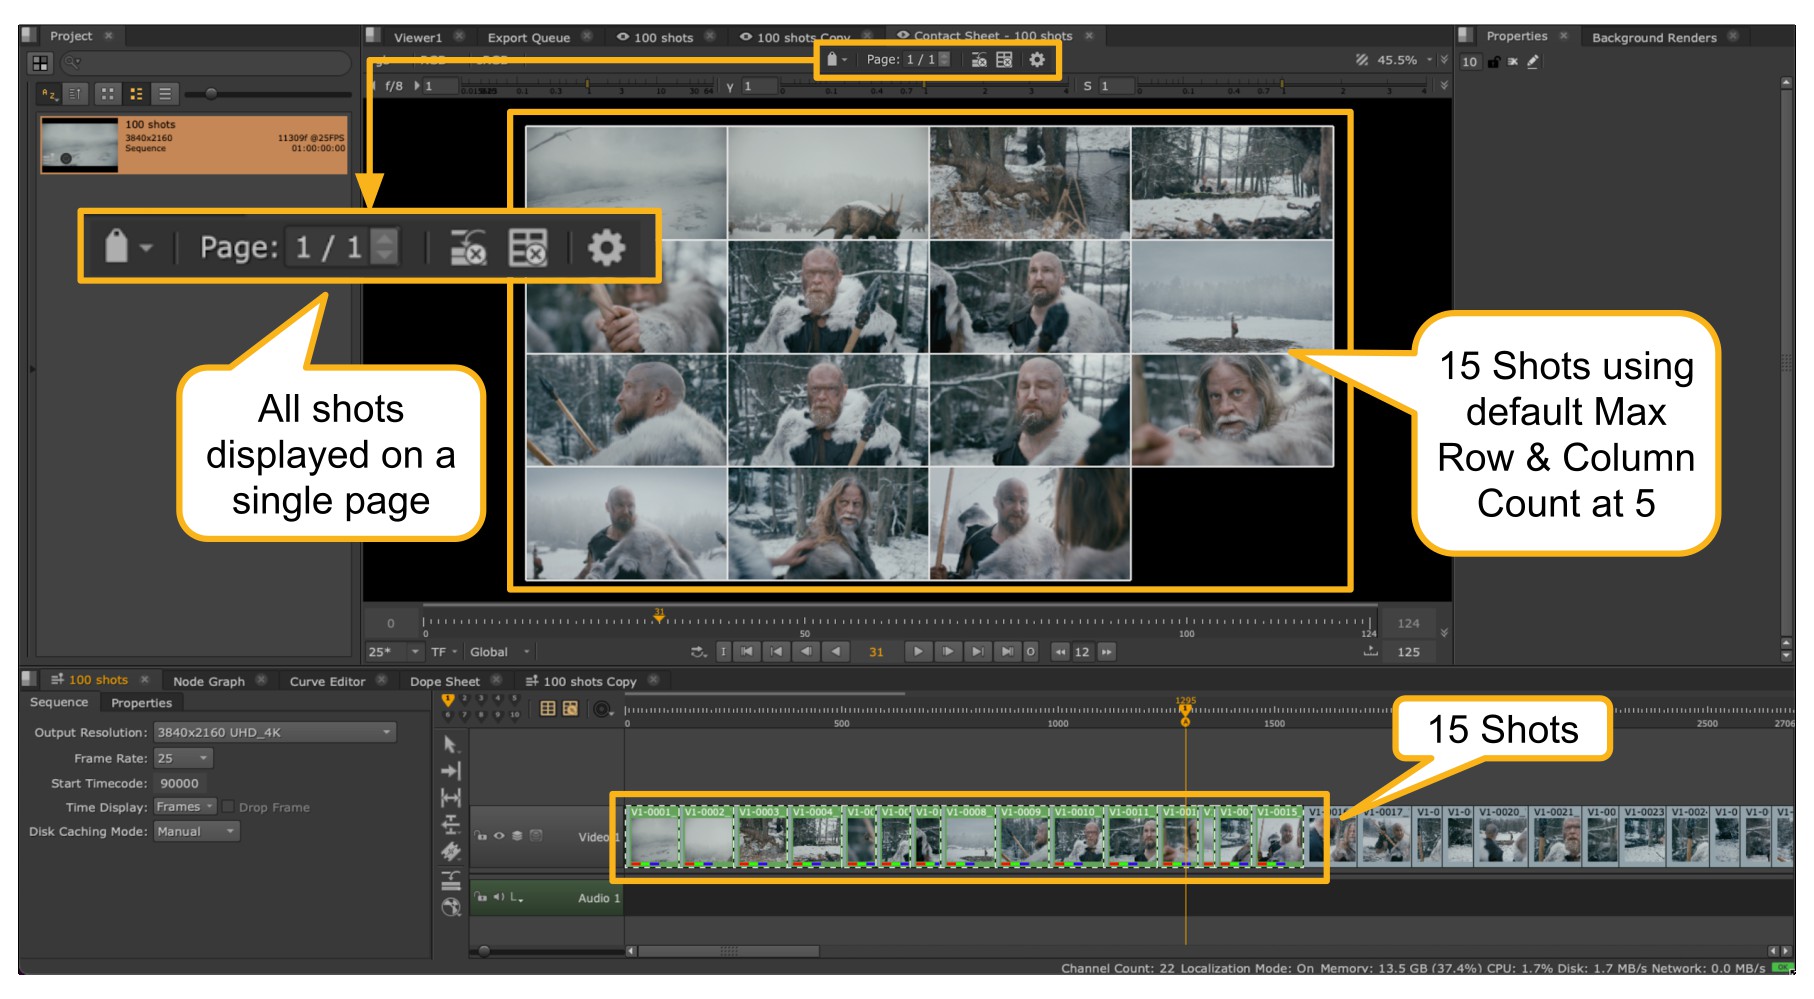
| 5. | At this point, depending on how many clips you have selected, additional pages may be shown available in the Contact Sheet menu bar Pages area. The default Max Rows & Max Columns Count is set to 5 by default, meaning that up to 25 shots can be displayed per page before the remaining are automatically spilled over to additional pages. In the screenshot below with these default settings 15 shots are selected to be displayed. |
If you now select a further 20 shots, making a total of 35, then a second page is created as you’ve exceeded the maximum allowed determined by the Row & Column Count, and 10 shots are placed on page 2. The page navigation box is updated accordingly.
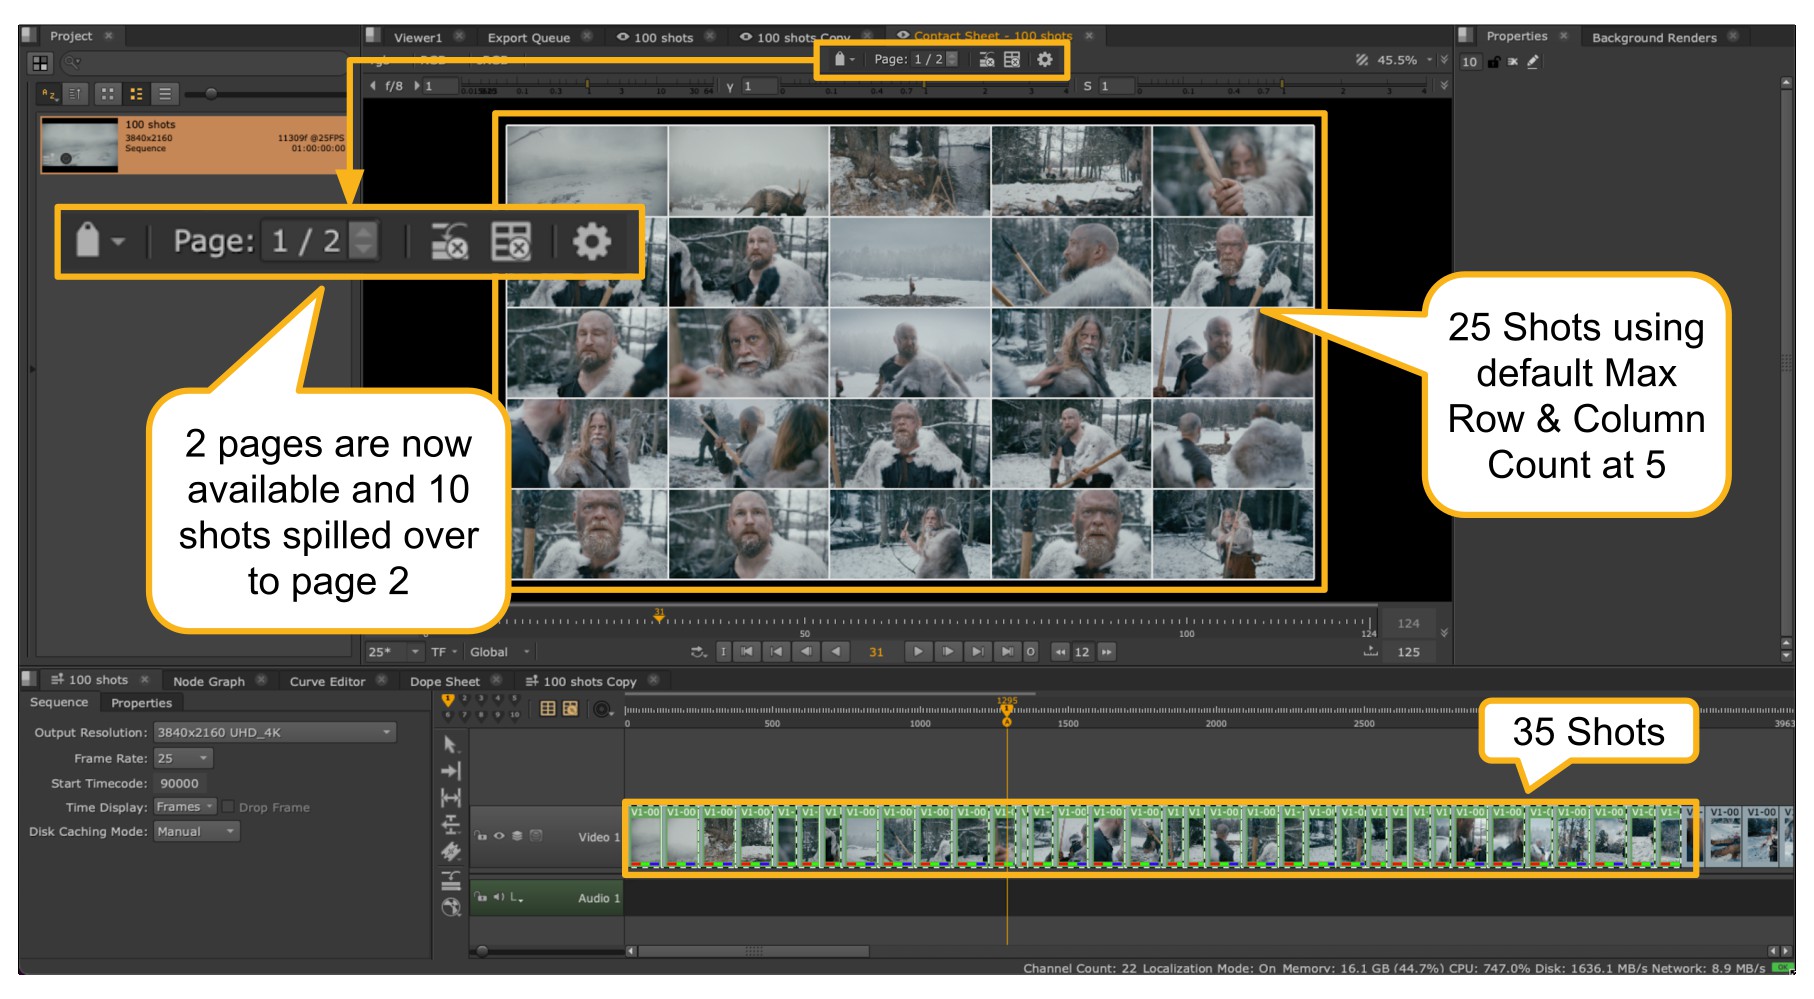
So now using the up and down arrows you can navigate between the pages; this is what is seen on page 2.

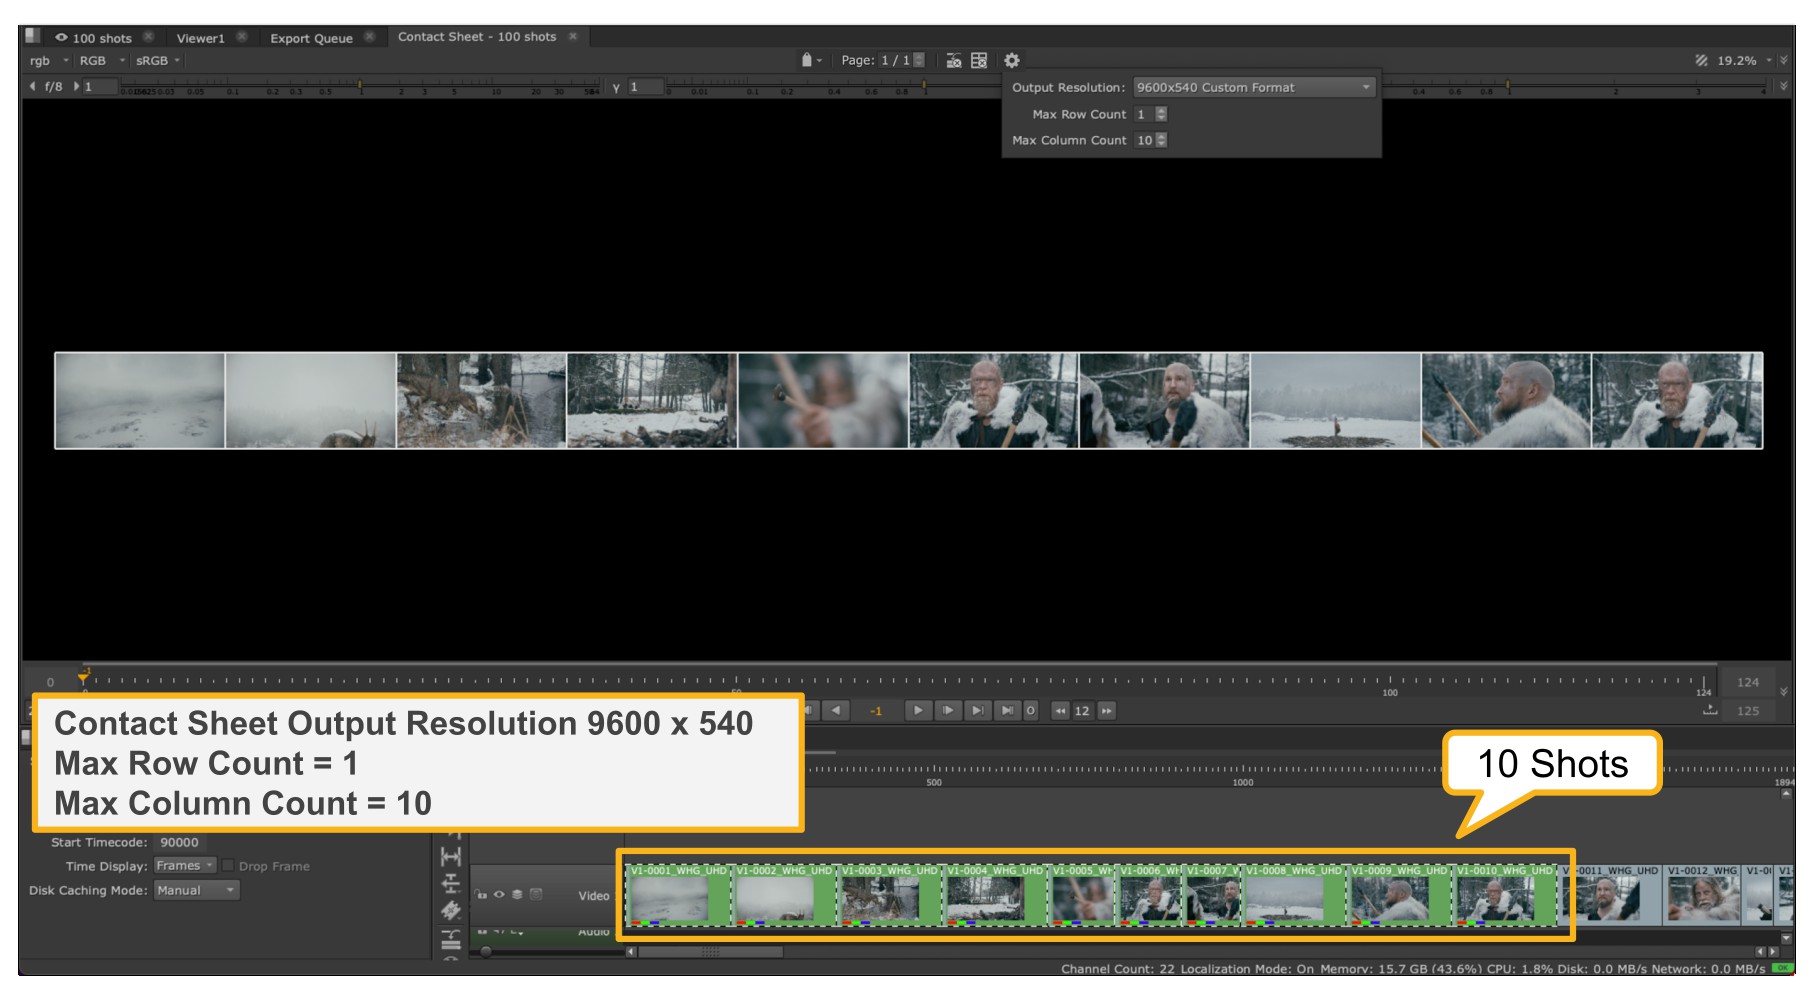
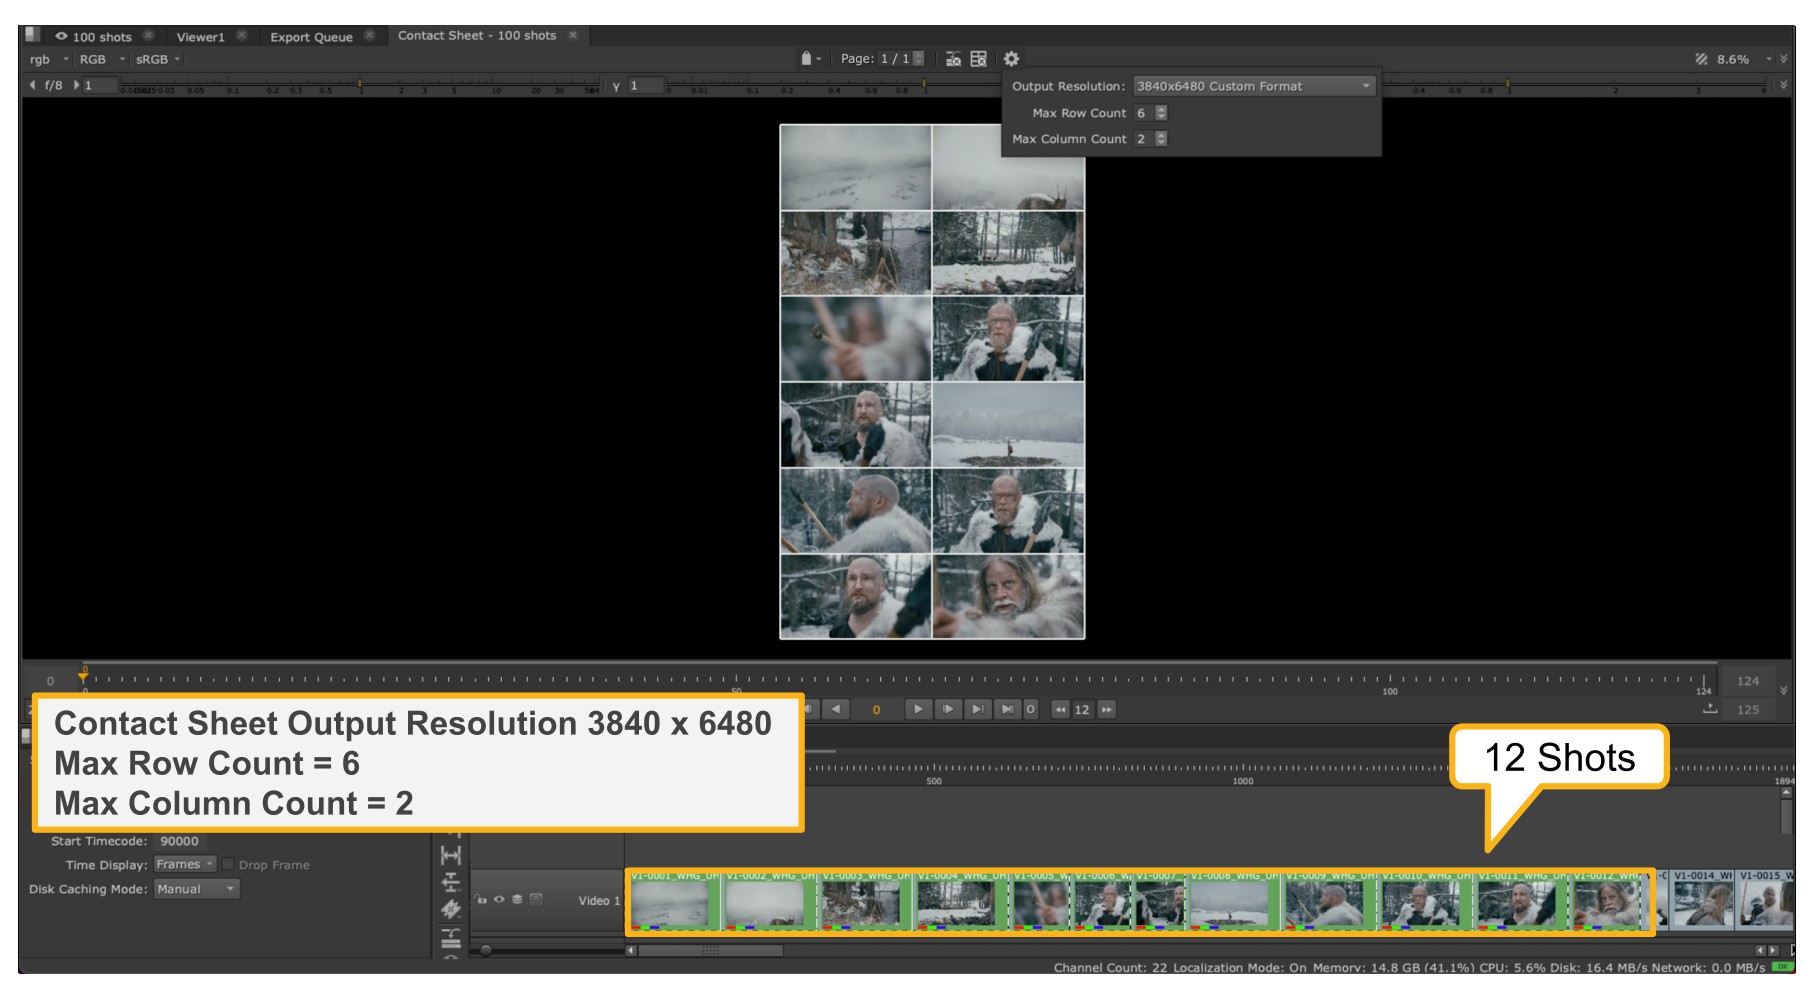
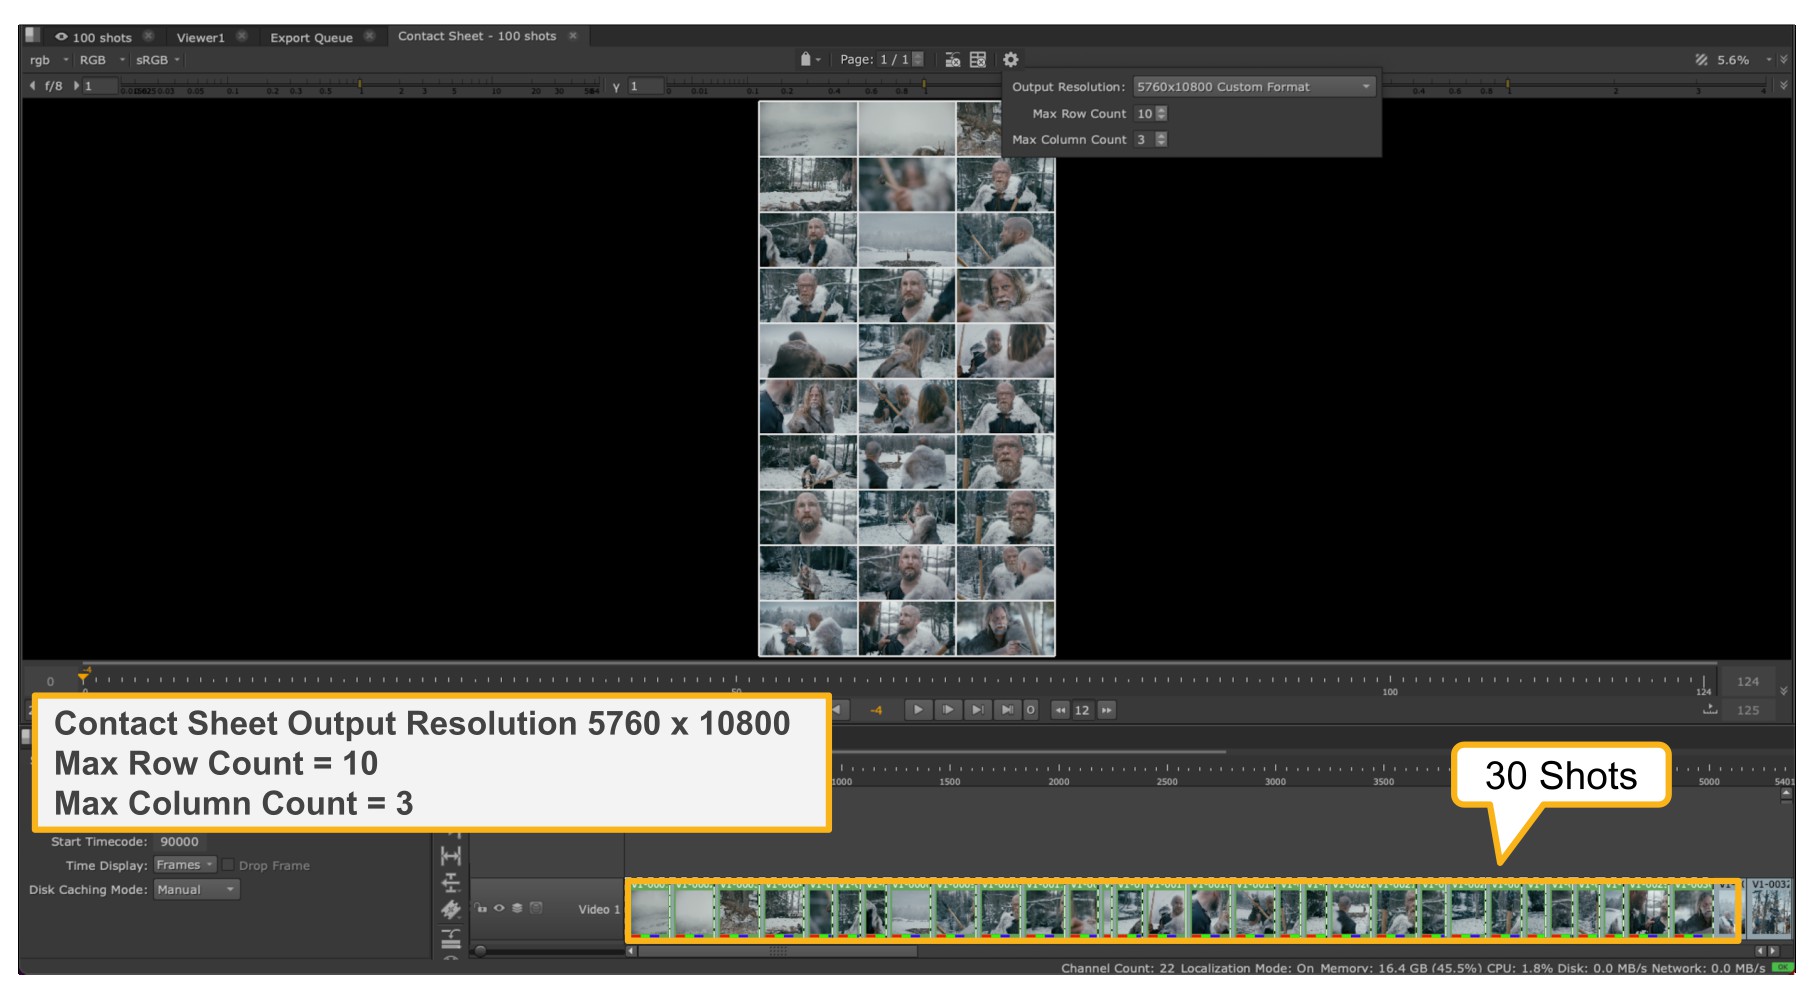
Using the Max Rows & Columns count you can optimise the amount of shots and their scale when working with large amounts of content in the Contact Sheet, which will also help playback performance, but in combination with the Contact Sheet Output Resolution create bespoke layouts a few examples of which can be seen below.