Motion Blur with ScanlineRender
The most common way to affect the motion blur in your 3D scene is to adjust the Sampling controls in the ScanlineRender node Properties.
Sampling Controls
Camera Samples:
The image is sampled multiple times over the shutter period. Increasing this value is the most accurate, but also the slowest, way of adding motion blur, because the full rendering calculation is done multiple times for each pixel. More samples means smoother motion blur and less aliasing, but a longer render time. However, ScanlineRender node doesn't require nearly as many samples as the classic ScanlineRender node, allowing you to get to a smoother result faster.
For example, turning Camera Samples from 4 to 25 results in a cleaner image:
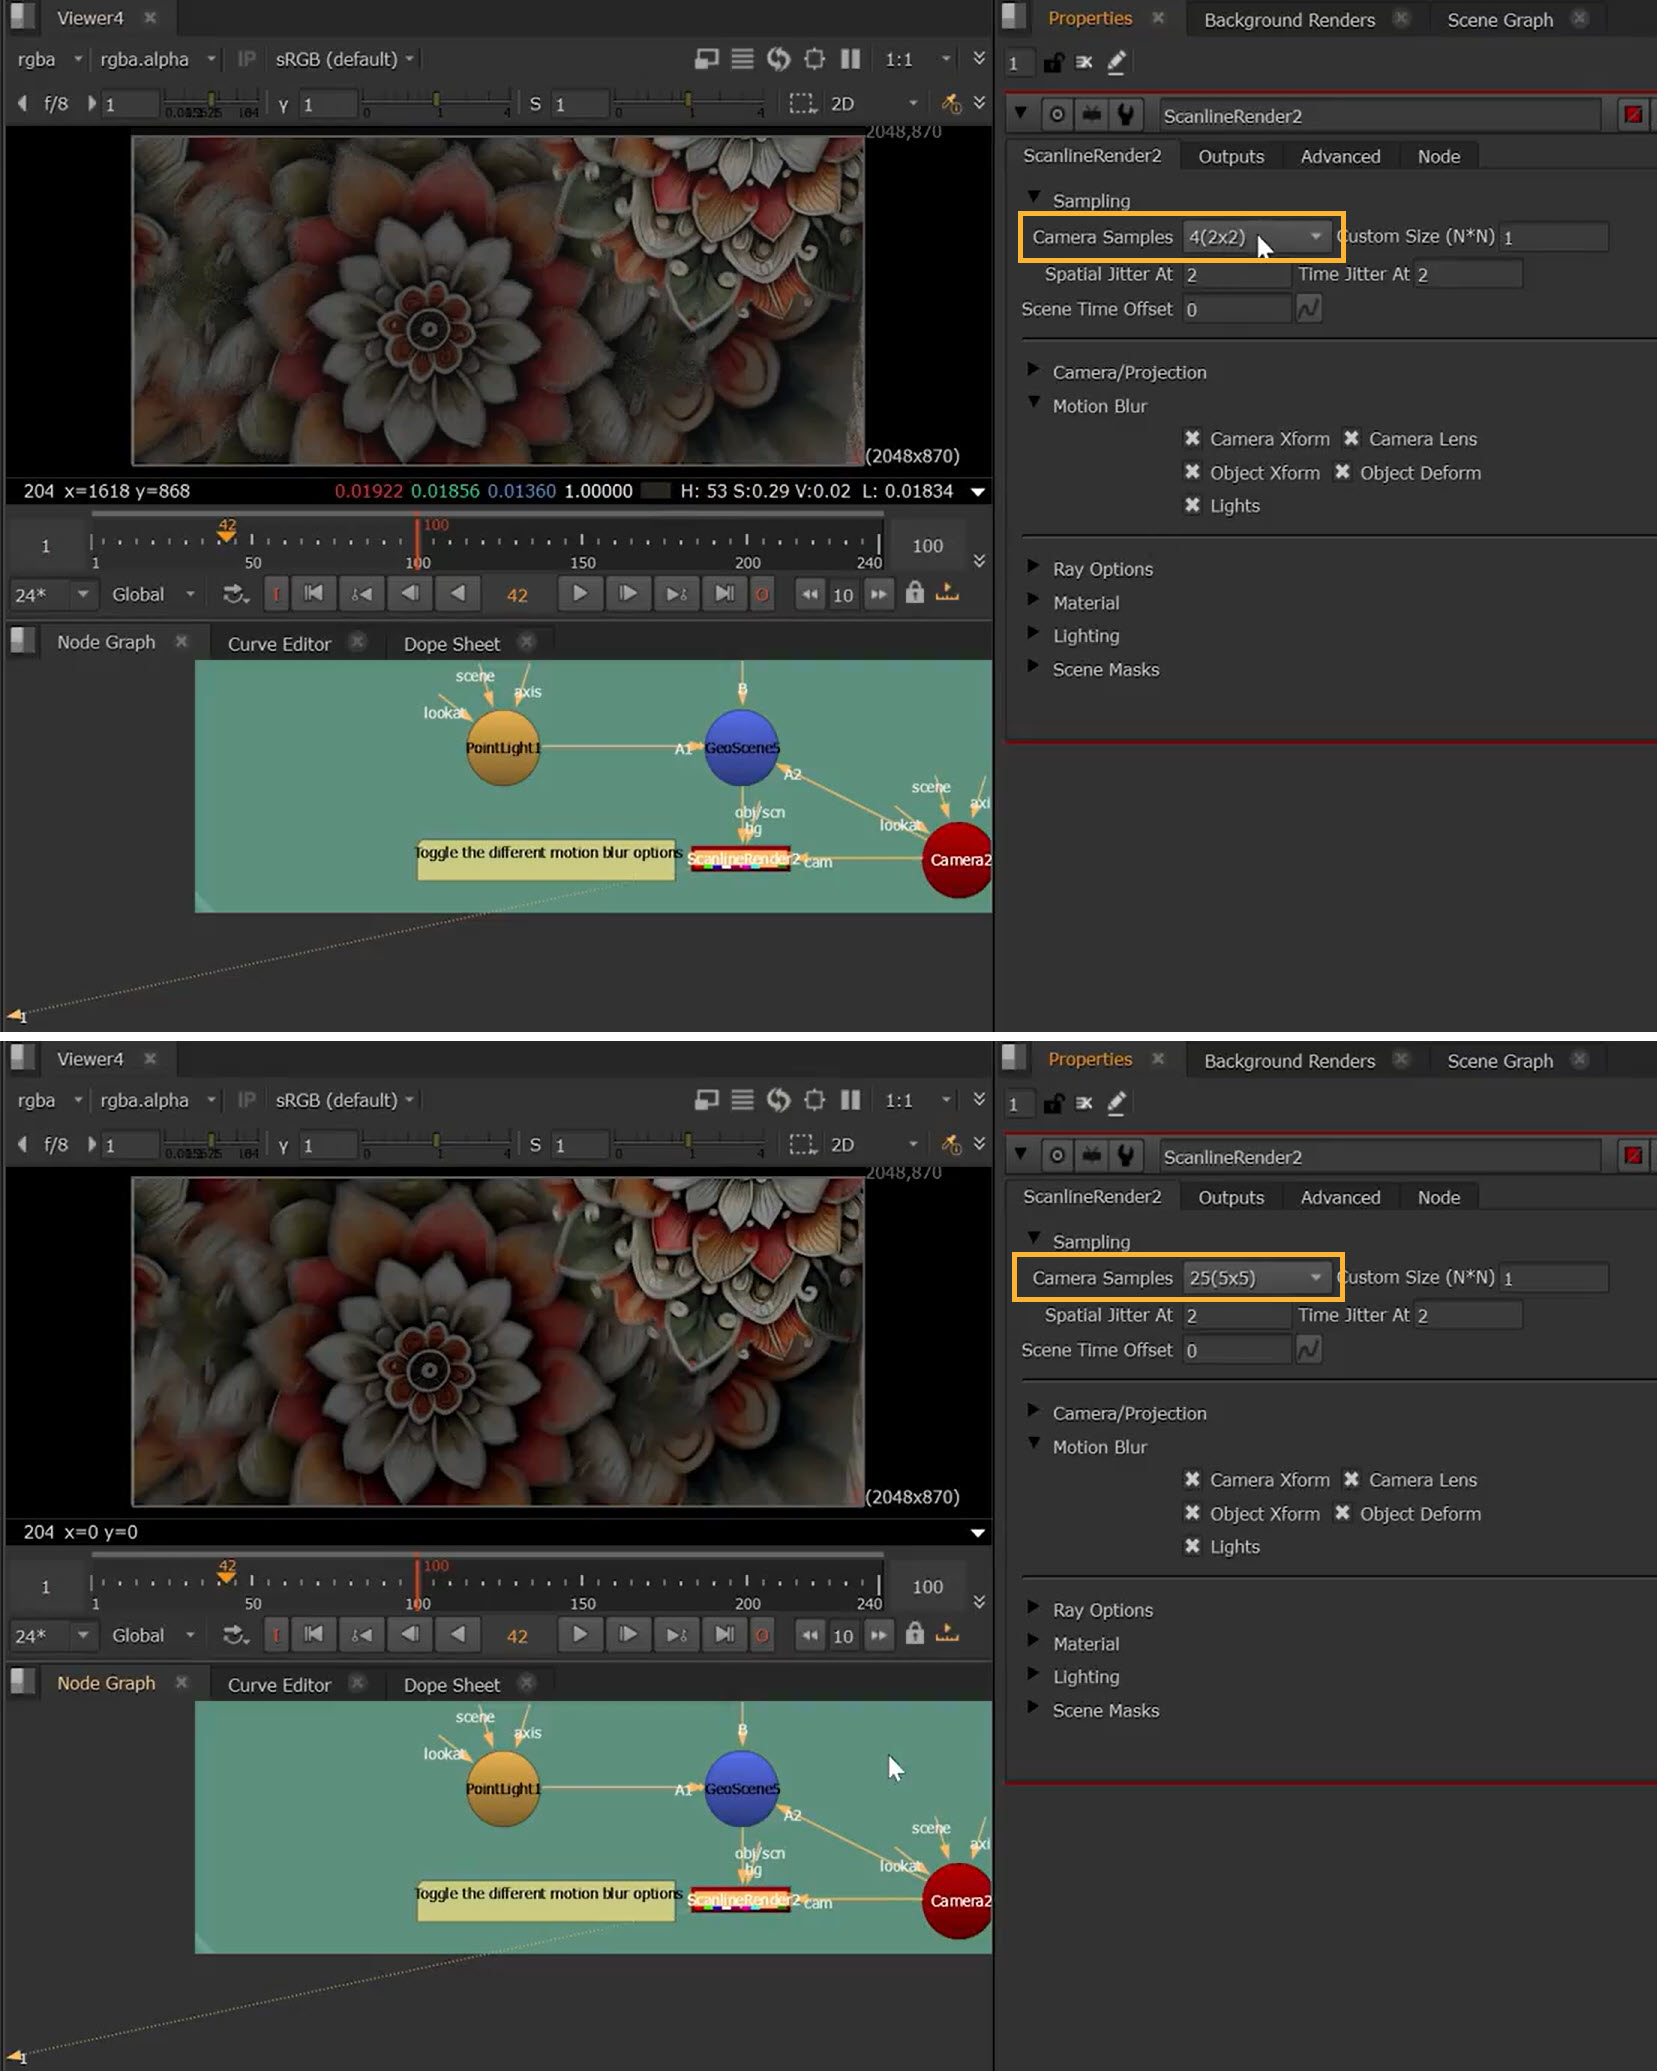
Additionally, because there was no jittering in the classic ScanlineRender mode, you got a "stacking" like effect for motion blur, but jittering can now be controlled making this more effective.
| Spatial Jitter At
The ‘Spatial Jitter At’ knob allows you to control at which sample levels ScanlineRender2 will jitter spatial subpixel locations when doing anti aliasing so that you break up the patterns for better results. By default the location of the sampling within the pixel itself is being randomly changed at a value of 2 or higher, so only turns on when samples are above 1. When turned off only the exact centre of the pixel is being sampled when samples is 1, or in a uniform grid if greater than 1. This means you have control over which sample levels have uniform sampling (samples at a value less than the ‘Spatial Jitter At’ value) or jittered sampling (samples at a value equal to or more than the ‘‘Spatial Jitter At’ value). Time Jitter At The ‘Time Jitter At’ knob determines at what sample number you start randomly jittering the time for motion blur. The default value is 2, which means jittering to produce motion blur occurs when samples are at a value 2 or higher. If samples are at 1, no motion blur will be created, but motion vectors will be produced so that you can still blur the image. Scene Time Offset The ‘Scene Time Offset’ knob allows you to shift the frame you are rendering and can be done in subframe increments. This means you can slip your render in time (with subframe accuracy) without affecting the camera or the objects in the stage, which can be really helpful when you are trying to slip the camera to get vector motion blur aligned properly. |
Motion Blur Controls
Of course, the Motion Blur section of the Properties also gives you further control over the motion blur in your scene. Toggling the following options affects the motion blur of different elements:
|
Camera Xform The ‘Camera Xform’ knob enables and disables the motion blur of a camera being transformed i.e. animating a Camera through space Please note that subsampling matrices produce artifacts currently, as this requires quaternions for the matrix interpolation method which has not yet been implemented. As a workaround increase the Shutter Segments to chop up the frame you are generating the matrix for, into multiple matrices. Camera Lens The ‘Camera Lens’ knob enables and disables the motion blur of a camera projection control being changed i.e. motion blur generated from animating the focal length of the camera Object Xform The ‘Object Xform’ knob enables and disables the motion blur of an object being transformed i.e. animating a GeoCube through space (the mesh transform matrix is animated) Object Deform The ‘Object Deform’ knob enables and disables the motion blur of an object being deformed i.e. an animated radius knob on a GeoSphere (the point xyz locations are animated) Lights The ‘Lights’ knob enables and disables the motion blur of a light being transformed i.e. animating a light through space. |
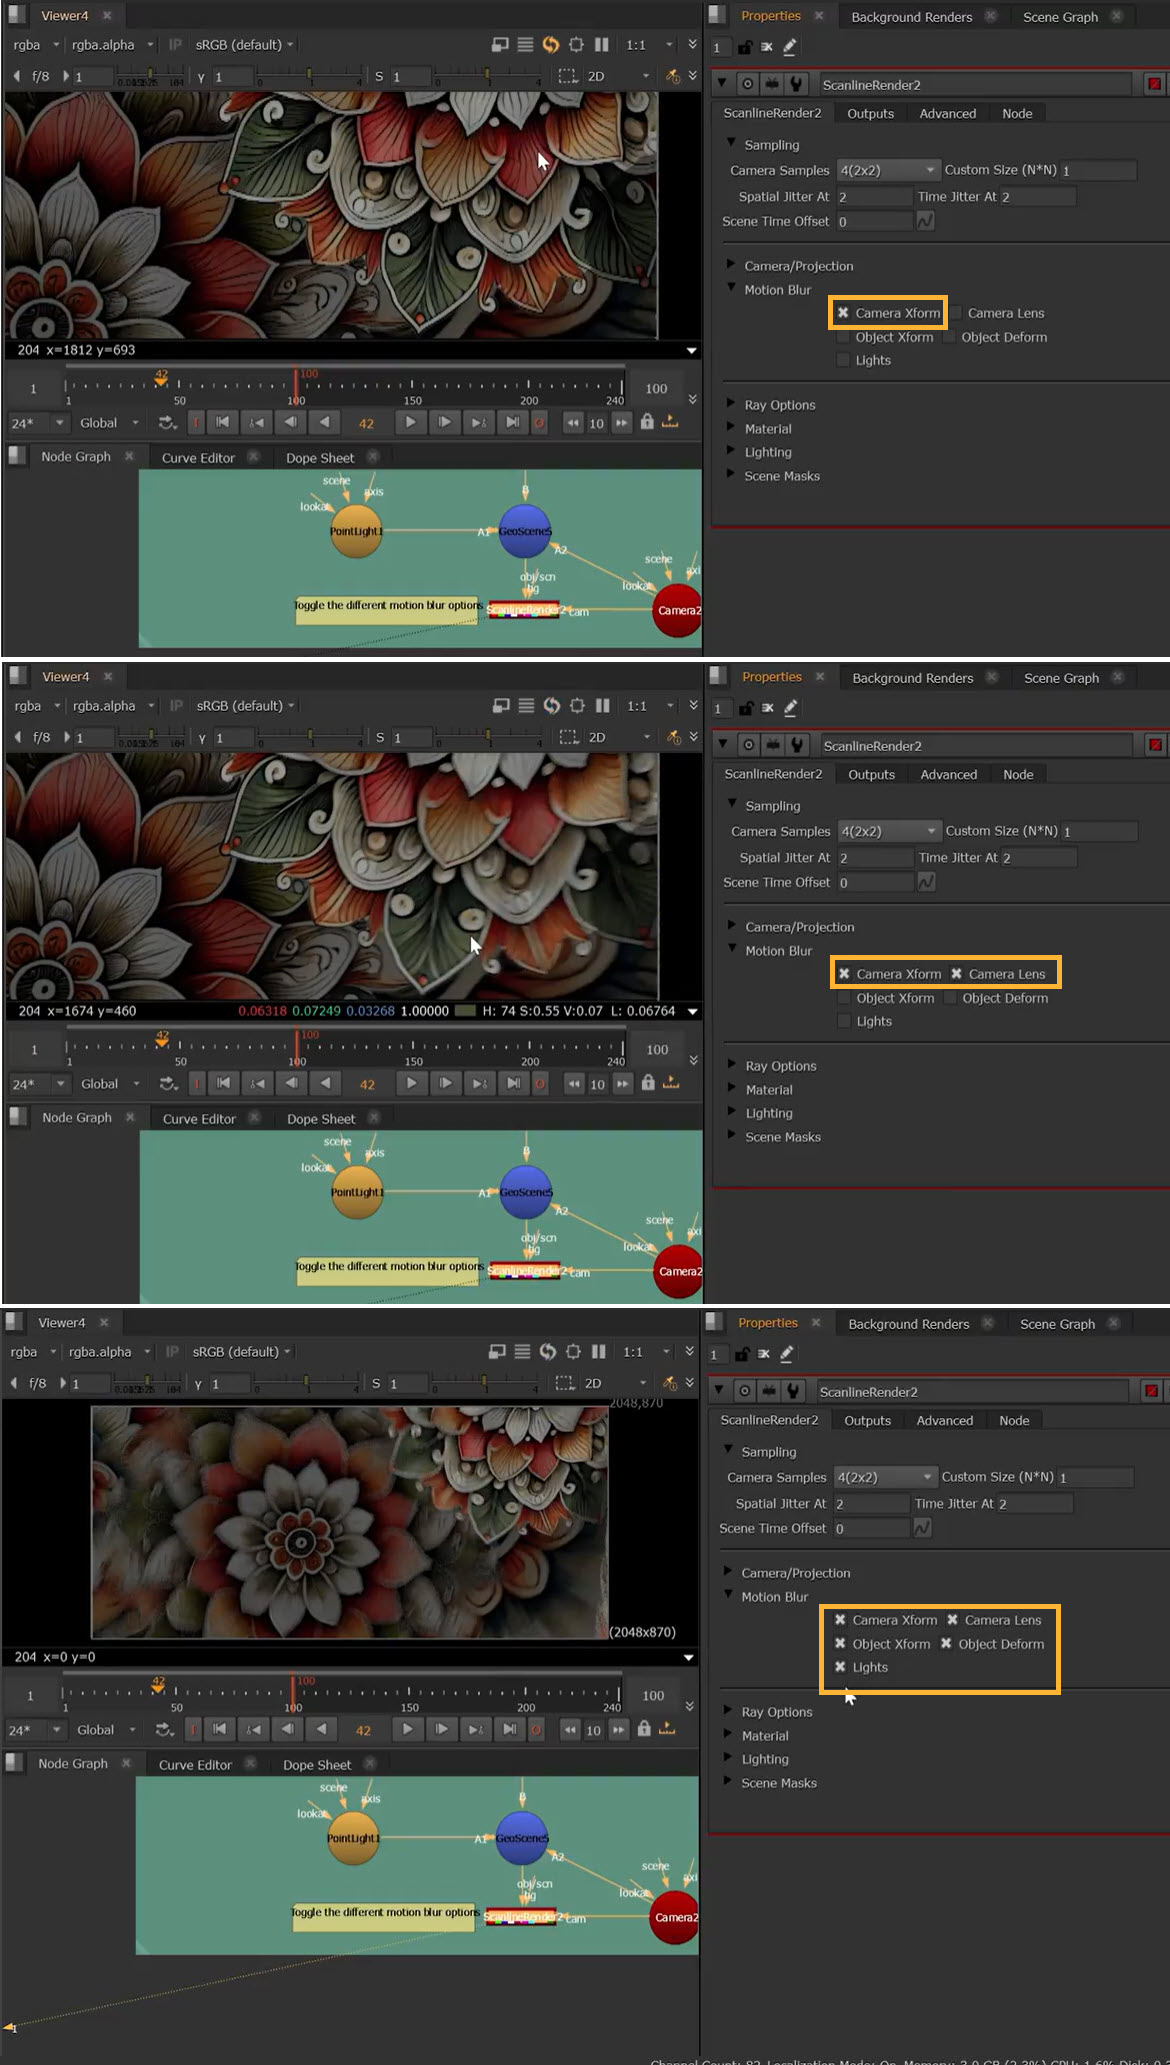
For example, turning on the motion blur of different elements at once:
Shutter Controls
You’ll also find that some of the controls in the Camera/Projection section of the ScanlineRender node Properties will affect motion blur:
| Shutter
The ‘Shutter’ knob is how long the shutter should be open for when motion blurring. Shutter Offset The ‘Shutter Offset’ knob is how the shutter behaves with respect to the current frame value. • centered: acts as a snapshot in the middle of the frame, so motion blur would be shown as if you paused halfway through the frame • start: opens the shutter at the start of the frame, so you see the motion blur ahead of the geo animation • end: opens the shutter at the end of the frame, so you see the motion blur after the geo animation • custom: opens the shutter at a time specified by the user Nuke has always defaulted to ‘start’ and going forward in time, so at a given frame the shutter is open. However often it can be useful to change this to ‘end’ when you want a motion blur trail to an impact point on a specific frame. Shutter Segments The ‘Shutter Segments’ knob is the number of time 'segments' used to interpolate motion blur. The greater the number of segments the greater the quality of rotational motion blur. This helps with rotational motion blur, which gives more realistic results for motion blur on objects with rotational movement like, car wheels, helicopter blades etc. Shutter Bias The ‘Shutter Bias’ knob moves your motion blur to be weighted more to the start of a frame or end of a frame, or one end of the shutter. |
Node Reference
Renders all the objects and lights in a scene.