Working with HDR Images
Nuke handles HDR (high dynamic range) images in the same way as any other image, and so manipulating HDR footage in Nuke does not compromise the range of data available.
In the Read and Write nodes MOV Options, for the YCbCr Matrix, you can choose between Rec 601, Rec 709, Rec 2020, or default (which will be selected based on the metadata). Rec 2020 can be used for HDR images, for more accurate color conversion.
Quicktime Color Metadata Control
If default is selected, movReader reads the nclc values, including the color matrix, from the container metadata (the colr atom), and uses this information to suggest a default value for the YCbCr Matrix knob.
When using the Write node, under Advanced, there are Metadata Export knobs for Color Primaries and Transfer Function , allowing for additional options.
• Color Primaries specifies the color primaries metadata to be written to the MOV file. This defines the XYZ coordinates of the RGB primaries and white point. Auto - Uses legacy colorspace assignment based on content resolution.
• Transfer Function specifies the transfer function (gamma) metadata to be written to the MOV file. This describes how RGB values are converted to and from linear light. Auto - Uses legacy colorspace assignment based on content resolution.
Nuke, Nuke Studio, and Hiero support viewing HDR output through approved monitors and Monitor Output devices such as AJA, Blackmagic Design, and Bluefish SDI/HDMI cards. See AJA and Blackmagic Design Monitor Out Devices for more details on supported cards. The following table contains details of the output devices we've tested and approved.
|
Device |
Operating System |
Connection |
|---|---|---|
|
Dell UP3221Q |
Linux and Windows |
HDMI |
|
macOS (Catalina 10.15.x, or later) |
Thunderbolt |
|
|
LG EP950 and BP95E |
Linux and Windows |
HDMI |
|
macOS (Catalina 10.15.x, or later) |
USB-C DisplayPort Alt Mode |
|
|
Apple XDR |
macOS (Catalina 10.15.x, or later) |
Thunderbolt |
|
EIZO |
Linux and Windows |
HDMI, Display Port |
|
macOS (Catalina 10.15.x, or later) |
USB-C Alt Mode |
EDR Displays - Mac Only (Beta)
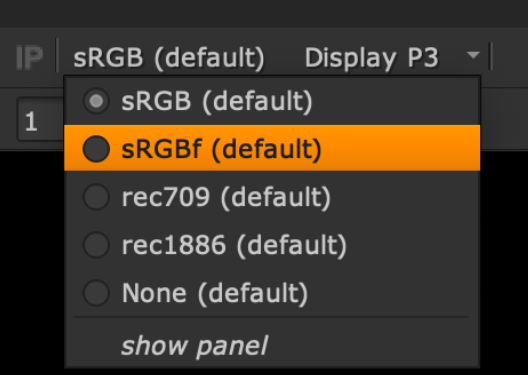
If you're running Nuke on macOS Catalina or later and have a compatible screen capable of displaying values above 1, you can view your projects with HDR luminance ranges using sRGBf in OCIO Color Management. You can also display images in the P3 gamut, giving more accurate color on wide gamut displays.
Note: This feature requires a 2019 Mac Pro running macOS 10.15, or later, and a suitable display or a current generation iMac Pro, iMac or MacBook Pro with an HDR screen.
- On an Apple XDR, set the profile of your display to one of the HDR options in the OS System Display Preferences:
- In the Preferences, open the Color Management > HDR section and check Enable macOS HDR Color Profile (Display P3) (Beta).
- In the Viewer Properties, set the gl buffer depth to half-float or float to allow HDR values to display.
- Set the Viewer Process to sRGBf using OCIO Color Management or provide your own extended color space. This ensures that the frame buffer is not clamped at 1.
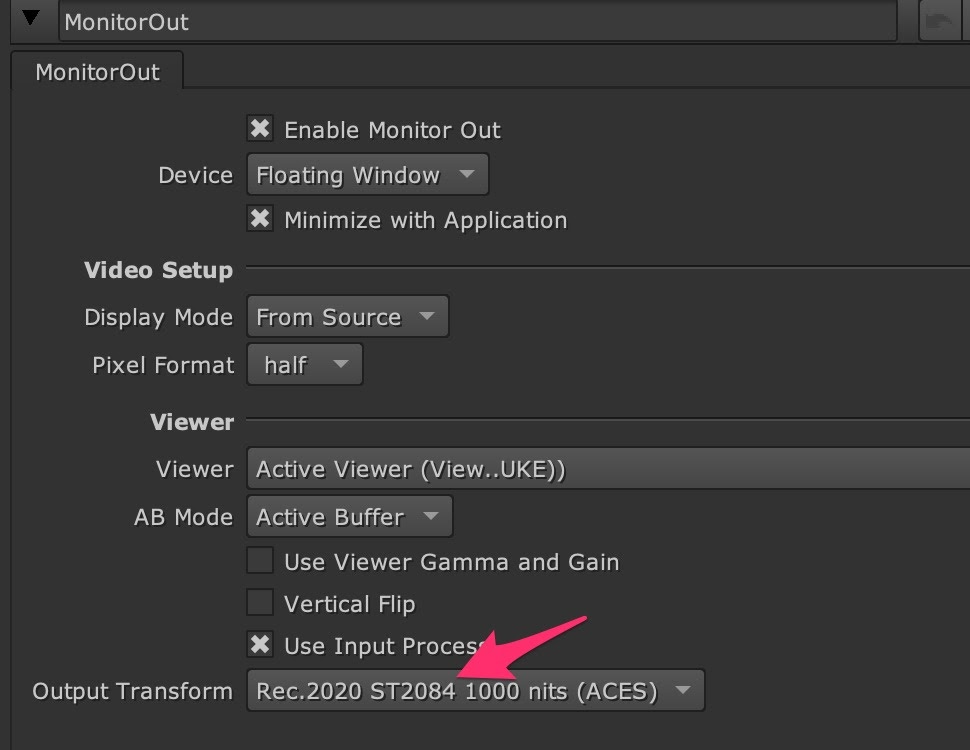
- To use the HDR Video (P3-ST2084) setting on the monitor, select an appropriate ST2084 Output Transform in the MonitorOut Properties or in the Viewer.
• Pro Display XDR (P3-1600 nits)
• Apple Display (P3-500 nits)
• HDR Video (P3-ST2084) - 1000 nits
On other monitors, enable the High Dynamic Range checkbox.
Note: Enabling this control requires you to restart the application.
This control sets the Viewer colorspace to Display P3, so that the screen can display values above 1. This setting also applies the P3 colorspace to the following;
• All Viewers
• Node Graph
• Dope Sheet
• Curve editors
• Scopes
A further color space conversion is required to allow HDR images to display correctly. An example of how this can be achieved in Nuke can be seen using a gizmo created by a customer, Nick Shaw - the gizmo is available for download here: PQ-EDR_v101.gizmo
For more information on gizmos and how to use them, see Accessing Gizmos in Nuke.
Using this gizmo as an Input Process and setting the input process order to after viewer process renders the correct image in the Viewer.
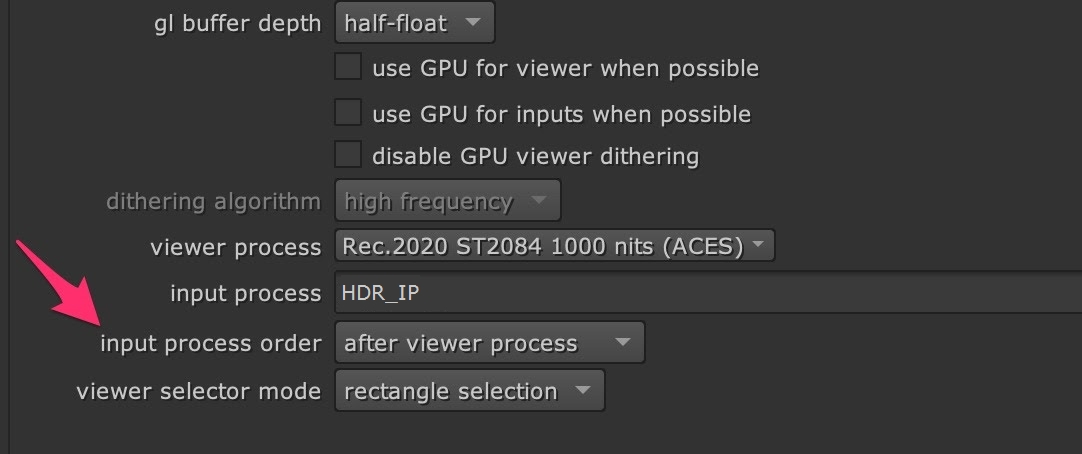
The gizmo also contains a slider called Normalization (nits). This allows you to set the PQ nit value which is normalized to 1.0. This is useful, for example, to prevent clipping of a 1000 nit PQ signal on the 16" MacBook Pro's 500 nit display.