Annotations
In Nuke Studio and Hiero, you can use annotations to add instructions and feedback for compositors. You can add annotations to a single frame, a frame range or timecoded section marked with in and out points, a clip, or a whole sequence.
The Annotations Panel allows you to post comments and notes in reply. The Annotations Toolbar includes a variety of painting tools to help visually indicate your thoughts on the images in the Viewer.
Workflow
The following steps show an example of Nuke Studio workflow for annotations:
| 1. | In the Viewer, open the Annotations Tools by selecting the paint brush icon  in the Viewer. See Annotations Tools. in the Viewer. See Annotations Tools. |
| 2. | Add an annotation to a Clip or a Sequence by using the Annotations Panel and Annotations Toolbar. See Adding Annotations. |
| 3. | You can choose to edit an annotation after it has been created. See Editing and Deleting Annotations. |
| 4. | You can respond to comments by leaving Notes. See Adding Notes. |
| 5. | You can render your sequence with annotations via Quick Export. See Rendering Out Annotations. |
Note: This workflow is also supported in Sync Review sessions.
Annotations Tools
Open the Annotations Tools by selecting the paint brush icon  at the top-right of the Viewer.
This will open both the Annotations Panel on the right, and an Annotations Toolbar down the left side and horizontally above the Viewer.
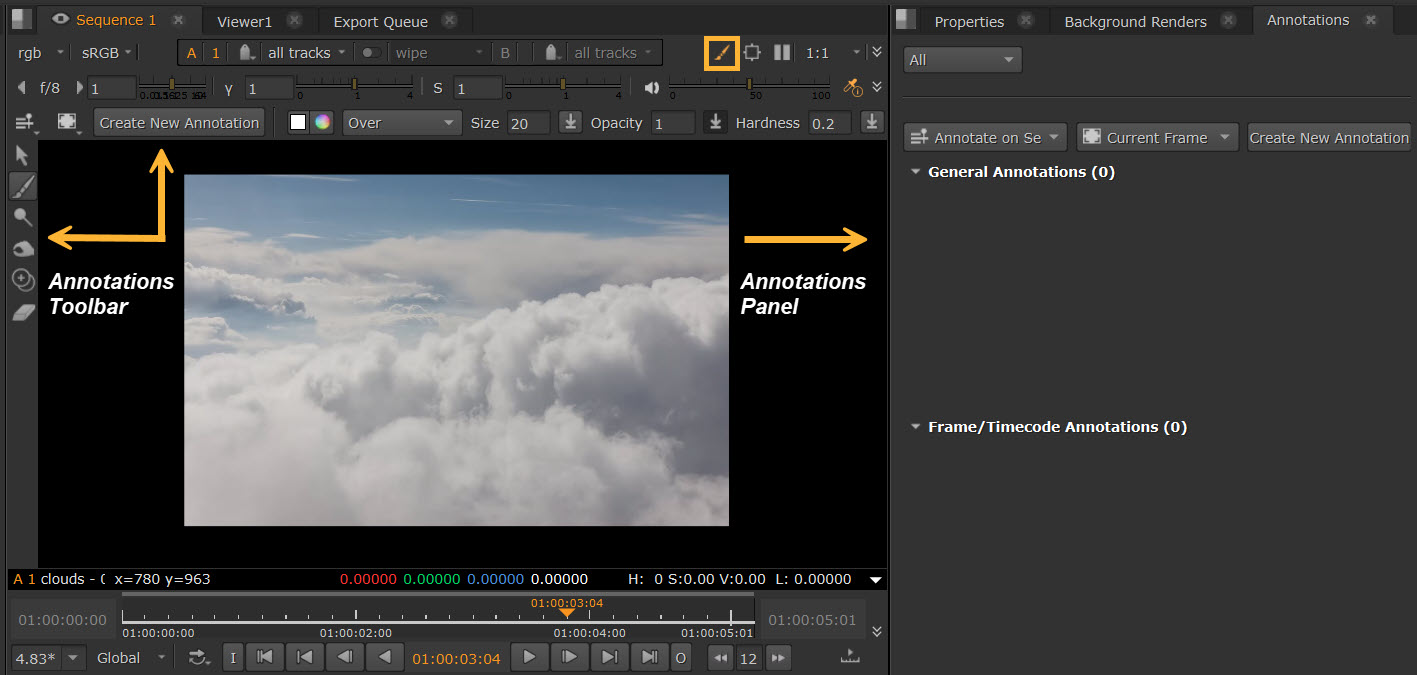
Note: Annotations on sequences and shots are only visible when you have the Annotations Tools open.
Adding Annotations
To add an annotation, do the following:
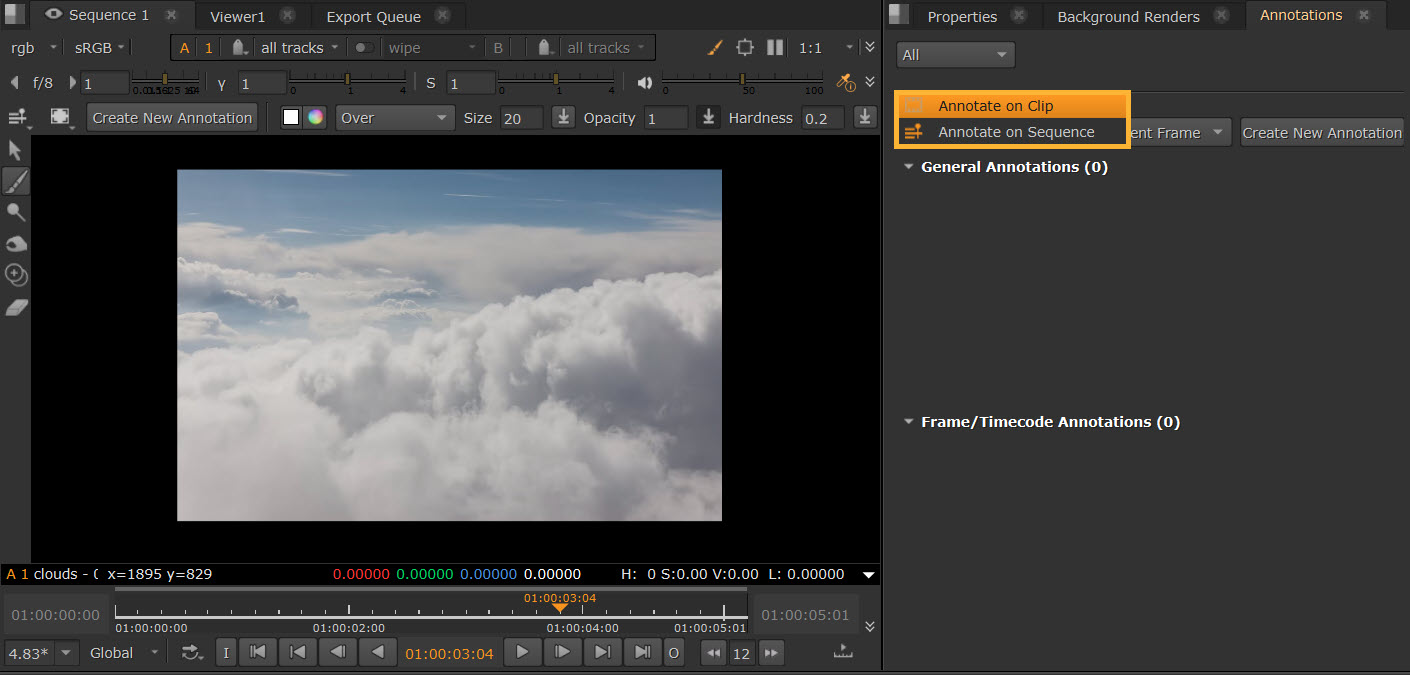
| 1. | After you have opened the Annotations Panel, move the playhead on the timeline to where you want to add your annotation. Select either Annotate on Clip or Annotate on Sequence from the dropdown. |
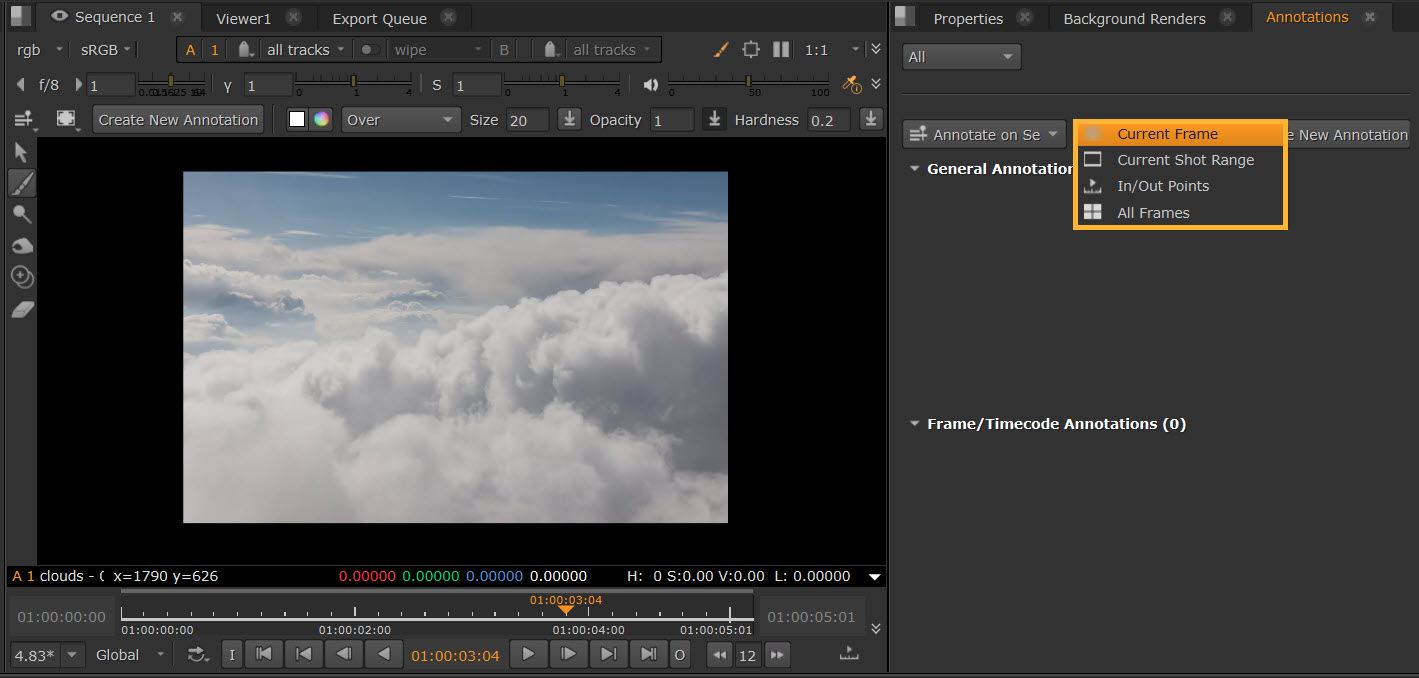
Select whether to add the annotations to Current Frame, Current Shot Range, In/Out Points or All Frames on the dropdown.
Then select Create New Annotation.
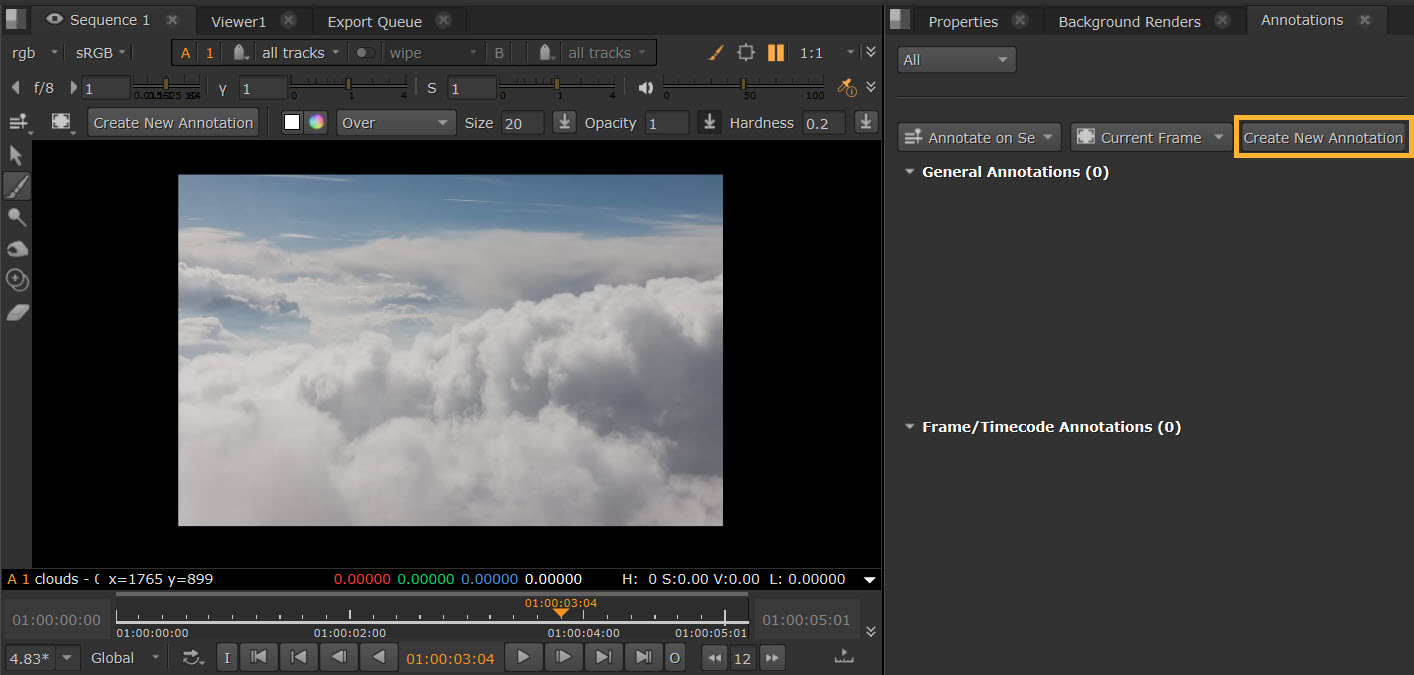
| 2. | A text field will appear, where you can adjust the frames or timecode in and out points via the orange text fields. Write your comment below. |
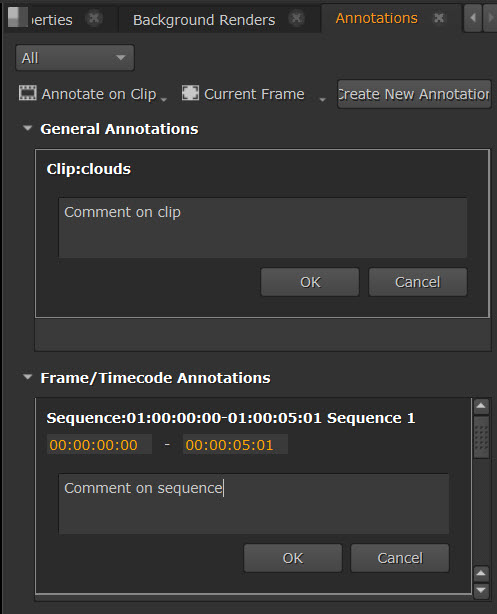
| 3. | Use the Annotation Toolbar to add any visual annotations to the image in the Viewer, such as using brushes. See Painting with the Annotations Toolbar. Any changes you make here will be saved to the same timecode, and will be linked to your comment. |
| 4. | You’ll notice that blue markers will be added to the timeslider and timeline to show where your annotation is located. These can be adjusted directly by dragging the markers. |

Note: There is no longer a separate Annotations track on the Timeline and your annotations are be marked by a blue chip.
If the annotation is out of the track item range, you will not see any markers, just the bar. If there are multiple annotations in one area, they will adjust in height so you'll be able to see them both. Sequence level annotations are taller.

| 5. | Once saved, to find your annotation again, you can select the relevant blue marker on the timeslider and it will be brought up on the Annotations Panel and in the Viewer. Similarly, clicking the comment in the Annotations Panels will jump to the relevant point on the Timeline. By default, in the Annotations Panel, the comments are ordered by timecode. You can also use the Filter dropdown at the top of the Annotations Panel: Current Clip, Sequence, and All to only show comments from specific clips or sequences. |

Painting with the Annotations Toolbar
You can toggle between using Paint, Dodge, Burn, Clone, and Eraser mode by selecting the brush selection button in the Annotations Toolbar. Selecting each one will bring up different options in the horizontal toolbar.
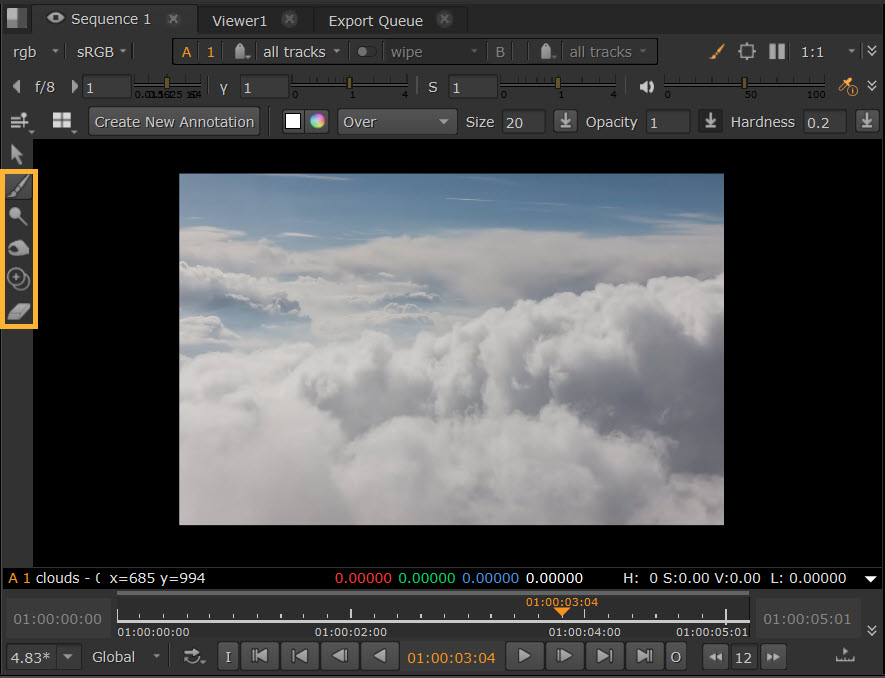
Tip: Use D keyboard shortcut to switch between the Dodge and Burn, and N to switch between Paint and Eraser.
Paint
The Paint tool will show options for Color, Blending Modes, Size, Opacity and Hardness.

• Color: The Color wheel icon opens a color wheel to pick from, or select the Color square icon for a color picker tool to grab from source.
Tip: When using the color picker tool, use Alt+Ctrl to grab from behind annotations. Alt+Ctrl+Shift to grab from a selection.
• Blending Modes: Choose from the dropdown to determine how the paint will be applied in relation to the rest of the image.
• Pressure: This toggle button  is for controlling pressure. Enabling it will mean that pressure affects the Size, Opacity, or Hardness of your stroke. Opacity pressure is enabled by default.
Dodge and Burn
The Dodge and Burn tools help to quickly annotate shadows and light. Dodge lightens the image and Burn darkens the image.

• There is no Color picker or Blending Modes for Dodge and Burn - it will grab the color from the source image.
• Size, Opacity, and Hardness, and Pressure work the same way as the Paint tool.
Clone
The Clone tool allows you to clone parts of your image. Select Ctrl to edit the clone under your cursor and stretch the scale of it.

Eraser
The Eraser tool allows you to remove any Paint, Dodge, or Burn you have already added.

Saving Drawings
Apply the Paint, Dodge, Burn, Clone or Eraser directly onto images in the Viewer.
Any drawing you do will be saved to the same timecode or frames as the annotation that you have open.
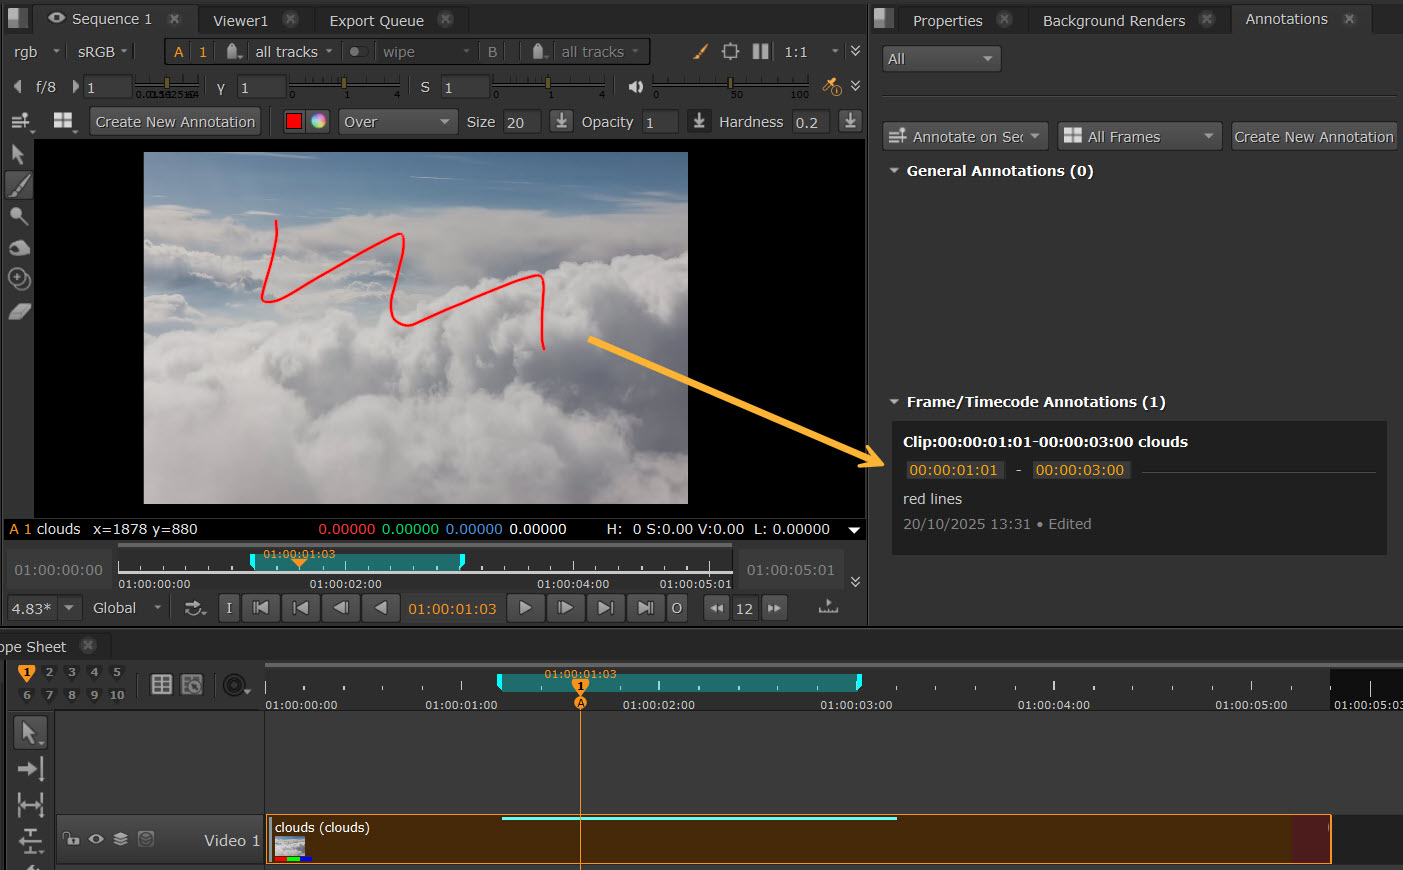
Note: There are currently no text tools in the Annotations Toolbar. You can use the Annotation Panel to add text, as explained above.
Editing and Deleting Annotations
You can choose to edit or delete any annotations.
• Use the Edit button ![]() on any comment in the Annotations Panel. This allows you to edit both the text in the Annotations Panel, and the any drawings in the Viewer. Once edited, your comment will show with an ‘Edited’ state.
on any comment in the Annotations Panel. This allows you to edit both the text in the Annotations Panel, and the any drawings in the Viewer. Once edited, your comment will show with an ‘Edited’ state.
• You can delete comments via the trash can button. This brings up a Delete menu where you can select what to delete from Delete Drawings (removes drawings only) or Delete All (removes the comment and any drawings).
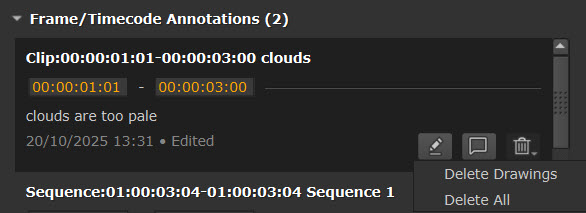
Tip: You can also edit the timestamp by typing in the orange fields in the Annotations Panel, or by dragging the blue markers to a new position on the timeslider.
Adding Notes
Select the notes icon ![]() to add notes to any comment to leave further thoughts or replies.
to add notes to any comment to leave further thoughts or replies.
Write in the text field and select Add Note to save it. It will then appear beneath the original comment under Notes.
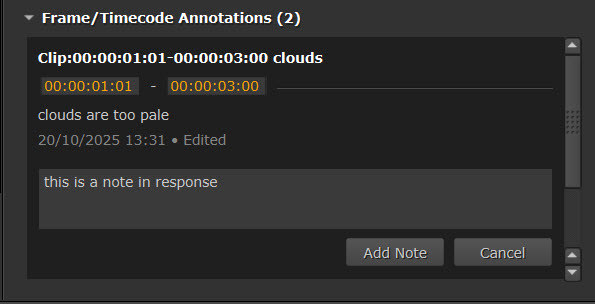
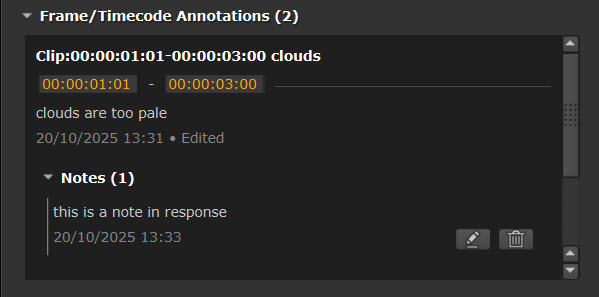
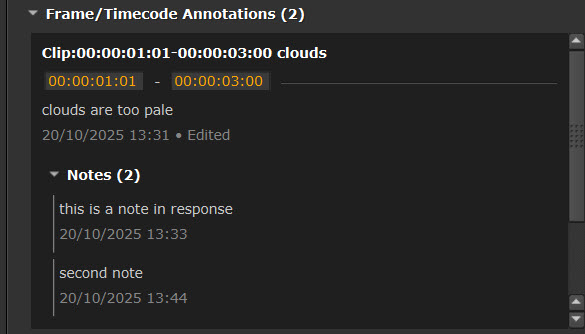
Follow the same process again to add further notes and replies.
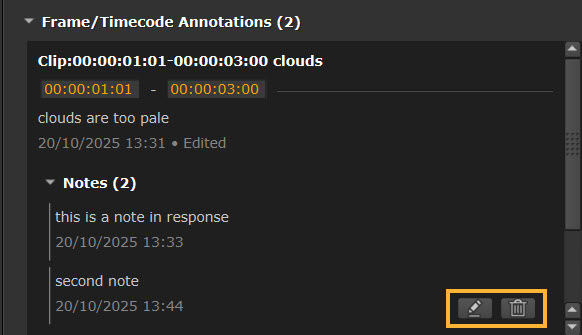
Notes can be edited and deleted using the Edit and Delete buttons, which are found when hovering over your note.
Rendering Out Annotations
You can render out your sequence with annotations visible via Quick Export.
To do this, go to File > Export, or use Ctrl + Shift + E to open the Export Dialog.
In the Quick tab, check to enable Include Annotations.
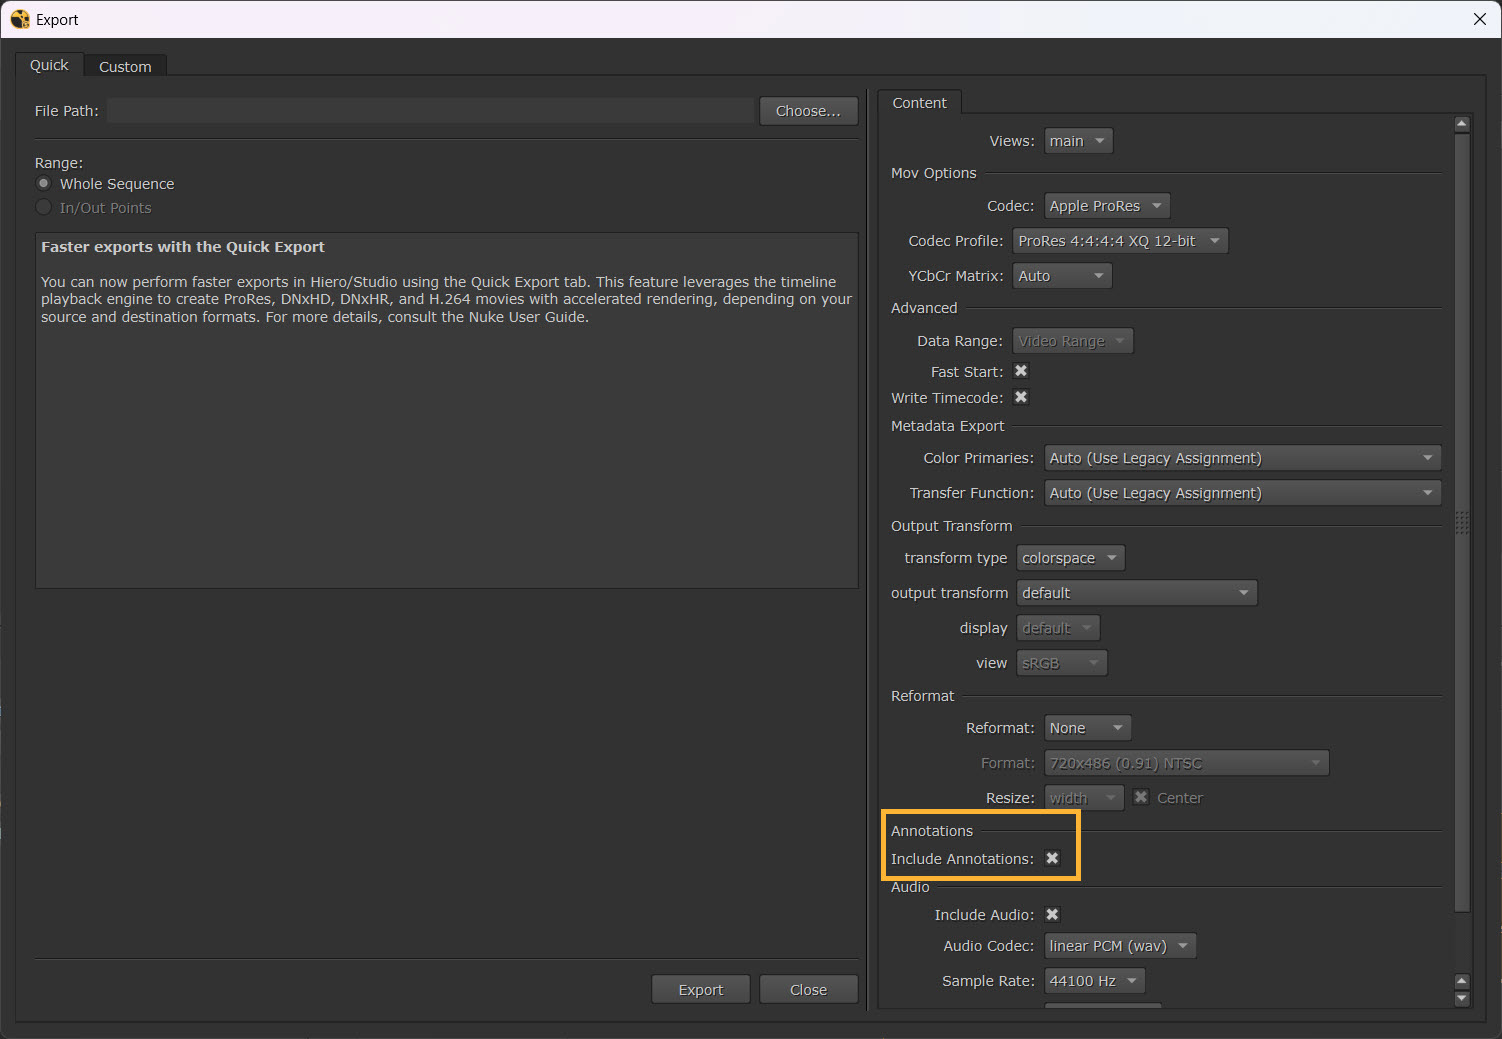
Note: See more about Quick Export at Exporting Sequences with Quick Export.
Note: Options for Create Comp with Annotations are coming soon.
