Search Tips
Creating and Editing Render Settings
When rendering with Hydra 2.0 in the 3D Viewer or with GeoRender, if you wish to edit the defaults of existing render settings prims, or you wish to create new render settings prims, you can do this using Nuke nodes.
Edit Defaults of an Existing Render Setting
In the case that you wish to update or override the default for a setting that exists in your schema, you can use the GeoRenderSetting node.
To edit existing schemas for render settings prims, you can create a new GeoRenderSetting node and override the value for that knob.
Add a GeoRenderSetting node, set the Mode dropdown to Edit, and make sure your existing render settings prim is targeted in the Mask knob. The existing render settings will then be populated below.
For instance if you wish to update the max samples default, you can do this by editing the Max Samples value in the GeoRenderSetting Properties panel. This acts as an override.
For this and existing schema settings to be applied, you must then set the Render Settings Prim path in your Viewer and/or GeoRender node to target your render settings prim. This option is only visible when Use Schema Mode is turned on.

Note: To create or add new render settings, you must do so in the Schema to specify a new schema. A new plug-in will need to be made which includes a USD auto-apply schema for the render settings prim. Render settings can only be created in the USD Schema, for information on how to create a USD schema see the Creating New Schema Classes with usdGenSchema section of the USD documentation.
Populate Settings for the GeoRender Node in Nuke
There are three nodes which allow you to build the settings that will drive the population of your Render Settings and Outputs in the GeoRender node. These will be applied whether or not you are working with auto-apply schema, and means that any settings you may not have access to that exist in your delegate can be manually added in Nuke.
GeoRenderSetting - Allows users to set renderer-specific settings such as "max bounces". It also specifies which RenderProduct will be used by the renderer.
GeoRenderProduct - Specifies a collection of RenderVariables the delegate will output.
GeoRenderVariable - Specifies individual renderer outputs, such as a given AOV like depth or beauty.
Note: Read more about the USD Render Schema in OpenUSD's documentation: USD Render Schema.
Create a GeoRender Output
If you are missing a particular pass available in the delegate, but not provided in your USD scene, you can add a new output to your GeoRender node using the GeoRenderProduct and GeoRenderVariable nodes.
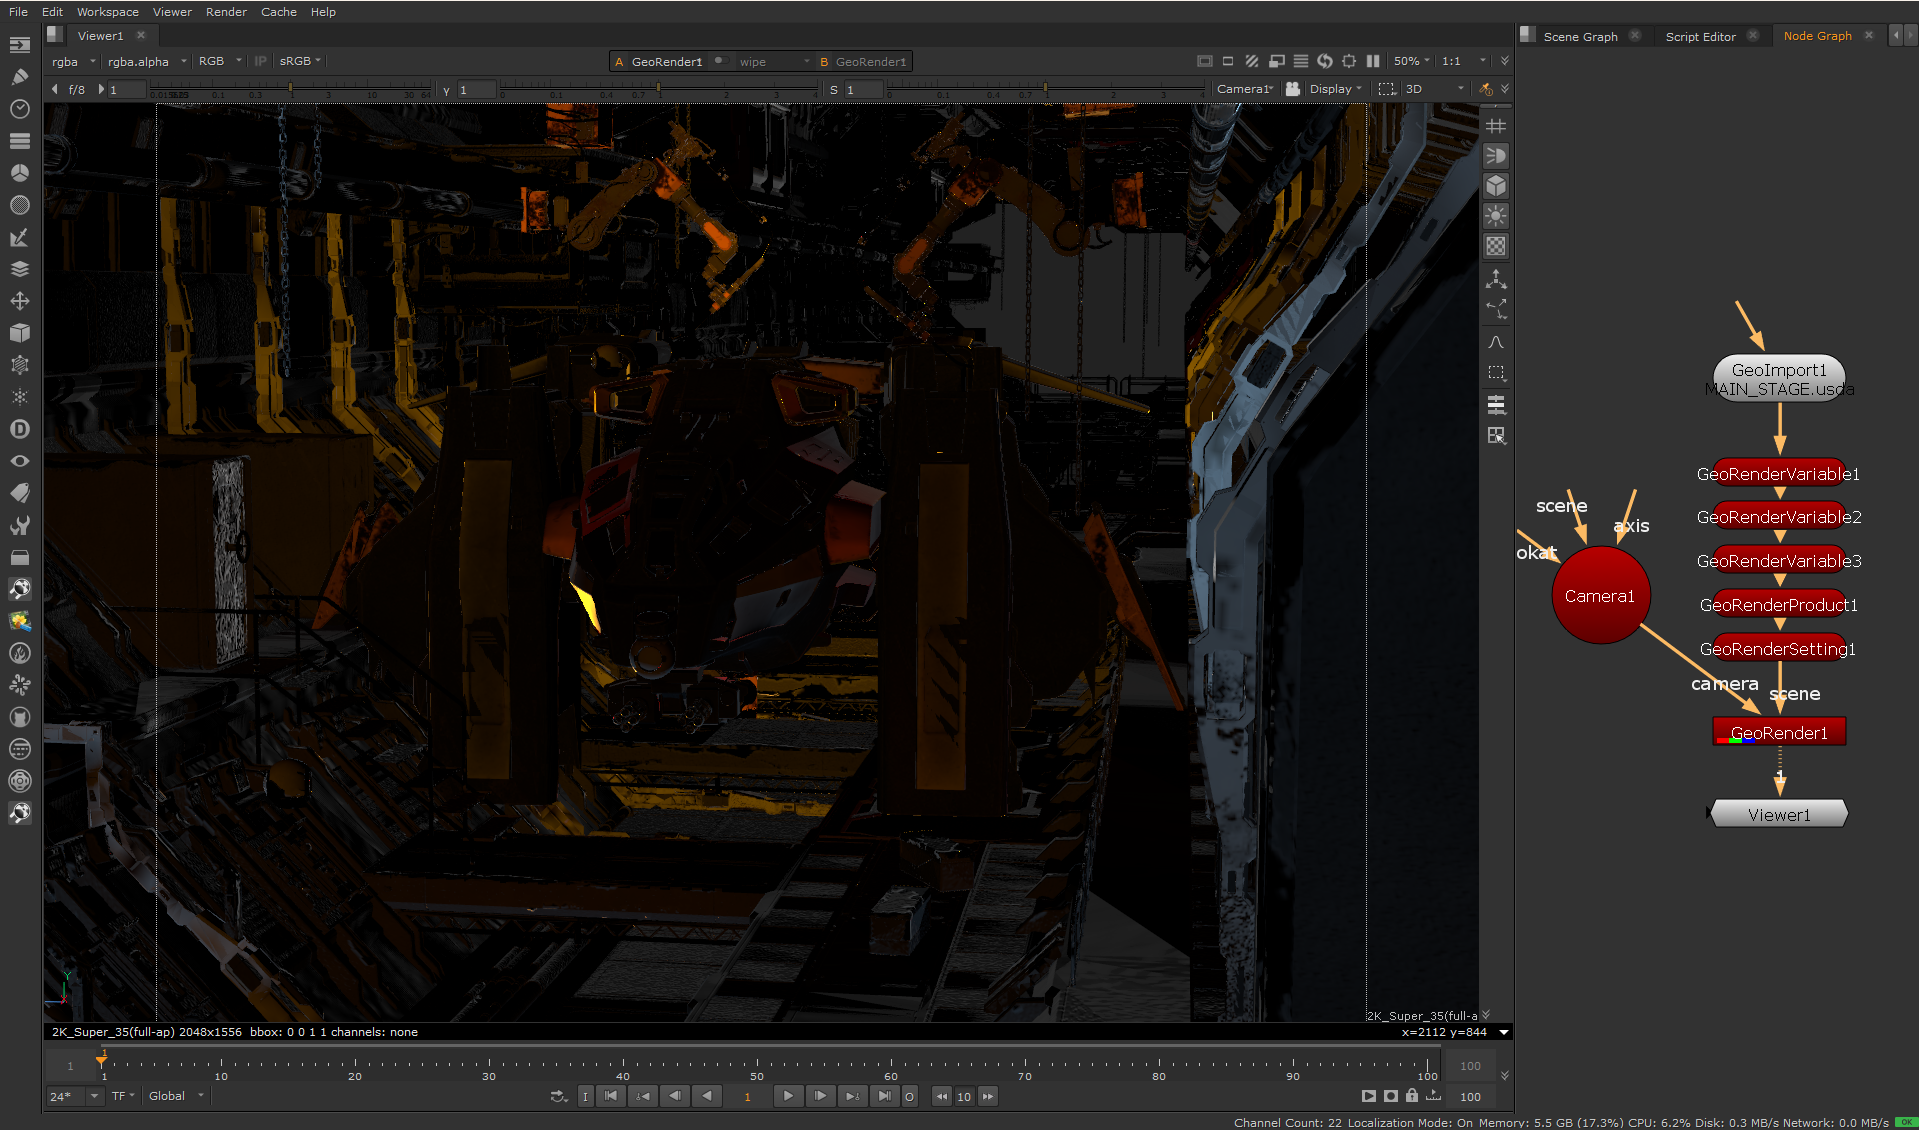
Add GeoRenderVariable and GeoRenderProduct nodes upstream of your GeoRender node.
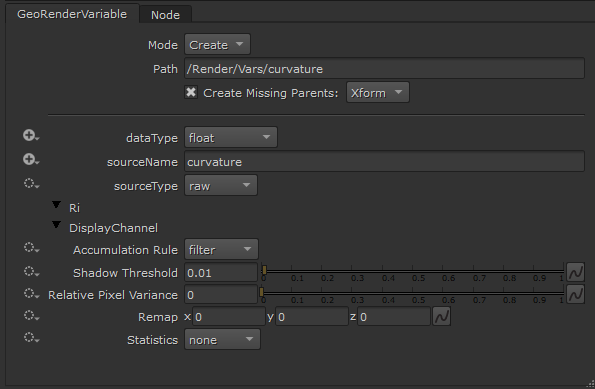
Make sure that the GeoRenderVariable nodes' Mode is set to Create, and provide prim paths to store the new variables in your USD scene.
In the GeoRenderVariable nodes, you will need to set data type and source name to the value provided by the Renderer's documentation. So in the case that you were creating a Float Curvature pass from the PRenderman Delegate. You would set the dataType and sourceName as follows:
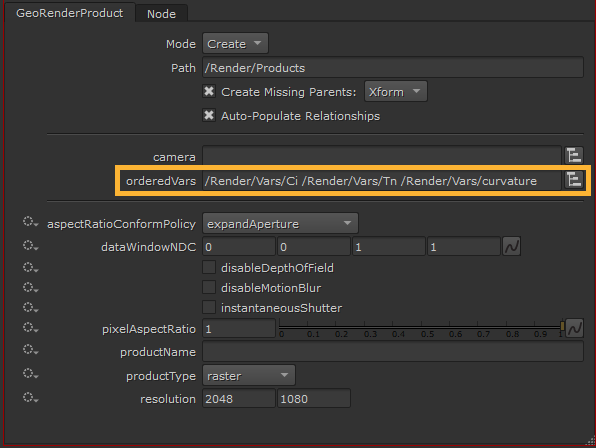
This then needs to be specified in the orderedVars option in your GeoRenderProduct node. Multiple variables can be added to this field. In this case, three variables are listed.
When connected through your GeoRenderSetting node to your USD scene, the GeoRender node will then render the additional pass as an AOV output.
With Use Schema Mode on, you must select also select the path set for your Products in the GeoRender node's Render Product Prim option:
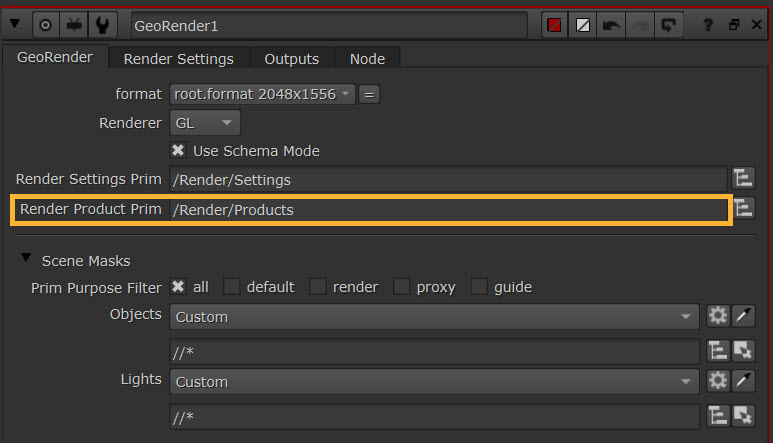
To create the given output:
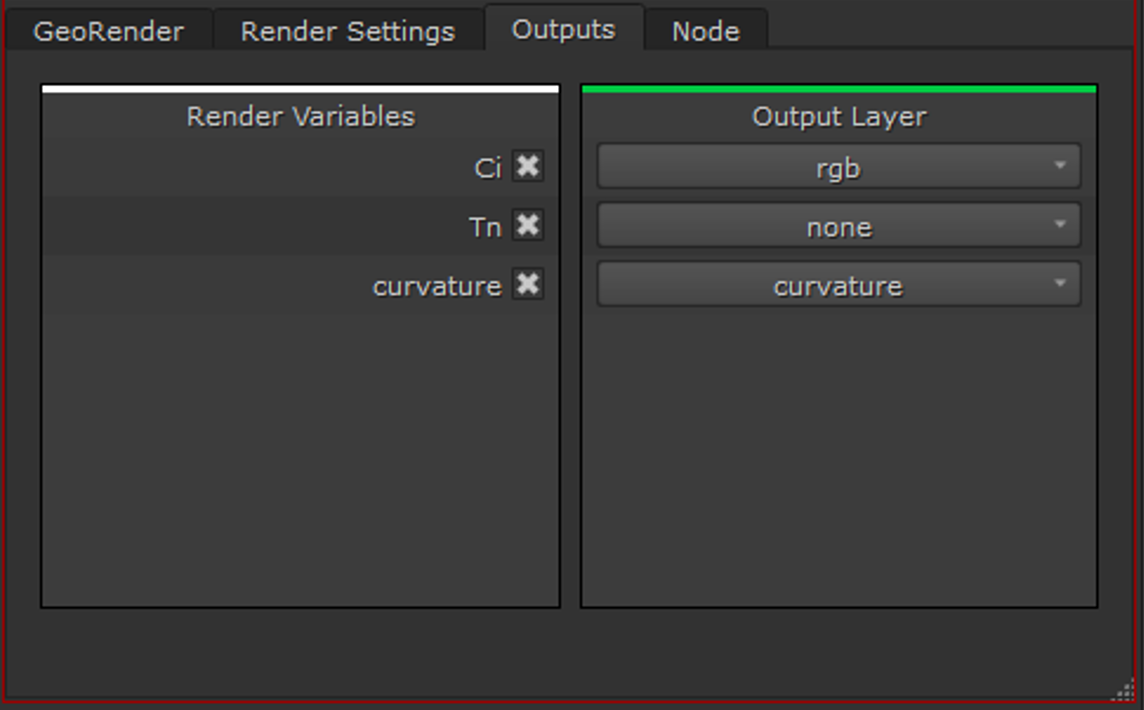
This allows you to create specific outputs or overrides for multiple delegate schemas in the same Nuke scene.
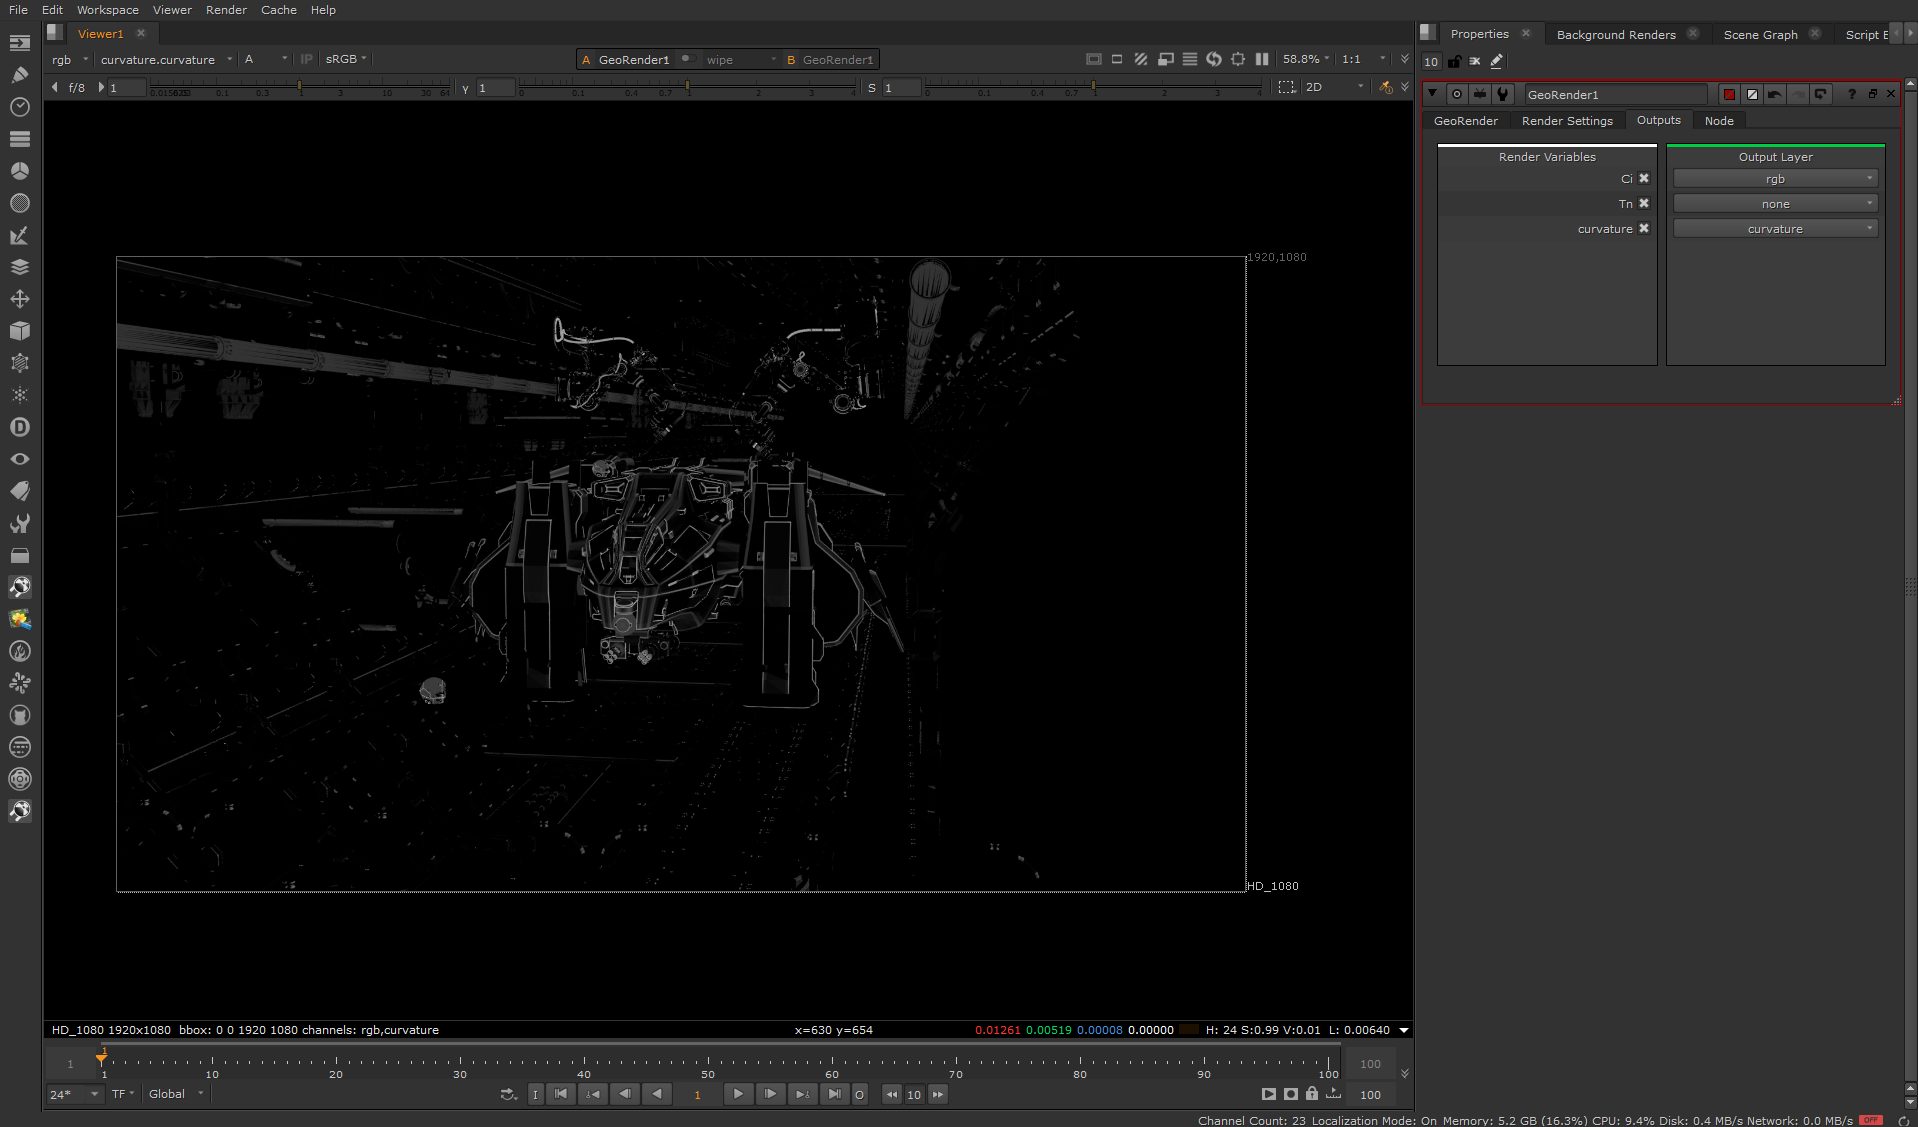
Note: The above workflow can also be used to add extra outputs when Use Schema Mode is off. These outputs will be created as soon as the GeoRenderProduct node is connected to your USD scene and will automatically appear under the GeoRender Outputs tab.
Converting USD Assets for Hydra 2.0
Some existing material assets may not display correctly when imported into Nuke. This is because existing assets which use material bindings may use the legacy material binding method which doesn't specify the MaterialBindingAPI, meaning Hydra 2.0 will not recognize them. To fix this, you can update your materials in your USD scene for Hydra 2.0 or copy and paste the below node into your script.
You can fix assets using the usdfixbrokenpixarschemas tool that ships with OpenUSD. An alternative workaround in Nuke is to use the GeoPython node with the following code:
from pxr import Usd, UsdShade, Sdf

# Get the input stage from the GeoPython node
stage = geo_python.stage()

# Traverse all prims on the stage
for prim in stage.Traverse():
# Check if this prim has any material:binding relationship
has_material_binding = any(rel.GetName().startswith("material:binding")
for rel in prim.GetRelationships() )

if not has_material_binding:
continue

# Check if MaterialBindingAPI is already applied
if prim.HasAPI(UsdShade.MaterialBindingAPI):
continue

# Apply the MaterialBindingAPI schema
UsdShade.MaterialBindingAPI.Apply(prim)
print(f"Applied MaterialBindingAPI to: {prim.GetPath()}")