Open topic with navigation
Masking Color Corrections
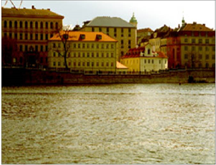
Virtually all the color-correction effects in Nuke include mask parameters that lets you limit the correction to the non-black pixel values of a matte image. For example, suppose you want to add a blue cast to the following scene without affecting the buildings.
|
|
| Original image. |
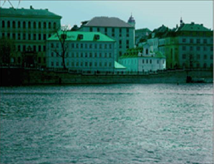
Color-corrected image. |
|

|
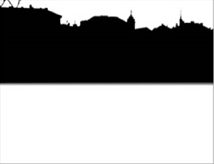
| Mask image. |
Color-corrected image. |
You could create a garbage mask that covers the river, then boost the red channel’s gamma in the area of the frame that underlies the mask.
Typically, mask controls are located toward the bottom of the properties panel. However, in the case of multi-purpose effects like HSVTool, there may be multiple mask controls, so that you can limit each type of correction with a different mask.
|

|
| Selecting a mask channel. |
To mask a color correction
|
1.
|
Open the node’s properties panel and locate the mask controls. |
|
2.
|
Select the channel you wish to use as the mask from the dropdown menu. |
|
3.
|
If you check inject in the mask controls, the mask from the mask input is copied into the predefined mask.a channel. This way, you can use the last mask input again downstream. You can also set a stream of nodes to use mask.a as the mask, and then change the masking of all of them by simply connecting a new mask into the mask input connector of the first node. |
|
4.
|
If necessary, check the invert box to reverse the mask. |
|
5.
|
To blur the edges of the mask, check fringe. |
|
6.
|
If the overall effect of the node is too harsh, you can blend back in some of the input image by dragging on the mix slider. |
|
7.
|
If you want to output only the portion of the frame underlying the mask, check the (un)premult by box. |