The Light node includes the DirectLight, Point, and Spotlight nodes, so you can set it to act as any of these three nodes. The advantage of using a Light node in this way is that if you want to change the light type later, you can do so without setting up a new node. For example, you might insert a direct light, but then realize that what you actually need is a spot light. If you inserted the direct light using a DirectLight node, you need to delete this node and insert a SpotLight node instead. However, if you inserted the direct light using a Light node, you can simply change the light type from directional to spot in the Light controls.
TIP: The node can also be used to import lights from .fbx files. This is described under Importing Lights from FBX Files.
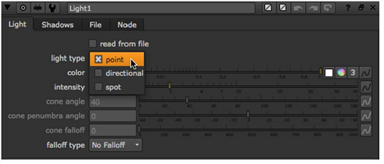
| 1. | Select 3D > Lights > Light to insert a Light node into your script. |
| 2. | In the Light controls, select the light type you want to use: point, directional, or spot. The controls are enabled and disabled according to the light type you select. For example, if you chose directional light, you get the same controls that appear on the DirectLight node. |
| 3. | Adjust the controls as necessary. For information on the functions of the controls, refer to the following: |
• If you selected point as the light type, see Inserting Point Lights.
• If you selected directional as the light type, see Inserting Direct Lights.
• If you selected spot as the light type, see Inserting Spot Lights.
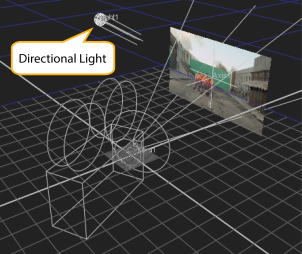
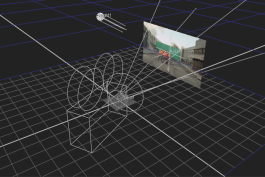
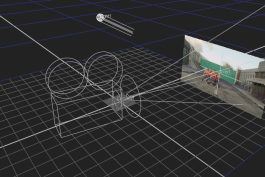
You can use the optional look input of the Light node, so that the light automatically rotates to face towards the connected input. You can attach a Camera, Light, or Axis node to the look input. For example, you can connect an Axis node to the look input so that the light rotates to face the axis, wherever it is moved.
If you animate a card to move along the x axis, you can attach a Camera and a Light node with the look inputs so that they automatically rotate and face the card as it moves. To do this, complete the following steps:
| 1. | After animating your card, insert an Axis node. |
| 2. | Expression link the Axis node to the Card node by holding Ctrl, clicking on the translate animation button in the Card node's properties, and dragging it to the translate animation button in the Axis node's properties. The expression link is displayed as a green line with an arrow denoting the direction of the expression. See Linking Expressions for more information. |
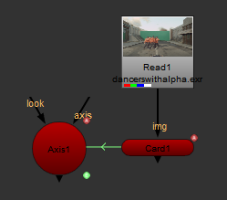
| 3. | Insert a Camera node and either drag the camera to the required position in the Viewer, or use the Camera node properties to adjust the position of the camera. |
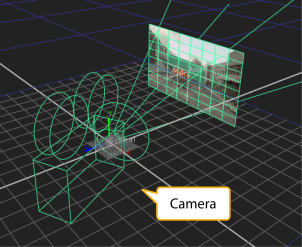
| 4. | Connect the Camera's look input to the Axis node. |
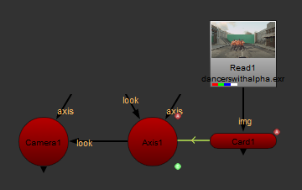
| 5. | Insert a Light node and drag the light to required position in the Viewer, or use the Light node properties to adjust the position of the camera. |
| 6. | Connect the Light node's look input to the Axis node |
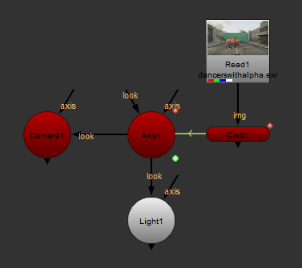
| 7. | Playback your animated card and notice that the Camera and Light follow the animated card. |
|
|
|
|