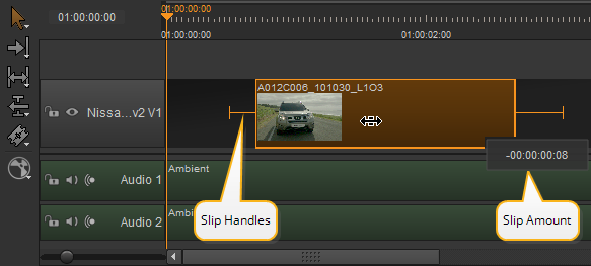
The Slip Clip tool allows you to shift a track item’s In and Out points by the same amount and in the same direction, retaining the original duration but altering the timeline output. Activate the Slip Clip tool by clicking the tool or pressing E.
NOTE: The target track item must have handles to use the Slip tool.
The Slip Clip tool displays different Viewer previews depending on whether the playhead is on the target track item or not, but the basic principles are the same.
Click the target clip to display the available handles and then drag the track item to the new position. Release the mouse to complete the slip.
NOTE: Using the Slip Clip tool does not move the track item on the timeline, only the output is changed.
Alternatively, nudge the slip using the , (comma) or . (period) keys or hold Shift to nudge by the Frame Increment set under the Viewer.
TIP: If you’re using the Multi Tool, you can nudge using the “slip bar” by clicking at the bottom the track item.
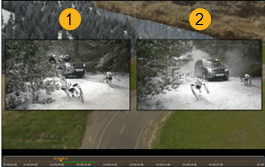
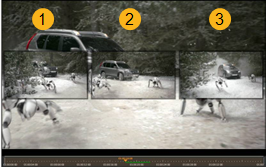
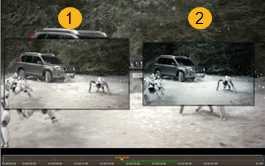
The following Viewer previews are displayed, depending on the playhead position:
NOTE: The Viewer background always displays the playhead’s current position.
• When the playhead is not currently on the target track item, the Viewer displays the In frame (1) and Out frame (2), allowing you to accurately gauge the new output.
• When the playhead is on the target track item, the Viewer displays the In frame (1), the current frame (2), and Out frame (3), allowing you to accurately gauge the output of the track item against the current frame.
• When the playhead is on the target track item and A/B compare is active, the Viewer displays the target track item (1) and the reference track item (2), allowing you to synchronize your working track against the reference track.
|
|