Nuke Studio has the facility to cache bin files locally, either individually or by setting an automatically localized folder (NUKE_TEMP_DIR/localize, by default), to help guarantee playback stability. Local caching is controlled initially in the Preferences dialog, then on a clip-by-clip basis.
To setup your initial caching preferences:
| 1. | Open the Preferences dialog by pressing Shift + S. |
| 2. | Navigate to Performance > Caching and enter a file path for auto-localize from, if required. |
Any files that reside in this directory are automatically cached when conformed or ingested in Nuke Studio.
| 3. | Enter a file path for localize to, if required. |
Leaving this field as the default creates a sub-directory in the Temp Directory as the local cache.
| 4. | Enter a value for max localized files, in mega bytes, to control how much disk space is available in the cache directory. |
NOTE: Negative values in this field reserve the specified amount of space at all times. For example, -2000 stops 2 GB of memory being used for caching.
To cache individual clips and control localization:
| 1. | Select the clip(s) in the bin view. |
| 2. | Right-click and select Localization Policy to display the available options: |
• Always - the selection is cached, regardless of its location, as long as the max localized files limit is not breached.
• Never - the selection is never cached, regardless of its location.
• Auto - the selection is cached if it resides in the auto-localize from directory, as long as the max localized files limit is not breached.
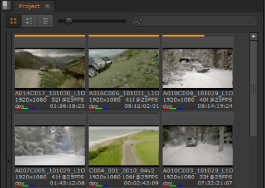
As clips cache, a progress bar displays in the thumbnail. Fully cached clips are marked with an orange bar at the top of the thumbnail.
| 3. | In the main menu bar, navigate to Cache > Localization > Edit Settings to display Localization Options. |
NOTE: This dialog also displays when you reach the max localized files limit.
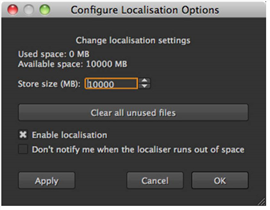
| 4. | The localization cache defaults to 0 MB, unlimited cache, but you can change its size using the Store size field, if required. |
NOTE: Negative values in this field reserve the specified amount of space at all times. For example, -2000 stops 2 GB of memory being used for caching.
| 5. | You can enable or disable local caching by clicking Enable localization. |
You can also toggle local caching on or off using the Cache > Localization menu.
| 6. | Click Clear Unused Files to purge the localization cache of all clips not in use in the current session. |
You can also purge the cache using the Cache > Localization menu.
| 7. | Check Don't notify me when the localizer runs out of space to stop this dialog displaying if you run out of localization cache space. |
| 8. | Click Apply to confirm changes without closing the dialog or click OK to close the dialog and accept changes. |
|
|