Working with Lights
There are several types of lights that you can add and manipulate in your Classic 3D scene to create the required effect.
Inserting Direct Lights
A direct light is a light that emits parallel light in one direction. It appears to illuminate all objects with equal intensity, as if it was coming from a far away source. Being at an infinite distance from the objects, direct light has orientation, but no position. A real world example of a direct light is the sun. You can use direct light to simulate sunlight and moonlight, for example.
| 1. | Select 3D > Lights > Direct to insert a DirectLight node in your script. |
| 2. | Connect the DirectLight node to the Scene node. |
| 3. | In the DirectLight node’s controls, adjust the following: |
• Drag the color slider to change the light color.
• Drag the intensity slider to change the brightness of the light.
• To control the direction of the light, enter values in the rotate fields.
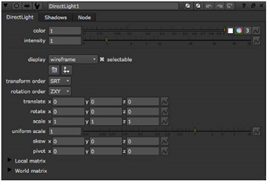
• To adjust the settings for shadows, change values for the controls on the Shadows tab. For more information on these controls, see Casting Shadows.
Inserting Point Lights
A point light is a point in 3D space that emits light in every direction. A real world example of a point light is a light bulb. You can use point light to simulate light bulbs, lamps, and candles, for example.
| 1. | Select 3D > Lights > Point to insert a Point node in your script. |
| 2. | Connect the Point node to the Scene node. |
| 3. | In the Point node’s controls, adjust the following: |
• Drag the color slider to change the light color.
• Drag the intensity slider to change the brightness of the light.
• To control how much light the object gets from the light source (based on the distance between the object and the light source), use the falloff type dropdown menu. A Linear type diminishes the light at a fixed rate as it travels from the object, whereas Quadratic and Cubic types diminish the light at an exponential rate. If you select No Falloff, the distance between the light source and the object does not affect the lighting.
• To control the position of the light in the 3D space, enter values in the translate fields.
• To adjust the settings for shadows, change values for the controls on the Shadows tab. Note, however, that the Point light doesn’t cast shadows if you’re using ScanlineRender. For more information on these controls, see Casting Shadows.
Inserting Spot Lights
A spot light is a point in 3D space that emits a cone-shaped light in a given direction. A real world example of a spot light is a desk lamp.
| 1. | Select 3D > Lights > Spot to insert a Spotlight node in your script. |
| 2. | In the node’s controls, adjust the following: |
• Drag the color slider to change the light color.
• Drag the intensity slider to change the brightness of the light.
• Drag the cone angle slider to control the spread of the light (how wide or narrow the beam is) in degrees from 0 to 180.
• Drag the cone penumbra angle slider to control the softness along the edge of the area of illumination. A negative value fades inward from the circle's edge. A positive value fades outward from the circle's edge. The cone falloff should be set to zero or a low value in order to see the softness. This feature is only visible in the rendered objects and not in the 3D OpenGL Viewer.
• Drag the cone falloff slider to control how concentrated the light is (that is, how much the light diminishes from the center of the circular region out to the edge). The higher the value, the more focused the light becomes. The falloff is independent of the falloff type.
• To control how much light the object gets from the light source (based on the distance between the object and the light source), use the falloff type dropdown menu. A Linear type diminishes the light at a fixed rate as it travels from the object, whereas Quadratic and Cubic types diminish the light at an exponential rate. If you select No Falloff, the distance between the light source and the object does not affect the lighting.
• To control the direction of the light, enter values in the rotate fields.
• To control the position of the light in the 3D space, enter values in the translate fields.
• To adjust the settings for shadows, change values for the controls on the Shadows tab. For more information on these controls, see Casting Shadows.
Inserting Environment Lights
An environment light is a light that illuminates the objects using an image of light from a real-world environment. This image-based lighting is generated using High Dynamic Range Images (HDRI). When HDR images are created, several differently exposed images are combined to produce a single image of the surrounding environment. As a result, HDR images have a wide range of values between light and dark areas, and represent the lighting conditions of the real world more accurately.
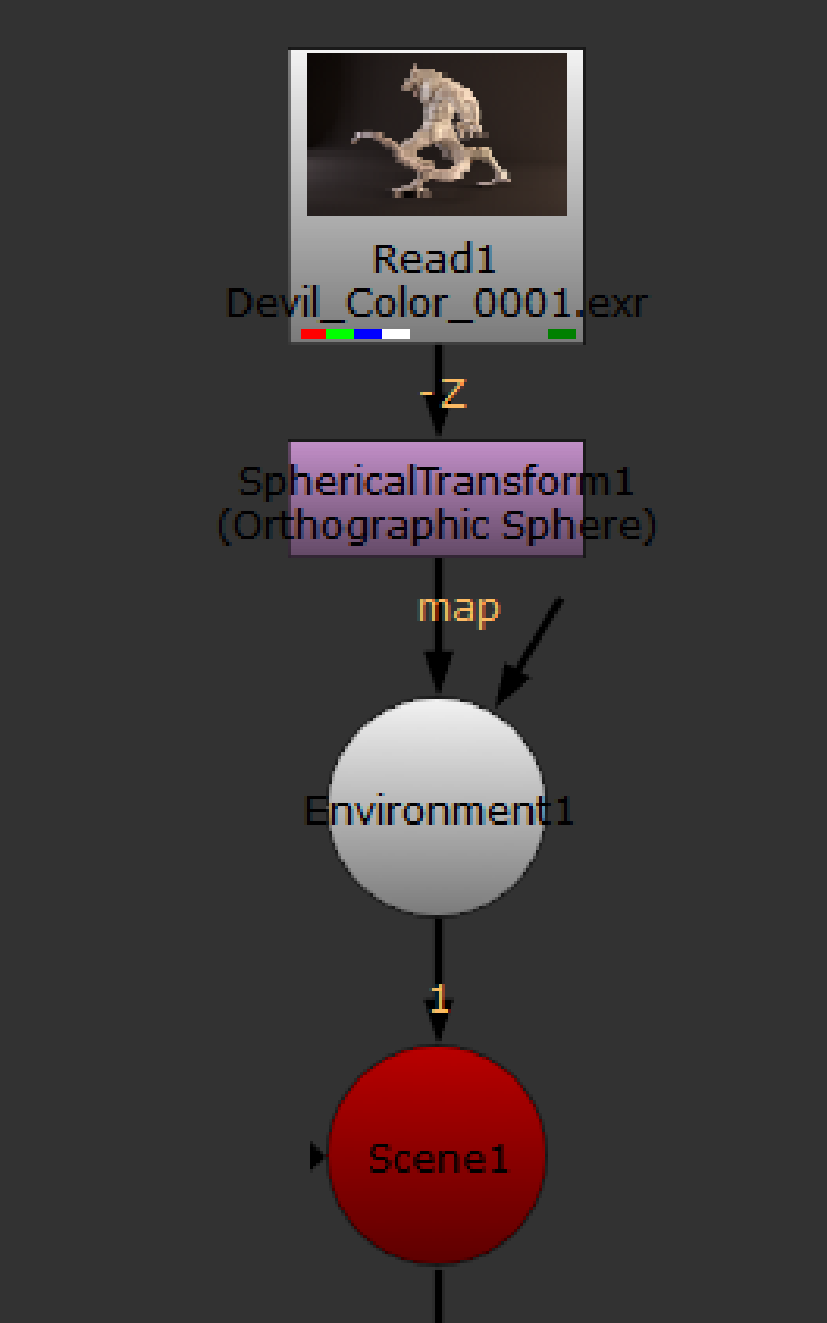
To use environment light, you first need to shoot a real life environment as an HDR image. Using the SphericalTransform node, you then convert this image into a spherical mapped image. The sphere is used to surround the 3D objects, so that the mapped image color illuminates them.
Environment light only works with shiny object materials that can reflect the mapped image. It results in a very realistic lighting that makes it easier to integrate the objects into the environment.
| 1. | Read an HDR image of the environment into your script. |
| 2. | Select Transform > SphericalTransform to insert a SphericalTransform node after the HDR image. You use this node to convert the HDR image into a spherical mapped image. In the node’s controls, select the Input Type and the Output Type (in this case, Sphere). |
| 3. | Select 3D > Lights > Environment to insert an Environment node in your script. Connect the SphericalTransform node to the Environment node’s map input, and the Environment node to the Scene node. |
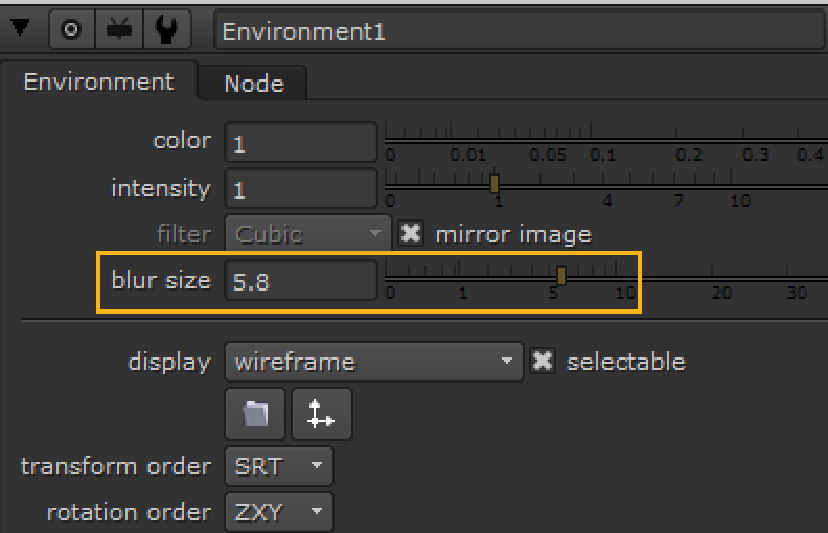
| 4. | In the Environment node’s controls, adjust the following: |
• Drag the color slider to change the light color.
• Drag the intensity slider to change the brightness of the light.
• From the filter dropdown menu, select a filtering algorithm for the map image. For more information, see Choosing a Filtering Algorithm.
• To change the blur size of the map image, adjust the blur size slider.
Inserting Direct Lights, Point Lights, or Spot Lights
The Light node includes the DirectLight, Point, and Spotlight nodes, so you can set it to act as any of these three nodes. The advantage of using a Light node in this way is that if you want to change the light type later, you can do so without setting up a new node. For example, you might insert a direct light, but then realize that what you actually need is a spot light. If you inserted the direct light using a DirectLight node, you need to delete this node and insert a SpotLight node instead. However, if you inserted the direct light using a Light node, you can simply change the light type from directional to spot in the Light controls.
Tip: The node can also be used to import lights from .fbx files. This is described under Importing Lights from FBX Files.
| 1. | Select 3D > Lights > Light to insert a Light node into your script. |
| 2. | In the Light controls, select the light type you want to use: point, directional, or spot. The controls are enabled and disabled according to the light type you select. For example, if you chose directional light, you get the same controls that appear on the DirectLight node. |
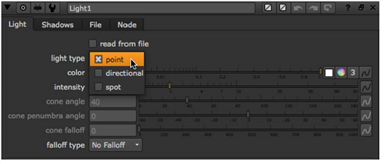
| 3. | Adjust the controls as necessary. For information on the functions of the controls, refer to the following: |
• If you selected point as the light type, see Inserting Point Lights.
• If you selected directional as the light type, see Working with Lights.
• If you selected spot as the light type, see Inserting Spot Lights.
Using the Look Input
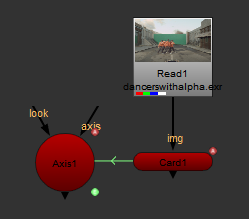
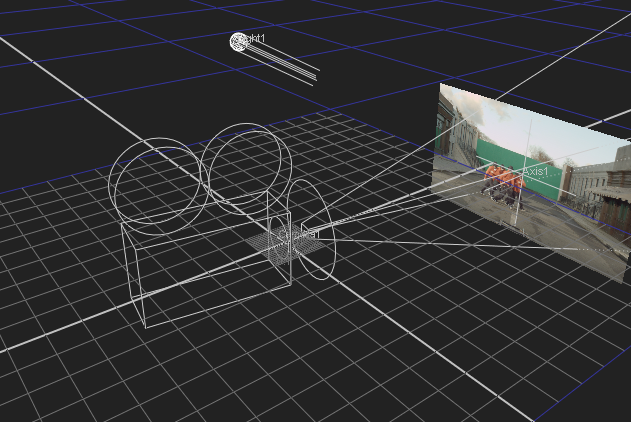
You can use the optional look input of the Light node, so that the light automatically rotates to face towards the connected input. You can attach a Camera, Light, or Axis node to the look input. For example, you can connect an Axis node to the look input so that the light rotates to face the axis, wherever it is moved.
If you animate a card to move along the x axis, you can attach a Camera and a Light node with the look inputs so that they automatically rotate and face the card as it moves. To do this, complete the following steps:
| 1. | After animating your card, insert an Axis node. |
| 2. | Expression link the Axis node to the Card node by holding Ctrl, clicking on the translate animation button in the Card node's properties, and dragging it to the translate animation button in the Axis node's properties. The expression link is displayed as a green line with an arrow denoting the direction of the expression. See Linking Expressions for more information. |
| 3. | Insert a Camera node and either drag the camera to the required position in the Viewer, or use the Camera node properties to adjust the position of the camera. |
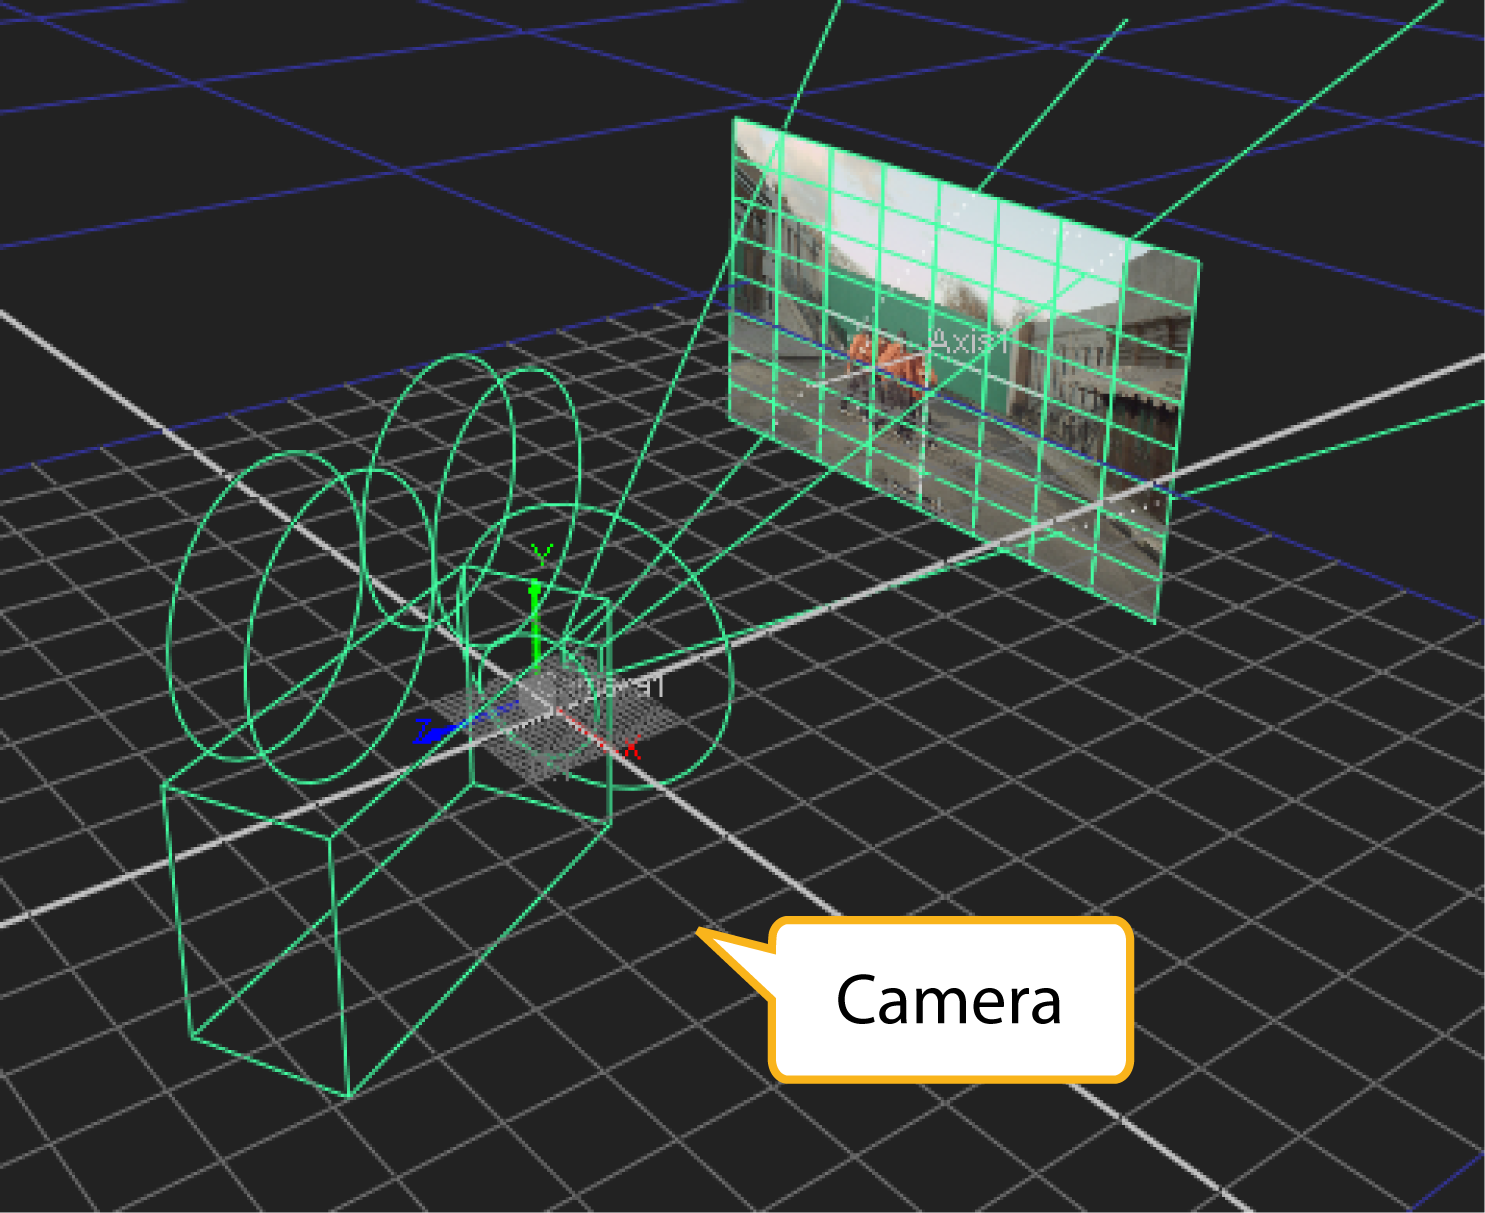
| 4. | Connect the Camera's look input to the Axis node. |
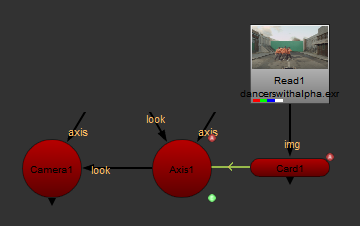
| 5. | Insert a Light node and drag the light to required position in the Viewer, or use the Light node properties to adjust the position of the camera. |
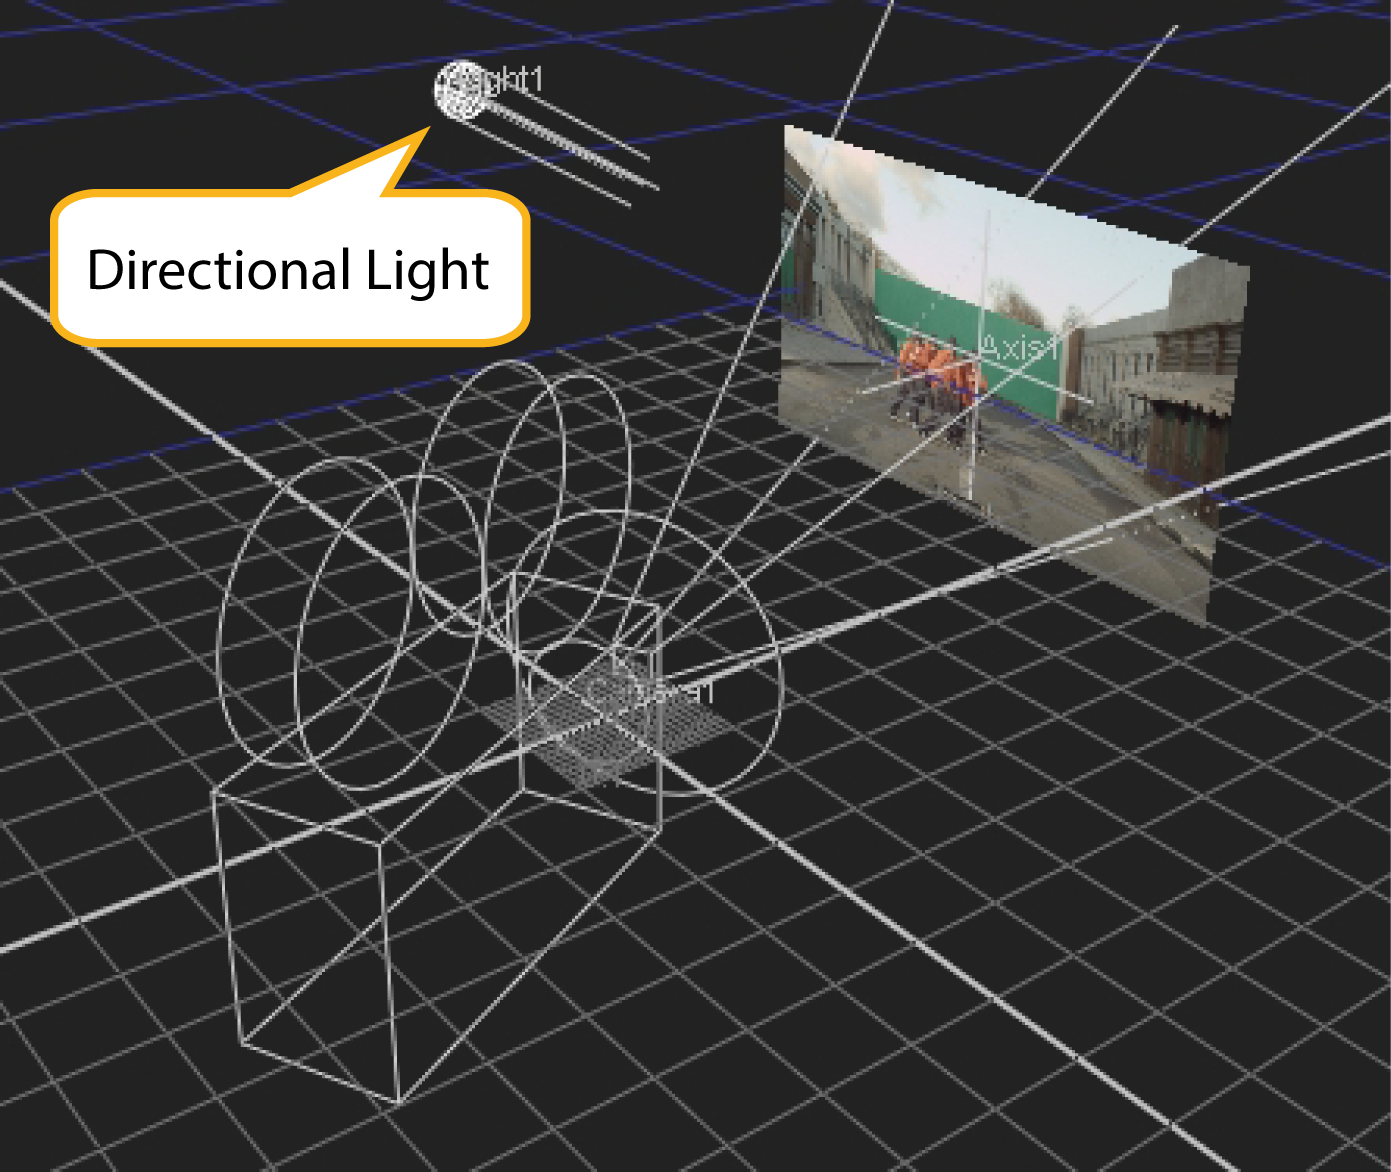
| 6. | Connect the Light node's look input to the Axis node |
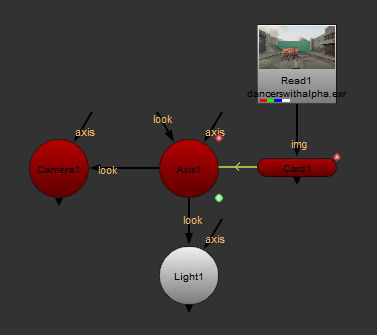
| 7. | Playback your animated card and notice that the Camera and Light follow the animated card. |

|
|
Importing Lights from FBX Files
FBX is a standard 3D file format that gives you access to 3D scenes created in other applications supporting the same format. What you generally have in an .fbx file is an entire 3D scene containing cameras, lights, meshes, non-uniform rational B-spline (NURBS) curves, transformation, materials, and so on. From this scene, you can extract cameras, lights, transforms, and meshes into Nuke. This way, you can, for example, create a light in Maya, export it in a .fbx file, and use the same light again in Nuke.
Note: For the FBX SDK version used in Nuke, see Third-Party Library Versions.
Tip: If you have trouble with .fbx files, it may be because they were written with an older version of FBX. If they load very slowly, it is also possible that they are ASCII rather than binary. To get around these problems, you can use the FBX converter on the Autodesk website (http://usa.autodesk.com/fbx/download/). It converts between various different formats, including older FBX versions, ASCII, and binary, and is available on Windows, Mac, and Linux.
You can use the Light node to read in directional, point, and spot lights from FBX scene files (for more information on these three light types, refer to Lighting). One Light node only reads in one light. Therefore, if your .fbx file contains three lights and you want to import all of them into Nuke, you need to use three Light nodes.
To import a light from an .fbx file:
| 1. | Select 3D > Lights > Light to insert a Light node in the place where you want to add the light in your script. |
| 2. | In the Light controls, check read from file. This enables the controls on the File tab, allowing you to read in lights from an .fbx file. It also disables all controls whose values are filled from the .fbx file. You can still view these values and use them in expressions, but you cannot modify them, because they are read from the .fbx file. Any changes you make in the .fbx file are reflected in these values of the Light node. |
| 3. | On the File tab, click the folder icon and browse to the .fbx file that contains the light you want to use. Click Open. |

| 4. | From the animation stack dropdown menu, select the take you want to use from the .fbx file. FBX files support multiple takes in the same file. One of the takes is usually a default take without any animation. |
| 5. | From the node name dropdown menu, select the light node you want to import from the .fbx file. |
| 6. | If you want to override the frame rate used in the .fbx file to sample the animation curves, enter a new frame rate (frames per second) in the frame rate field. Check use frame rate to use the rate you entered (rather than the one in the .fbx file). |
| 7. | To scale the intensity channel values read from the .fbx file, adjust the intensity scale slider. If the light is too dark, increase this value. |
| 8. | If you want to modify the light properties imported from the .fbx file, uncheck read from file on the Light tab and make the necessary modifications. As long as read from file is unchecked, your changes are kept. |
| 9. | To reload the light properties from the .fbx file, make sure read from file is checked and click the reload button on the File tab. |