Viewer Overlays and Input Processes
Nuke's Viewer overlays and render modes help you to position elements correctly and compare shots in the Node Graph. You can also use Input Process and Viewer Process to modify the image from the viewed node before it is displayed on your monitor.
Guides and Masks
The Viewer guides and masks assist with placing effects and text within the current format. For example, text placed with the Title Safe guide is visible to the audience. Use the Guideline and Mask dropdown menus to select the required overlays.
Note: Guides and masks are not applied at render, they are simply Viewer overlays.
Guidelines are intended to highlight areas of the current format that won’t appear in the final render. By default, no guidelines are selected. You can select any of the following guideline options:
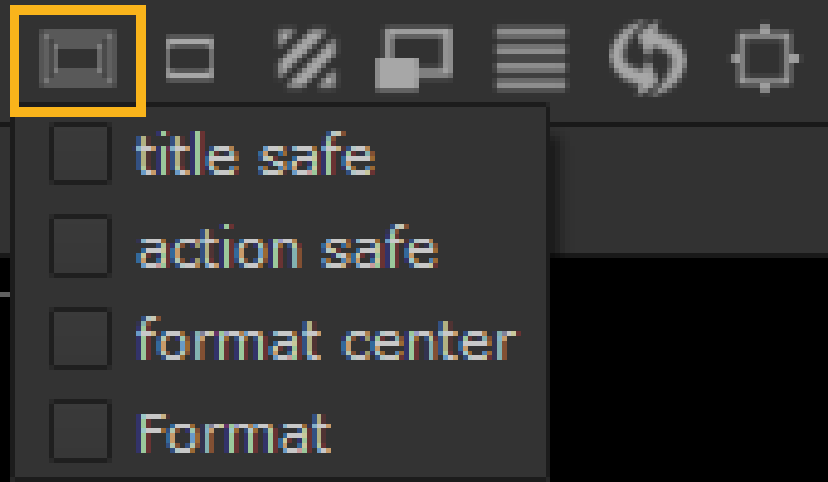
• title safe - any text intended for the audience should reside within this zone.

• action safe - any visual elements intended for the audience should reside within this zone.

• format center - overlays a crosshair in the center of the format area.

• format - any formatting changes must be applied to the area outlined in red.
Tip: The above guideline options also exist in the Viewer Settings. Press S on the Viewer to display its settings and adjust the safe zone and format center controls.
Masks can be used to simulate a particular format, for example, 4:3 or 16:9. You can also choose the mask overlay type.
• none - no masking is applied to the Viewer. This is the default state.

• lines - any mask applied is highlighted using a pair of lines in the Viewer.
• half - any mask applied is highlighted using semi-transparent shading.

• full - any mask applied is highlighted using black shading.
• blanking ratio - select the masking ratio applied to the Viewer, for example, 4:3 or16:9.
Tip: The above mask options also exist in the Viewer Settings. Press S on the Viewer to display its settings and adjust the mask region outside ratio and mask mode controls.
Adding Custom Guides and Masks
You can add custom guides and masks to the Viewer dropdowns by creating a file called custom_guides.py and placing it in your .nuke folder.
Tip: For information on locating your .nuke folder by platform, see Loading Gizmos, NDK Plug-ins, and Python and Tcl Scripts.
The guides and masks that ship with the application are kept in the Nuke bundle, here:
<installation_directory>/pythonextensions/site-packages/custom_guides.py
Copy the custom_guides.py file to your .nuke folder and then add the guides and masks you require to the existing Python code inside the .py to append them to the Viewer dropdowns. For example:
guides.Guide("myGuide", 0.75, 1, 0.8, 0.3, guides.kGuideMasked)
OR
guides.MaskGuide("5:3",5.0/3.0)
Using the Viewer Composite Display Modes
The wipe control provides an option for displaying a split-screen of two images, which can help you compare before and after versions for color correction, filtering, and other image manipulation. This control also includes display compositing options to overlay different images.
To Display a Comparison Wipe:
| 1. | Select a node in your script and press 1 to display its output in the Viewer. |
| 2. | Select the node you want to compare and press 2. |
The 2 keystroke connects the image to the Viewer (assigning the next available connection, number 2).
| 3. | From the A and B dropdown menus on top of the Viewer, select the images you want to compare. The menus display a list of nodes most recently connected to the Viewer. |
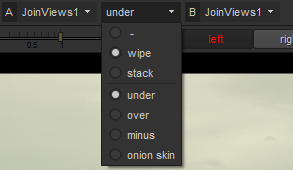
| 4. | From the Viewer composite dropdown menu in the middle, select wipe. |
The two images are displayed split-screen in the Viewer. You can view their details in the A and B information bars at the bottom of the Viewer.
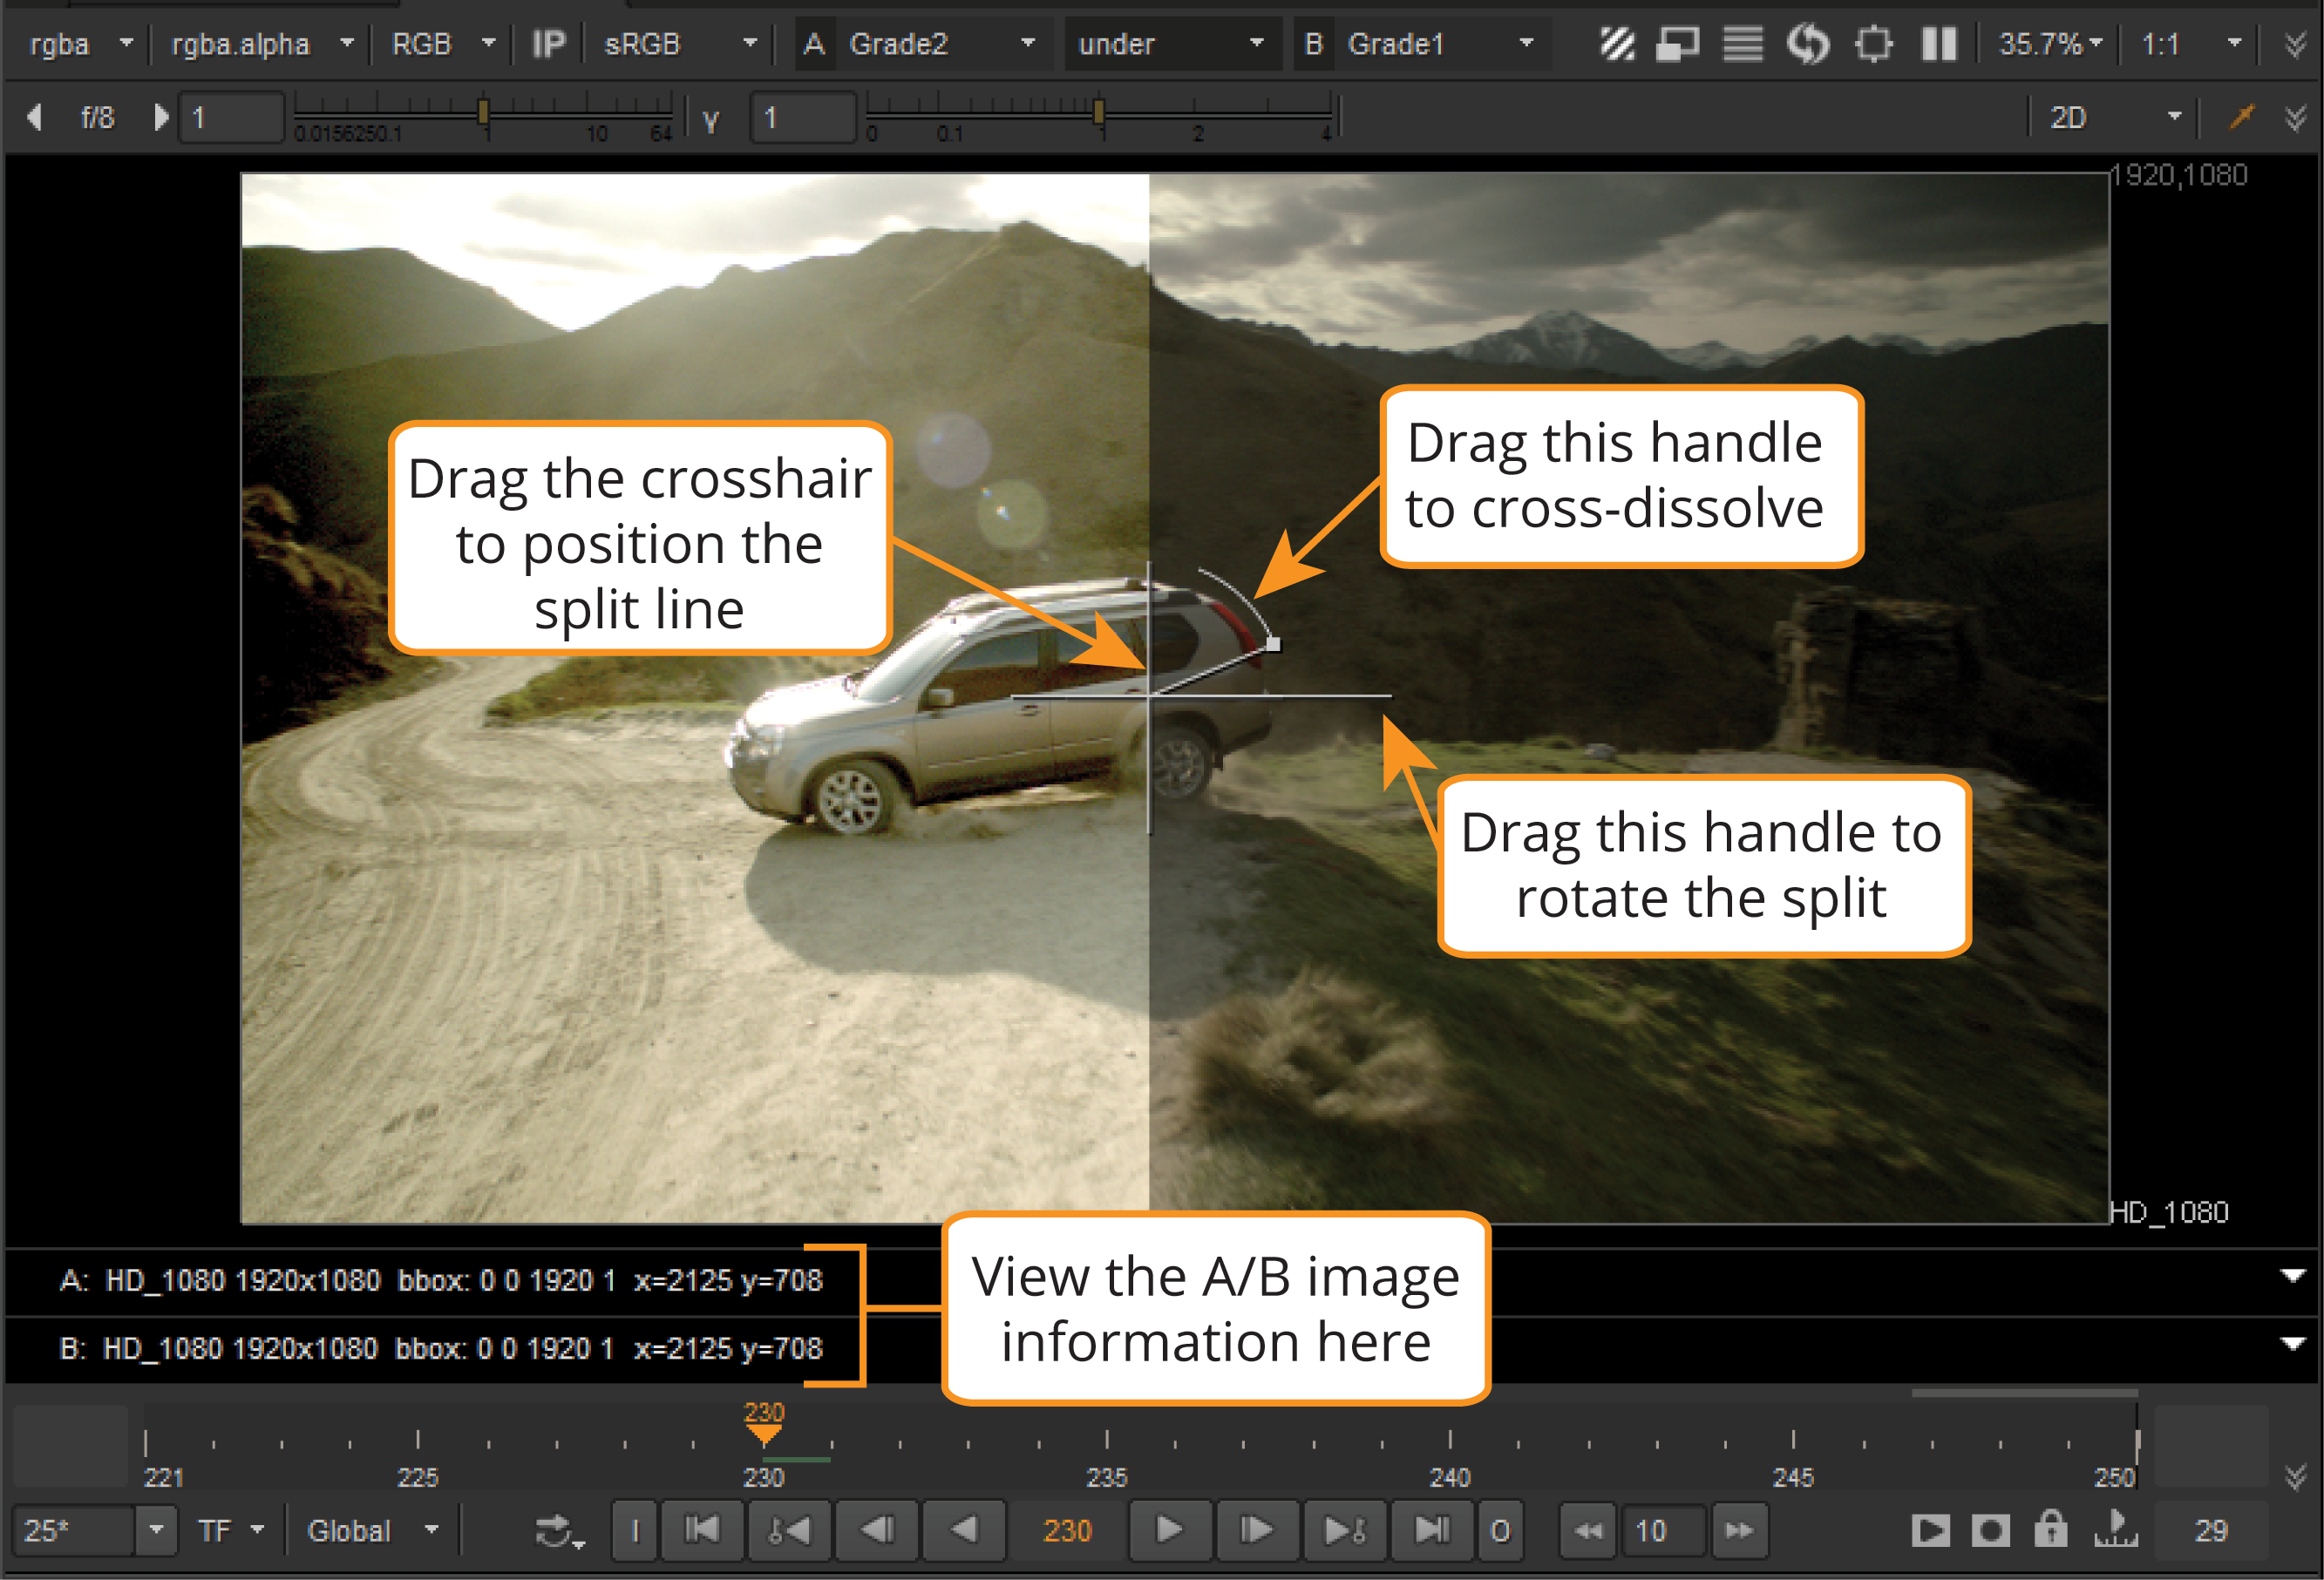
| 5. | Drag the handles of the crosshair to adjust the wipe: |
• Drag the crosshair center to change its position.
• Drag the long handle (on the right) to rotate the wipe.
• Drag the “arc” handle to cross-dissolve the second image.
| 6. | When finished with the split-screen, select none (-) from the Viewer composite dropdown menu. |
Tip: If you press Shift while selecting a channel, your selection only affects the currently active input of the Viewer node. This way, you can display different channels from the Viewer’s different inputs. For example, when keying it can be useful to view the RBG channels from one input and the alpha channel from another, and toggle between the two.
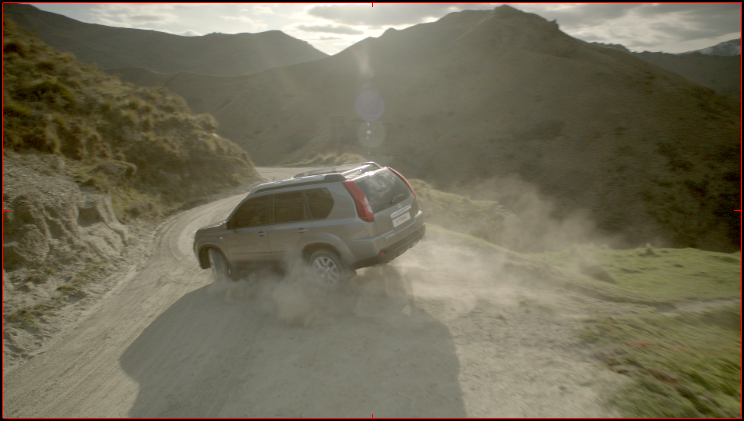
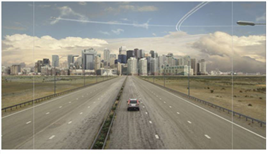
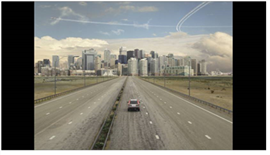
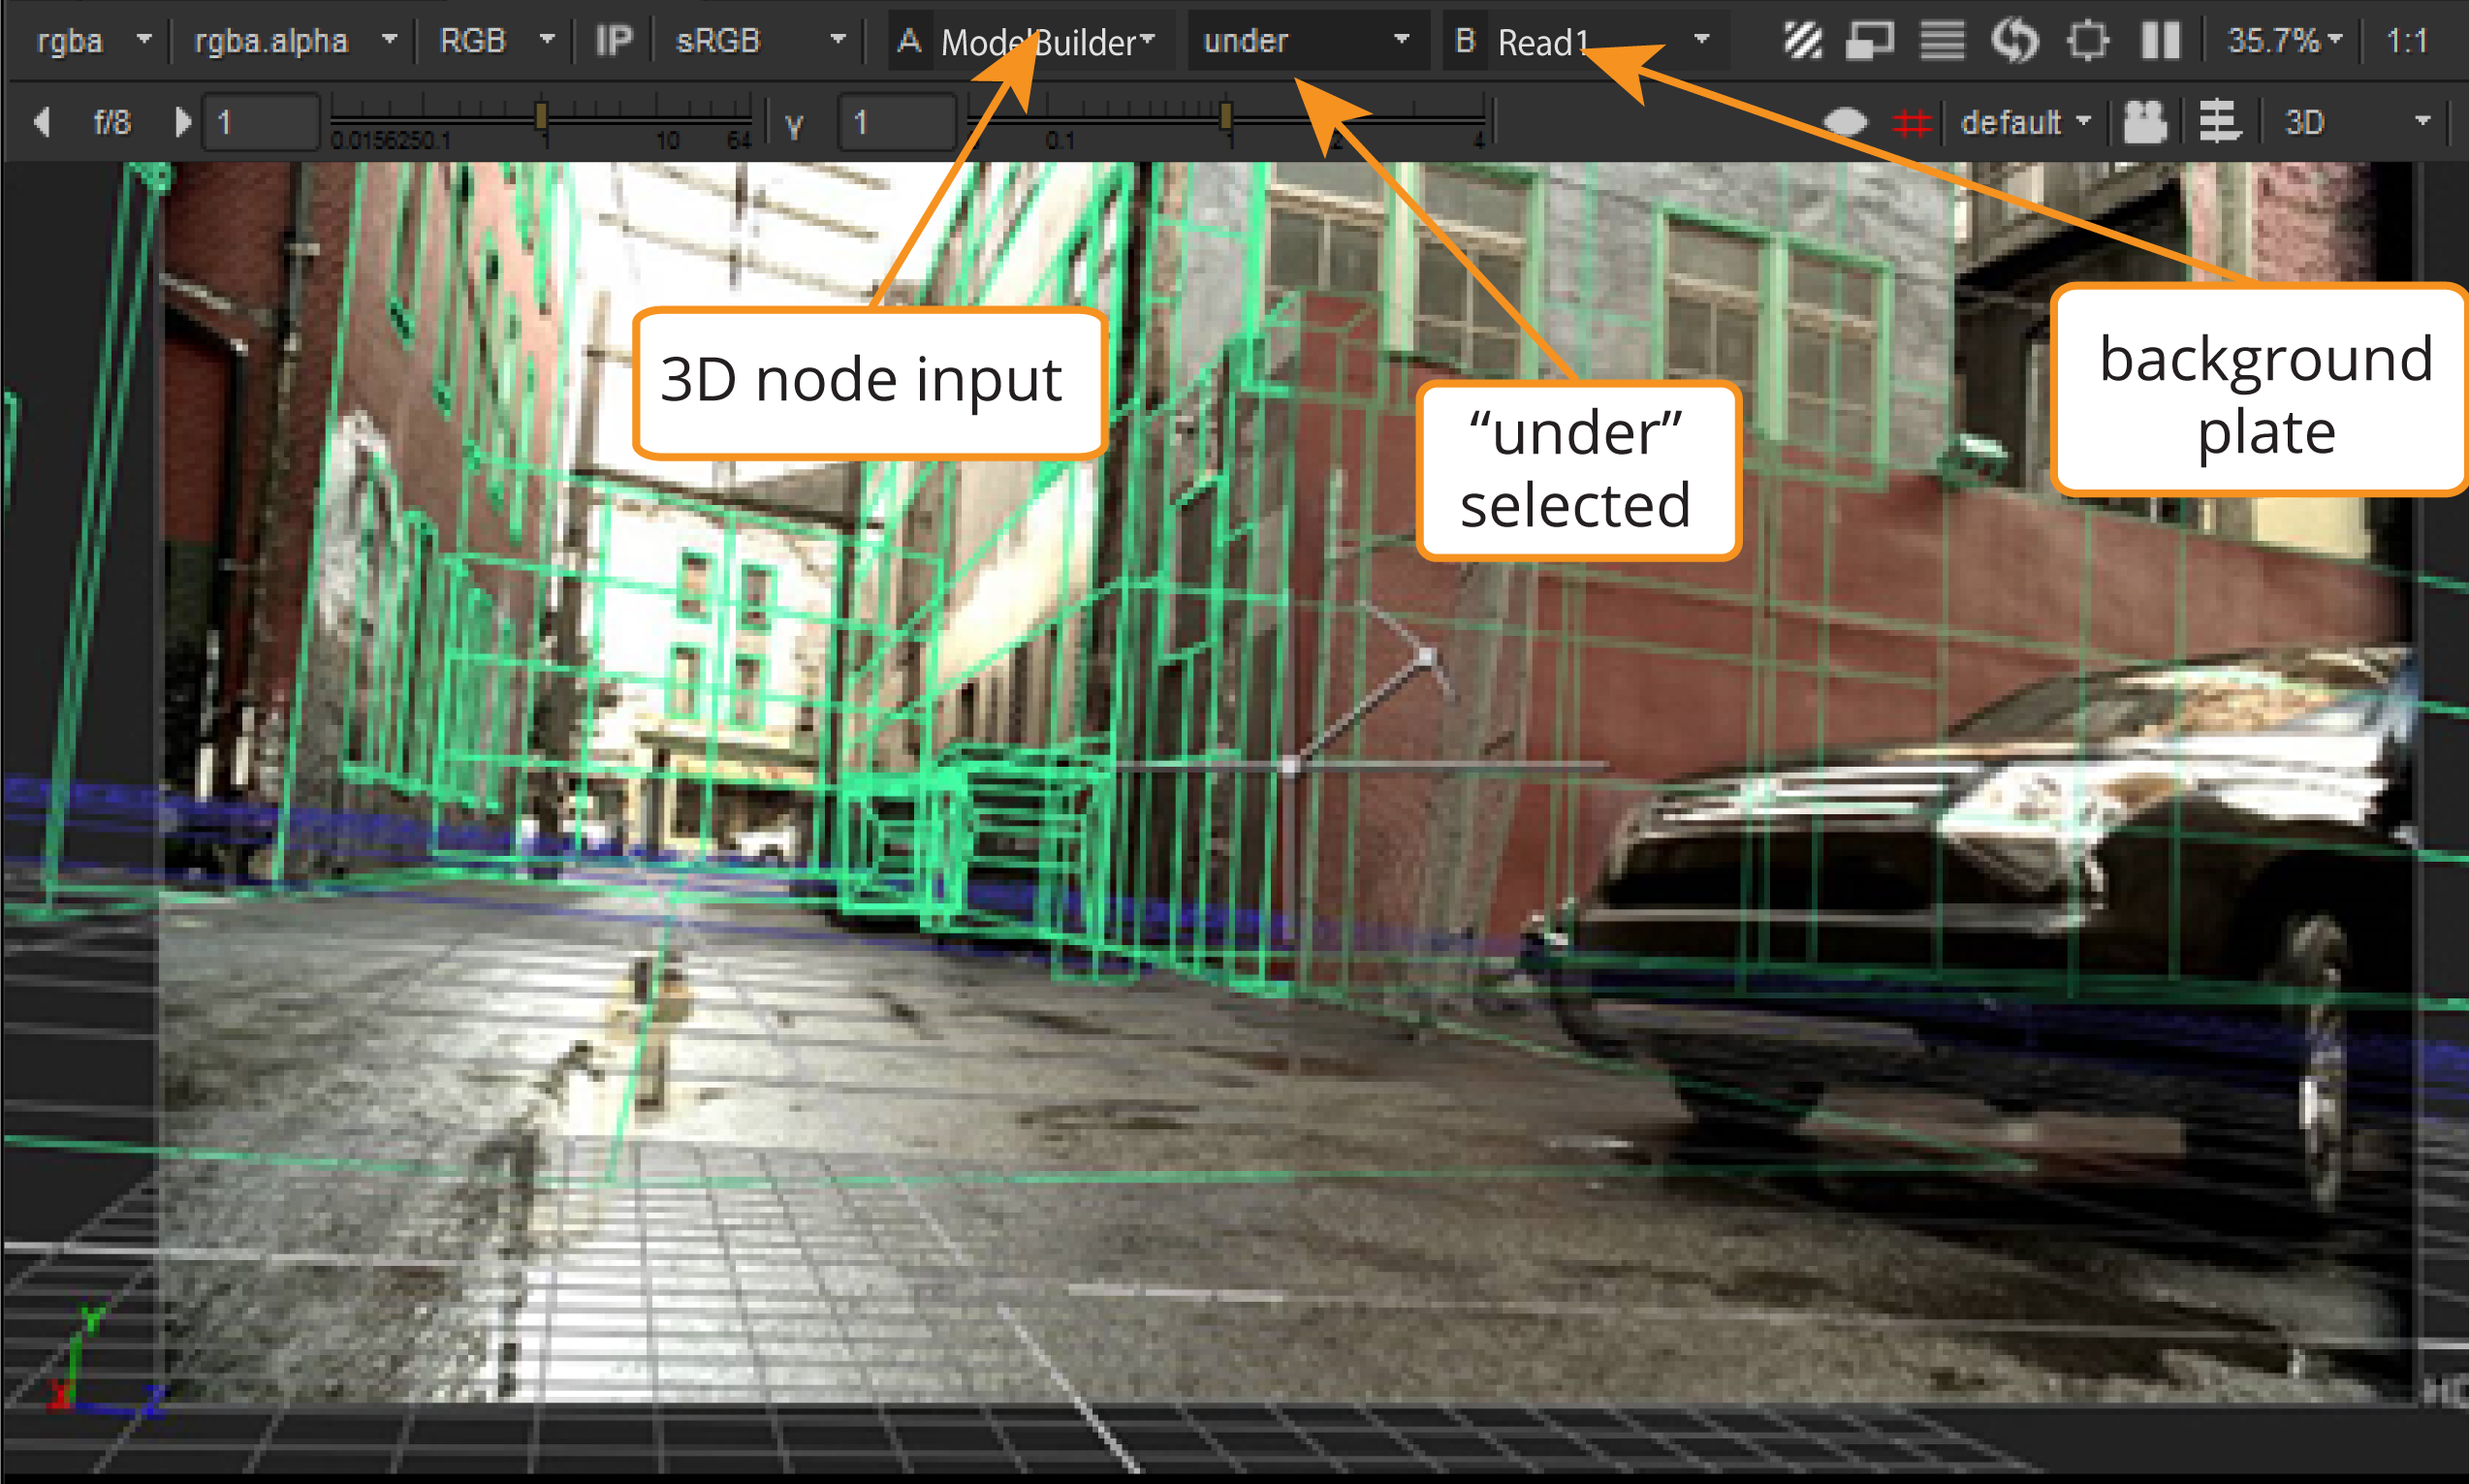
The display composite options - over, under, and minus - can also be selected to overlay two images. When the two images are 2D, this allows you to create a quick comp.
When one image is 2D and the other is a 3D node, you can use under to line up the wireframe preview with the 2D reference, and see how the 3D matches prior to a full render.
One example of this is when you want to preview a wireframe 3D scene with a background plate that you are trying to match, as shown below. For more information, see the Classic 3D Compositing chapter.
Special thanks to  for use of the above footage.
Input Process and Viewer Process Controls
Input Process and Viewer Process operations can be used to modify the image from the viewed node before it is displayed on your monitor. Both only affect the Viewer in which they are activated and do not affect your rendered output. Input Process is a legacy system which uses a node instantiated in the Node Graph to process the image. This is handy for script-specific, temporary, or experimental use, but can be error prone due to the node accidentally being deleted or changed and is limited to a single node. The Viewer Process system allows a gizmo (or compiled node) to be registered from the Python programming language at start-up. The registered item appears in a dropdown menu in the Viewer and the node is instantiated internally within the Viewer when the item is selected so there is no danger of accidental deletion or modification. This also enables multiple Viewer Processes to be registered at different points of start-up (as Nuke works through the NUKE_PATH menu.py files).
The Viewer settings contain an option for the Input Process to be applied before or after the Viewer Process, so the two may be used in conjunction, for instance, with the Input Process applying a projection mask after the Viewer Process applies a film look profile. While you could combine the two into a single Viewer Process node, it can be advantageous to keep operations separated. Having both the Viewer Process and Input Process available provides a great deal of flexibility.
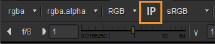
You can create an Input Process by creating a node in the Node Graph and naming it as an Input Process using Nuke’s Edit menu. Once an Input Process has been named, the IP button appears in the Viewer controls. When the IP button is activated, any image you view is passed through the Input Process.
Unlike Input Processes, Viewer Processes are registered using Python. They can be session independent and always appear in the Viewer’s Viewer Process dropdown menu. There are two predefined Viewer Processes, sRGB and rec709, but you can also build and add your own. When a Viewer Process is selected from the Viewer Process dropdown menu, any image you view is passed through that Viewer Process.
Whenever possible, the Input Process and Viewer Process are executed on the GPU. 1D LUT and 3D LUT (Vectorfield) have GPU implementations, so the built-in Viewer Processes run on the GPU (unless gl buffer depth has been set to byte in the Viewer settings, in which case all processing is done on the CPU). To get the GPU'd versions of the nodes for use in a custom Viewer Process gizmo, press x over the Node Graph, enter ViewerGain, ViewerGamma, or ViewerClipTest in the command entry window, and press Return.
The following table lists the differences between an Input Process and a Viewer Process.
|
Input Process |
Viewer Process |
|
Set by selecting the node in the Node Graph and choosing Edit > Node > Use as Input Process. |
Registered using Python. |
|
Activated using the IP button in the Viewer controls. |
Activated using the Viewer Process dropdown menu in the Viewer controls. |
|
Requires that the node exists in the Node Graph. Can quickly and easily be modified by artists. Can also be accidentally deleted, disabling the effect. |
Is defined in a text file called menu.py that is run at start-up. Accessible for artists, but not likely to be accidentally modified or deleted. |
|
Script dependent. Unless your Input Process node is saved in the template.nk file that is loaded at start-up, the Input Process is lost when you restart Nuke. |
Session independent. The Viewer Processes registered in menu.py are always available in each new session of Nuke. |
|
There can only be one Input Process at a time. Setting a new Input Process overrides any previously used Input Process. |
There can be an unlimited number of Viewer Processes available in the Viewer Process dropdown menu. For example, it is possible to register Viewer Processes in any menu.py file at start-up, so Viewer Processes can be added at any directory in your NUKE_PATH. |
|
Useful for temporary or non-critical viewing options that you want in the current shot for convenience, or for testing Viewer Processes before registering them. Can also be used for other things, such as field charts or masks that may be switched on or off and changed around in the shot. |
Useful for viewing options that you often need or that should not be modified by artists on a shot-by-shot basis. |
Note: Note that Input Processes and Viewer Processes are part of a built-in, fixed pipeline of nodes that are applied to images before they are displayed in the Viewer. This pipeline is either:
gain > Input Process > Viewer Process > gamma > dither > channels > cliptest (if input process order has been set to before viewer process in the Viewer settings)
OR
gain > Viewer Process > Input Process > gamma > dither > channels > cliptest (if input process order has been set to after viewer process in the Viewer settings).
However, depending on what the Input Process and Viewer Process are doing, the order in the built-in pipeline may not be the correct order. Therefore, if your Input Process or Viewer Process have controls that also exist for the Viewer, such as float controls named gain, gamma, or cliptest, then the Viewer drives them from the corresponding Viewer controls and does not do that image processing itself. This allows you to implement these controls in your Input Process or Viewer Process node/gizmo using whatever nodes and order you want. If your Input Process and Viewer Process do not have these controls, then the Viewer applies the effects in its normal way according to the built-in pipeline.
In the built-in pipeline, dither is applied to diffuse round-off errors in conversion of floating point data to the actual display bit depth. Although the cliptest is drawn at the end, it is computed on the image as input to the Viewer.
Note: By default, the predefined Viewer Processes, sRGB and rec709, affect all channels. However, if you want them to only affect the red, green, and blue channels, you can activate apply LUT to color channels only in the individual Viewer Settings or on the Viewers tab of the Preferences.
Input Process Controls
To activate or deactivate the effect of an Input Process, click the IP button in the Viewer controls. Note that the IP button only appears if the input process field in the Viewer settings is not empty. The button is also only enabled when a node in the Node Graph is set as an Input Process.
To open the Viewer settings, press S on the Viewer, or select Viewer Settings from the Viewer’s right-click menu. By default, input process is set to VIEWER_INPUT. If a node called VIEWER_INPUT exists in the Node Graph, it is automatically used as the input process for the Viewer. This ensures backwards compatibility with pre-5.2 scripts.
However, the Input Process node does not have to be named VIEWER_INPUT. You can use any node as an Input Process. Do the following:
| 1. | Select the node in the Node Graph and choose Edit > Node > Use as Input Process. |
Alternatively, you can press S on the Viewer to open the Viewer settings and enter the name of the node in the input process field.
| 2. | In the Viewer settings, you can also define whether the Input Process is applied before or after the Viewer Process currently in use. To do so, set input process order either to before viewer process or after viewer process. |
The Input Process node should not be connected to other nodes in the Node Graph. If you attempt to connect it, an error is displayed in the Viewer. If you delete the Input Process node from the Node Graph, the effect of the Input Process is disabled.
Viewer Process Controls
To activate a Viewer Process, select it from the Viewer Process dropdown menu in the top right corner of the Viewer. Any images you now view using this Viewer are passed through the selected Viewer Process.
Nuke includes the following predefined Viewer Process gizmos: sRGB, rec709, and rec1886. By default, sRGB is used because it is a best-guess default for a typical computer monitor.
In addition to using the predefined Viewer Processes, you can also add your own by registering a node or gizmo as a Viewer Process. You can register as many Viewer Processes with custom Viewer LUTs as you like. For more information on creating and registering custom Viewer Processes, see Creating Custom Viewer Processes.
All available Viewer Processes (both predefined and custom ones) appear in the Viewer Process dropdown menu in the Viewer controls. To disable the use of a Viewer Process, select None from the Viewer Process dropdown menu.
To open the properties panel of the currently active Viewer Process, select show panel from the Viewer Process dropdown menu.
Note that if the control you want to adjust has the same name as any of the Viewer controls (for example, gain or gamma), you should adjust the control on the Viewer. This drives the control in the following:
• the Input Process’ controls if an Input Process is in use
• in the Viewer Process’ controls if no Input Process is in use.
Tip: If you want to render out a file with the Viewer Process effect baked in, you can select Edit > Node > Copy Viewer Process to Node Graph to create an instance of the Viewer Process node in the Node Graph.