Using the Viewer Controls
A Viewer’s on-screen controls let you navigate the timeline, display channels, zoom, choose cameras (3D mode), and create display wipes and composites.
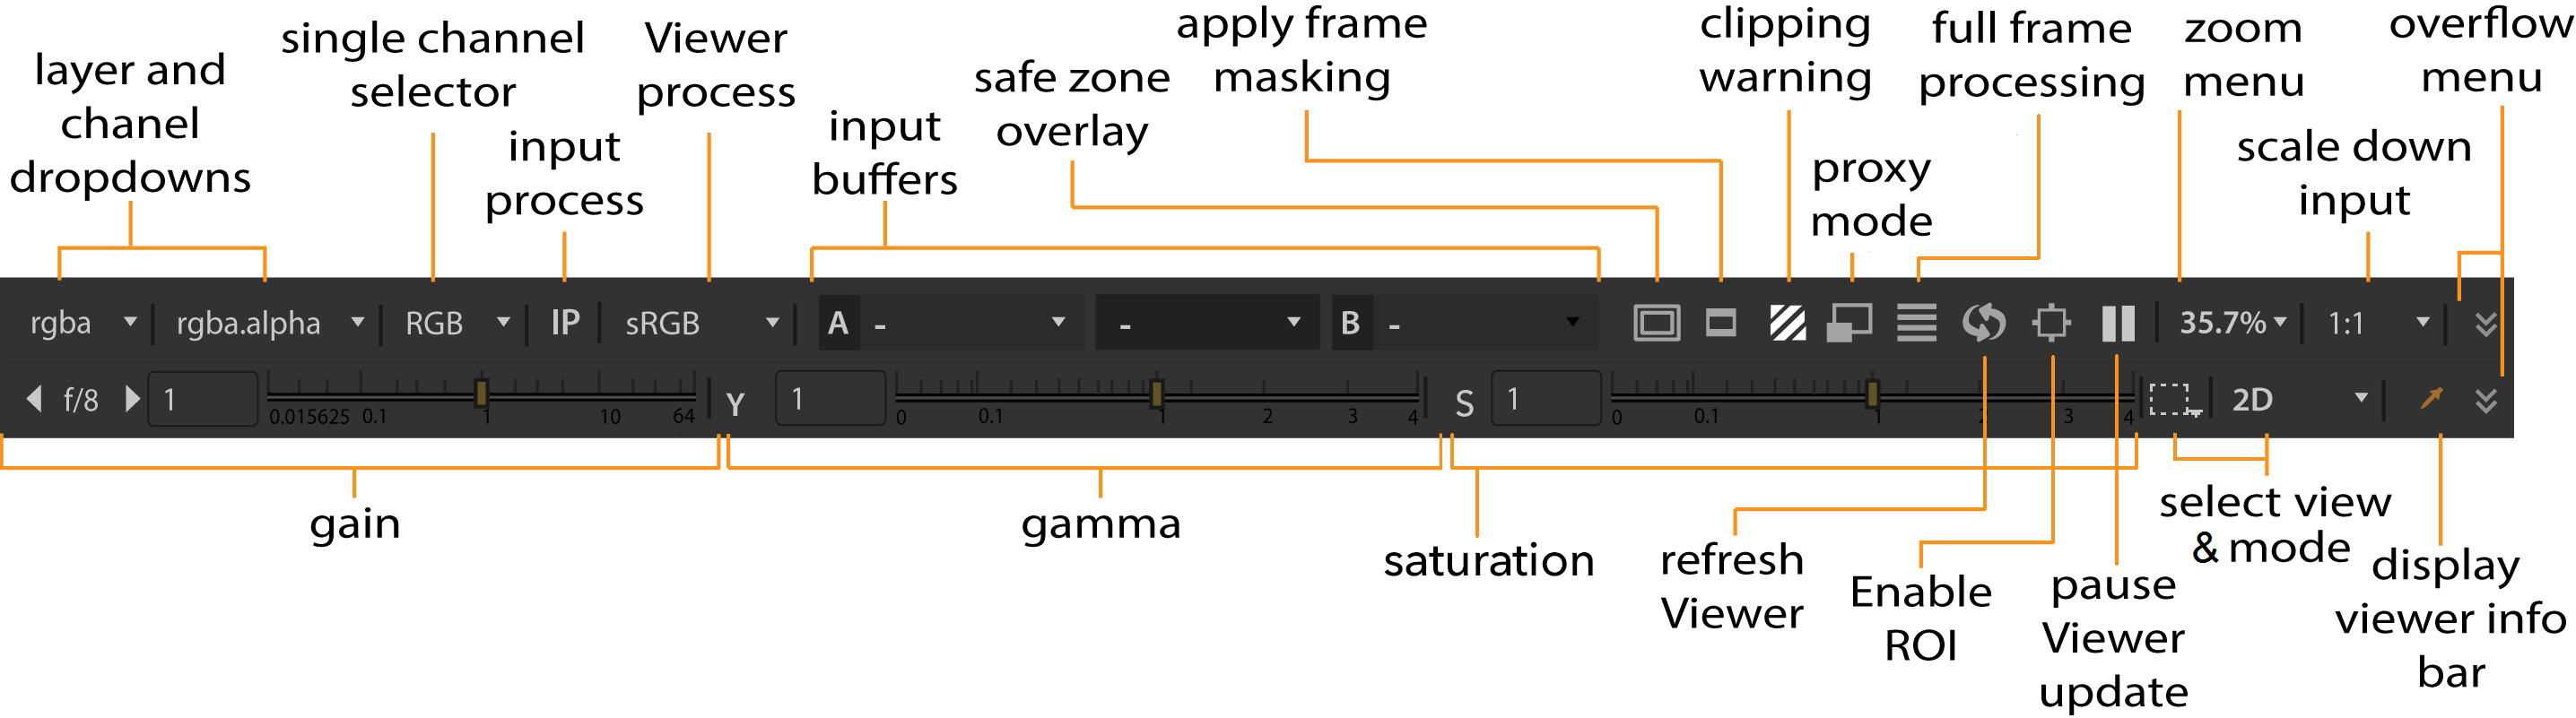
Compositing Viewer Controls
There are many useful tools at the top of the Viewer, some of which allow you to select layers and channels, adjust gain and gamma, and zoom and scale down the image in the Viewer.
The tools at the bottom of the Viewer allow you to adjust the playback settings, including setting the frame range, selecting the playback mode, and locking the Viewer playback range.
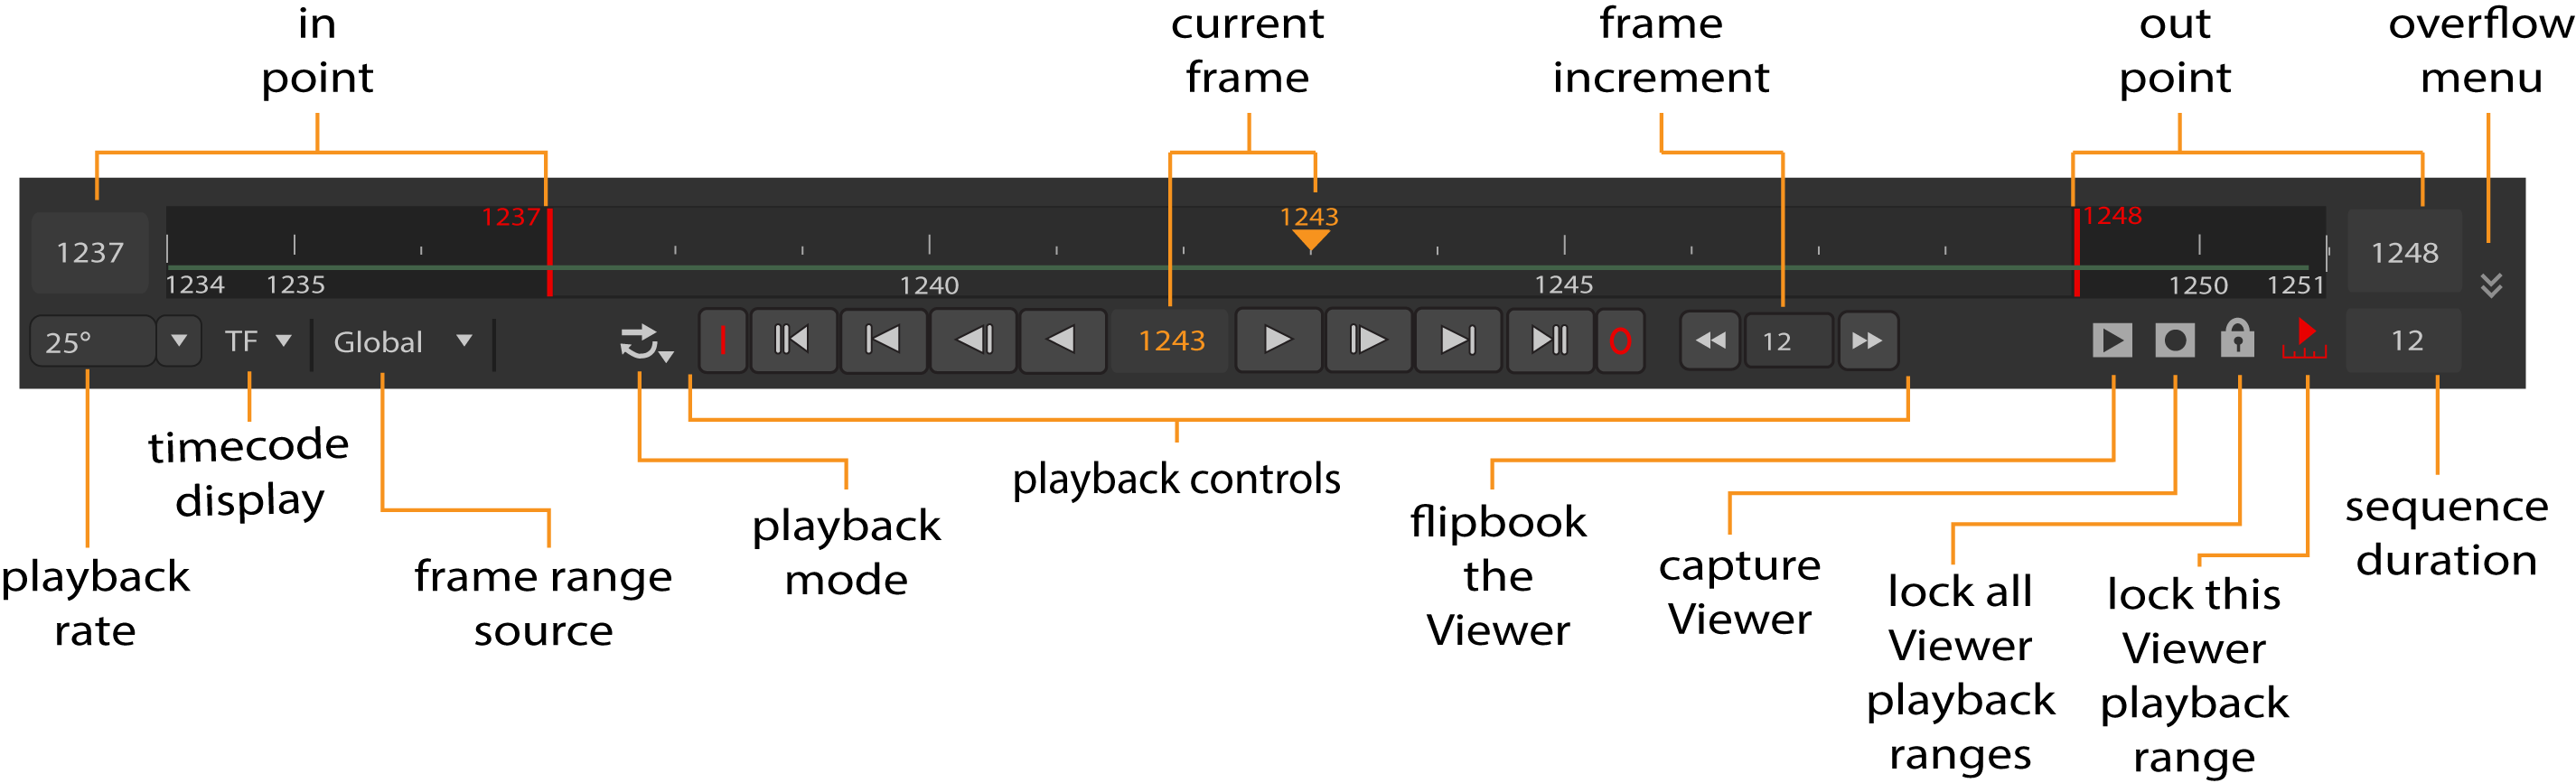
Drag the orange marker along the timeline to quickly cue to a specific frame. The number of the current frame appears below the center of the timeline. You can also cue to a frame by typing its number directly into this field.
Tip: The current frame and in an out point fields also accept simple mathematical functions, such as +/-20 to jump forward or backward 20 frames.
By default, Nuke automatically adjusts the timeline of every Viewer window to show the frame range defined in your Project Settings. If no frame range is defined, the frame range of the first image you read in is used as the global frame range.
Viewer timeline controls also have a frame range source dropdown menu that you can use to define where the timeline gets its frame range from. You can set this menu to Global, Input, or Custom. Global is the default setting described above.
The playback rate field (frames-per-second) displays the project’s playback speed. Nuke attempts to maintain this speed throughout playback, although this adjusts depending on the resolution of the imagery and your hardware configuration.
Note: The asterisk (*) denotes the playback speed selected using the Project Settings > Root > fps control.
To have the Viewer adjust the timeline to show the “in” and “out” frames of the current input clip, select Input from the frame range source dropdown menu. The number of the first frame in the clip is shown in the left end of the timeline and the number of the last frame in the right end. If you change the input of the Viewer, the frame range on the timeline is adjusted accordingly.
To manually adjust the frame range for the current Viewer window, pan and zoom on the timeline until you see the desired frame range and Custom becomes selected in the frame range source dropdown menu. Alt+drag to pan, and MMB+drag to zoom in. You can also zoom in on or out of the timeline using the mouse wheel. To reset the zoom, press the middle mouse button over the timeline.
To adjust the playback range for the current Viewer window, click+drag the red playback range markers on the timeline to a new “in” and “out” frames as shown below, or enter a new playback range in the playback range field and press the frame range lock button.

To toggle between the new playback range and the visible timeline range, click the lock frame button again.
The fps field (frames-per-second) initially displays the project’s playback speed. Nuke attempts to maintain this speed throughout playback, although this adjusts depending on the resolution of the imagery and your hardware configuration.
The following table lists the functions of the playback buttons:
|
Buttons |
Functions |
|---|---|
|
|
The Play backward and Play forward buttons play the sequence backward or forward at the script’s frame rate. When you press a play buttons, it toggles to a stop a button. |
|
|
The Back 1 Frame and Forward 1 Frame buttons cue the sequence to the previous or next frame. |
|
|
The Previous keyframe and Next keyframe buttons cue the sequence to the script’s previous or next keyframe. |
|
|
The First frame and Last frame buttons cue the sequence to the first and last frame. |
|
|
The Frame Increment field allow you to specify the number of frames by which the Previous increment/Next increment buttons cue the sequence. This is set to 10 frames by default. |
The Playback Mode button lets you control how many times and in what direction the Viewer plays back the sequence. Click the button to toggle between the following modes:
|
Button |
Function |
|
|
Repeatedly plays the sequence in a loop. |
|
|
Repeatedly plays the image back and forth from head to tail. |
|
|
Plays once through the section between in and out point and stops at the out point. If these are not marked, then it plays from the beginning to the end of the sequence. |
|
|
Plays once from the beginning to the end of the sequence, ignoring any in and out points. |


Jumping to a Specific Frame
You can move quickly to a specific frame on the timeline by choosing Viewer > Go to frame (or by pressing Alt+G), entering a frame number in the dialog that appears, and clicking OK.
Synchronizing Viewer Playback
The 'Lock All Viewer Playback Ranges' button allows you to toggle synchronized playback of Viewer windows. By default, all Viewers are locked - that is, if you cue to a frame in one Viewer, all other Viewers follow suit.
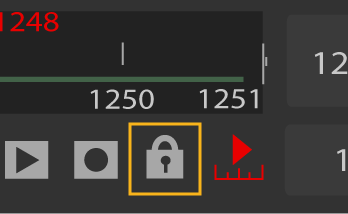
When the lock icon changes from a closed lock to an open lock, that Viewer’s playback becomes independent of other Viewers, and not cued to the other Viewers.
Pausing the Display
The 'Pause Viewer Update' button stops the Viewer from updating and holds the last frame rendered. To reactivate display rendering for all frames, press the button again.
You can click the 'Refresh Viewer' button (or press U) to manually update the display while keeping Viewer paused.
Displaying a Single Channel
You can press the R, G, B, and A keys on your keyboard to display the red, green, blue, and alpha channels respectively. Or, you can also select a channel from the RGB dropdown menu in the top-left corner.
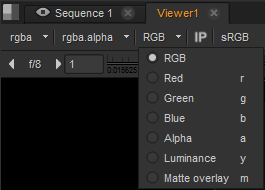
Press one of the channel keys again to toggle back and display all channels.
Tip: If you press Shift while selecting the channel, your selection only affects the currently active input of the Viewer node. This way, you can display different channels from the Viewer’s different inputs. For example, when keying it can be useful to view the RBG channels from one input and the alpha channel from another, and toggle between the two. To achieve this, do the following:
1. Create a Viewer with several inputs.
2. Activate one of the inputs by pressing its number (for example 1) on the Viewer.
3. Press Shift and select RGB from the channel dropdown menu.
4. Activate another input (for example, input 2) by pressing its number on the Viewer.
5. Press Shift and select A from the channel dropdown menu.
6. Toggle between the inputs by pressing their numbers or the up and down arrow keys.
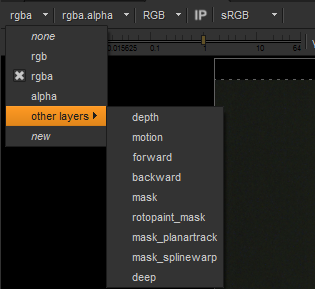
Layer and Channel Dropdown Menus
The layer dropdown menu lets you choose a set of color channels to display in the Viewer. By default, this is set to display the rgba layer, but you can choose any layer in the data stream.
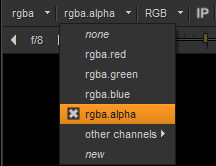
The channel dropdown controls which channel appears when you view the “alpha” channel. The default setting displays the alpha channel when you press the A key, but you can change this by selecting any channel in the data stream, as shown below.
Displaying Alpha Mattes
When you’ve read in an image that has an alpha channel, you can display the alpha channel as a red overlay on top of the image’s red, green, and blue channels.
To Display an Image's Alpha Channel on its RGB Channels
| 1. | Select Image > Read to read in an image. |
| 2. | Connect a Viewer node to the Read node. |
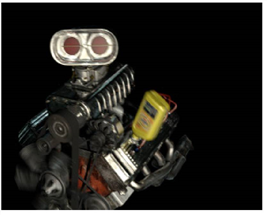
By default, Nuke displays the red, green, and blue channels in the Viewer.
| 3. | Click on the Viewer to make sure it’s the currently active panel. |
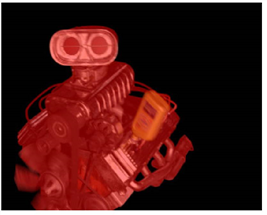
| 4. | Press M. |
Nuke displays the image’s alpha channel as a red overlay on top of the RGB channels.
| 5. | To return to the RGB display, press M again. |
Viewer Info Bar
The info bar displays information about the image format, bounding box, and pixel underlying the pointer, a sampled pixel or region of pixels. From left to right, the indicator displays the following about the current image and pixel or sample: image resolution and the size of the bounding box, the pixel's x and y position and its Red, Green, Blue, and Alpha values, and other values depending on the color type you have selected from the color type menu on the right.
|
Color Type |
Description |
Values for RGB 0.1, 0.1, 0.1, 1.0 (Dark Gray) |
|---|---|---|
|
Spotmeter |
Colorspace values measured in f-stops at 1/48th of a second shutter speed. |
f/5.9 @48th sec |
|
8-bit |
RGB colorspace values. |
25, 25, 25, 255 |
|
8-bit Hex |
The same colorspace values as 8-bit, but displayed in hexadecimal. |
1A 1A 1A FF |
|
log |
Logarithmic colorspace values. |
397, 397, 397 |
|
HSVL |
The default setting, shows colorspace values as Hue, Saturation, Value, and Level. |
0, 0.00, 0.10, 0.10000 |
You can sample a single pixel from the Viewer by pressing Ctrl/Cmd while clicking, a region from the Viewer by pressing Ctrl/Cmd+Shift while dragging, a single pixel from the node’s input by pressing Ctrl/Cmd+Alt while clicking, and a region from the node’s input by pressing Ctrl/Cmd+Alt+Shift while dragging.
To cancel a pixel selection, hold Ctrl/Cmd and right-click in the Viewer.
Adjust Display Gain, Gamma and Saturation
The gain, gamma and saturation sliders let you adjust the displayed image, without affecting your final output. These controls are useful for tasks like spotting holes in mattes. You can boost or reduce gain by entering a multiplier (exposure value), dragging on the slider, or using the F-Stop arrows. Boost or reduce gamma by entering a gamma level or dragging the gamma slider. Saturation correction is applied after the gain and Viewer processes, and any custom input process. Saturation uses Rec709 coefficients to compute luminance, and uses the same color space as that which is set in the Viewer.
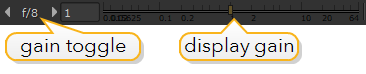
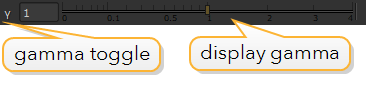
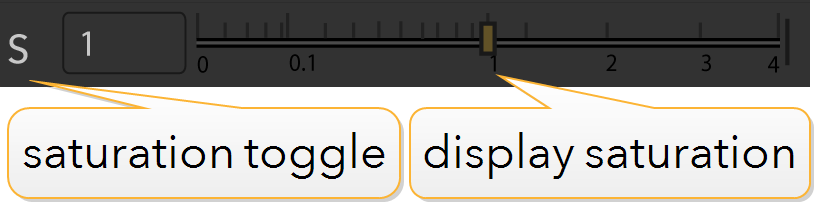
The gain, gamma and saturation toggle buttons let you switch between the default values of 1 (no change) and the last gain and gamma adjustments you made in the Viewer.
Press the 'Clipping Warning' button to apply stripes to all pixels outside the range 0.0 to 1.0.

2D / 3D Toggle and Camera Controls
The 2D / 3D dropdown menu lets you toggle between 2D and 3D display modes in the current Viewer. This menu also lets you choose between different orthographic (non-perspective) views when working in the 3D mode.
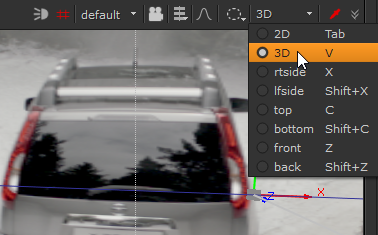
The camera dropdown menu on the right lets you choose which camera to look through when multiple cameras exist in your 3D scene. For more information on these controls, see Classic 3D Compositing.