Controlling Zoom and Resolution
Nuke includes a dedicated set of controls to determine what is rendered in the Viewer and at what resolution, allowing you to work on specific areas of the image at the required quality level while keeping the interface responsive.
Using the Zoom Menu
The Zoom dropdown menu lets you select the magnification factor by which the current image is displayed. This menu also shows the keyboard shortcuts to press to quickly switch between the different zoom settings.
Proxy Mode
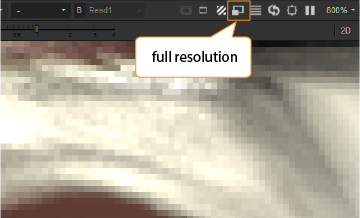
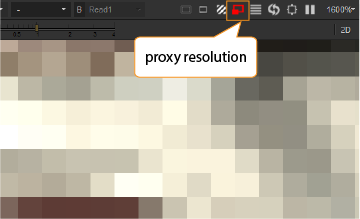
Nuke can generate low-res proxies for displayed frames as needed. Press Ctrl/Cmd+P or click the proxy mode toggle button on the Viewer to activate the proxy display mode.
|
|
|
By default, the proxy scale is set to 0.5. You can change the proxy scale in the Projects Settings, which you can open by selecting Edit > Project Settings (or pressing S).

Proxy display resolution defined on the Project Settings
properties panel.
You can also read in rendered proxies using the Read nodes’ controls. The proxy file does not need to match the proxy resolution in use. Depending on your settings, either the full-res or proxy file is scaled to the required proxy size. For more information, see Read Nodes and Proxy Files.
Lowering the Display Resolution of Individual Viewers
Viewers also have a dropdown menu that allows you to easily switch to lower display resolutions, regardless of whether you have activated proxy mode or not. Using this multiplier setting, you can, for example, change the display resolution of an individual Viewer to 50% of the current (be it full-size or proxy) resolution. This is useful if you want to have Nuke display your images more quickly without having to touch the project settings. It also comes in handy if you have just a few very large plates in your script, as you can choose to use lower resolutions when viewing just these plates.
To Lower the Display Resolution of Individual Viewers:
From the Viewer’s down-rez dropdown menu, choose the factor by which you want to lower the display resolution.

For example, if you have a 4K plate and are using a proxy scale of 1:2, your plate is still 2K even in the proxy mode. Setting the down-rez factor to 1:2 in the Viewer scales the plate down further to 50% of the proxy resolution, that is to 1K. This gives you much faster (but less accurate) feedback.
Pixel Aspect Ratio
The pixel aspect ratio determines whether your images are displayed using square or rectangular pixels. By default, the Viewer uses the pixel aspect ratio defined in your project settings. To see the current setting, select Edit > Project Settings (or press S).
For example, a pixel aspect ratio of 2 accurately displays anamorphic footage the way it is projected, as shown in the image:
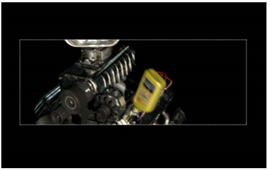
The Viewer uses the pixel aspect ratio
defined for the script.
If you want to ignore the pixel aspect ratio, you can toggle it by pressing Ctrl/Cmd+Shift+P over the Viewer window.
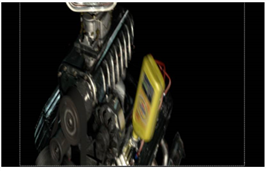
Press Ctrl/Cmd+Shift+P over the Viewer
window to ignore the pixel aspect ratio.
Full-frame processing
By default, when you display or play through a sequence in the Viewer, Nuke only calculates and caches the scanlines for the visible area. It's not caching the full frame, but a subset of the scanlines you're viewing. For example, if you have set the zoom level to be ÷4, Nuke is only caching 1/4 of the scanlines that make up the frame. In a lot of cases, this allows for faster playback and may be what you want.
However, if you play through a sequence and then pan around or change the zoom level, Nuke has to calculate the scanlines it didn’t calculate before. This may not be what you want if you are performing tasks that require you to constantly pan around or zoom in and out of the plate (such as paint and roto). If this is the case, you can click on the full frame processing button in the controls at the top of the Viewer to force Nuke to process every scanline in the image. Compared to the default mode, this may take slightly longer initially and requires more space in the Viewer cache, but once Nuke has cached the frames you require, you can pan around and change the zoom level without breaking the cache or affecting playback.

Region of Interest (ROI)
The ROI button lets you enable rendering only through a region of interest - a portion of the image you explicitly select. This is useful for quickly viewing render results in a process-heavy script.
To Define a Region of Interest:
| 1. | Click on the ROI button in the Viewer controls. The ROI overlay appears. |
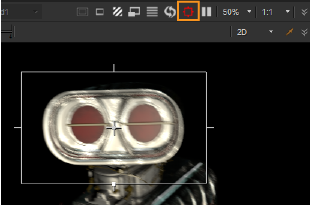
| 2. | Drag to resize and move the ROI overlay as necessary. |
To Free-Draw a Region of Interest
| 1. | Over the Viewer, press Alt+W once (do not hold the keys down). The ROI button turns red, but the ROI overlay does not appear. This allows you to freely draw your own ROI rather than adjust the default overlay. |
| 2. | Drag a marquee to draw the region of interest where you need it. |
To Clear a Region of Interest:
| 1. | After you’ve set a region of interest, you can clear it by pressing Alt+W over the Viewer. You can then drag a new marquee to define a new region of interest. |
| 2. | To turn off the feature and update the whole Viewer with the recent changes, click the ROI button again (or press Shift+W). |
