Train Networks from the Command Line
Training networks from the command line, rather than from the Nuke interface, allows you to start training on remote machines that may be more powerful than your local machine. If you have multiple GPUs, you can start multiple training runs simultaneously.
Note: NVIDIA CUDA is not supported on macOS so training defaults to the CPU, which may result in longer training times.
Running Nuke from the command line means typing commands into an operating system tool, such as Terminal on macOS or PowerShell on Windows, rather than launching Nuke in interactive mode from a desktop icon. Command line operation is sometimes called "headless" because you never see the Nuke interface, Nuke processes the script you specify under the hood. See What Is a Terminal and How Do I Use One? for more information and Command Line Operations for other examples of command line flags.
The basic syntax to start training from an existing CopyCat script is as follows: [Nuke executable] [Nuke mode] [arguments] [script location]
Note: You must have a NukeX license to train a network from the command line and include the --nukex argument in the command.
For example, from the install location:
./Nuke14.0 --nukex -i -F 1 -X CopyCat1 --gpu /path/to/myFirstTraining.nk
Note: Make sure to include the --gpu argument otherwise training defaults to using the CPU, which takes significantly longer to process.
Tip: The -F 1 argument ensures that the training loops over a single frame. If you omit -F, a warning is displayed but the training is not affected.
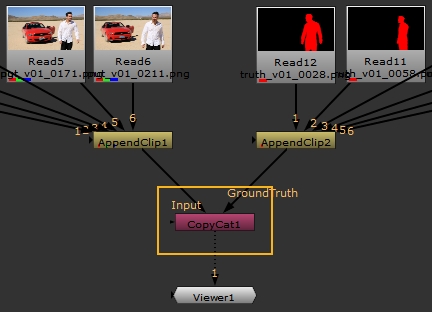
The command starts training with a NukeX interactive license, from the node CopyCat1, on the GPU, and using the script myTraining.nk containing the dataset. The name of the node supplied is the CopyCat node that is handling the training with all the Input and GroundTruth images already set up. In the example shown, CopyCat1 is highlighted, but you can use any CopyCat node in the specified script.
See Create a Data Set for Training for more details on how to create a dataset.
Note: Multi-GPU processing requires a Batch Size greater than or equal to the number of GPUs you want to use. For example, if you have two GPUs, CopyCat's Batch Size must be set to two or higher to use both GPUs. If you have four GPUs and you set the Batch Size to two, CopyCat only uses two GPUs.
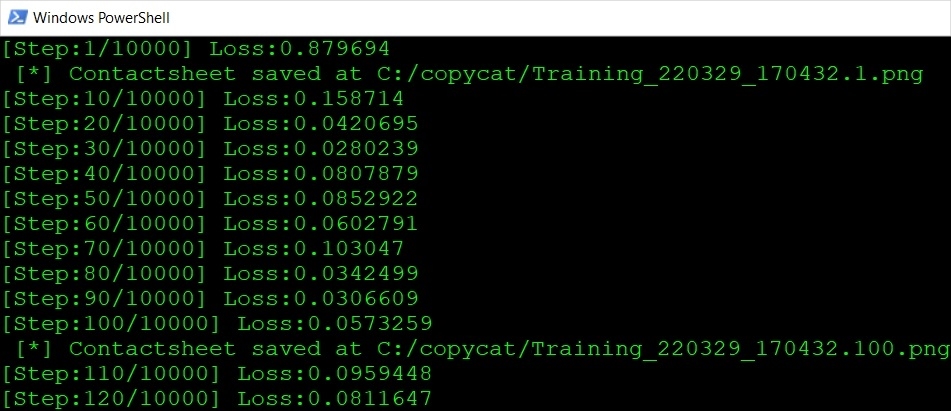
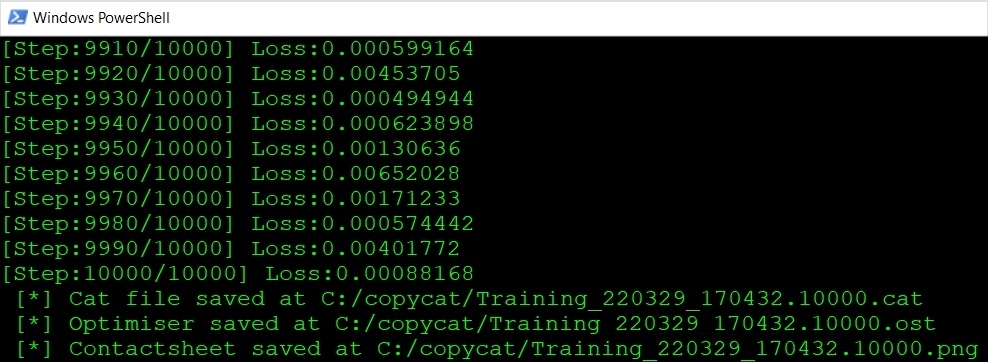
Running a script from the command line trains the network in exactly the same way as with an interactive GUI session, generating the same .png, .cat, .ost, and .summary files in the chosen Data Directory. Contact sheets and Step/Loss graphs are not displayed in command line mode, but the Step count and current Loss value are printed on-screen.
Training is complete when the specified number of steps are processed or you stop training manually by closing the command line window or pressing the escape hotkey Ctrl/Cmd+C.
You can then apply the trained model to your footage using the Inference node. See Apply and Improve the Results from Your Network for more information.
Train Multiple Networks Simultaneously
The previous example uses all available GPUs to train a single network. If you want to start simultaneous training on multiple GPUs independently, you need to add the --gpu [index] argument to the command line as follows:
./Nuke14.0 --nukex -i -F 1 -X CopyCat1 --gpu 0 /path/to/myFirstTraining.nk
./Nuke14.0 --nukex -i -F 1 -X CopyCat1 --gpu 1 /path/to/mySecondTraining.nk
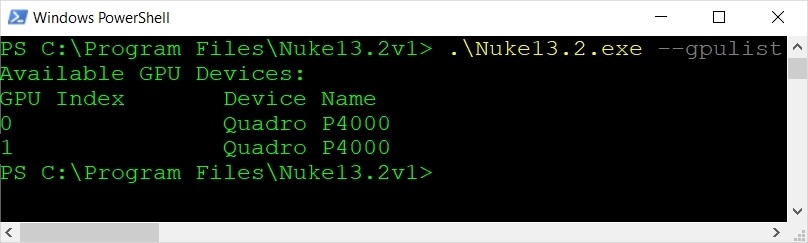
You can find out a GPUs index using the --gpulist argument. For example, using Windows PowerShell:
./Nuke13.2 --gpulist
Returns: