Writing Disparity into a Clip
When you're happy with the disparity map generated, you can save time down the line by writing the disparity into a new clip combining the source and disparity channels.
|
1.
|
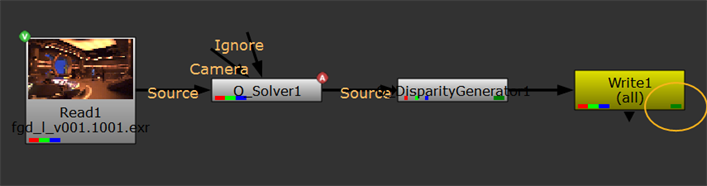
Select the O_DisparityGenerator node in the Node Graph. |
|
2.
|
Select Image > Write (or press W on the keyboard) to insert a Write node after O_DisparityGenerator. |
|
3.
|
In the Write node controls, select all from the channels dropdown and set file type to exr. |
|
4.
|
Enter a name for the clip in the file field (for example, my_clip.####.exr), and click Render. |
The newly created disparity channels are saved in the channels of your stereo clip. When you need to manipulate the same clip again later, the disparity vectors are loaded into Nuke together with the clip. The disparity channels are represented on nodes in the Node Graph by the dark green chip on the right of the node.
|
|
|
Rendering the output to combine the clip and the disparity
channels for future use.
|