O_DisparityToDepth Example
In this example, we first generate a depth map for a stereo pair of images using O_DisparityToDepth. Then, we blur the image according to the depth map.
Step by Step
|
1.
|
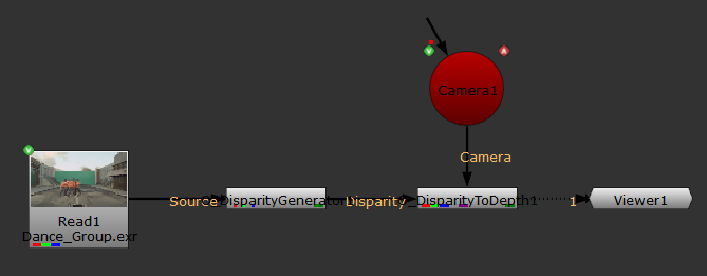
Launch Nuke and select File > Open to import the depth.nk script. This script has the left and the right view set up in the Project Settings. In the Node Graph, there is a stereo Camera node. |
|
2.
|
Select Image > Read to import Dance_Group.exr into Nuke. |
|
3.
|
To calculate disparity vectors, insert an O_DisparityGenerator node after the image. See DisparityGenerator for more information. |
|
4.
|
Select Ocula > Ocula 4.0 > O_DisparityToDepth to insert an O_DisparityToDepth node after the O_DisparityGenerator node. Ensure the O_DisparityGenerator node is connected to the Disparity input of O_DisparityToDepth. |
|
5.
|
Connect the Camera node to the Camera input of O_DisparityToDepth. Your node tree should now look something like this: |
|
6.
|
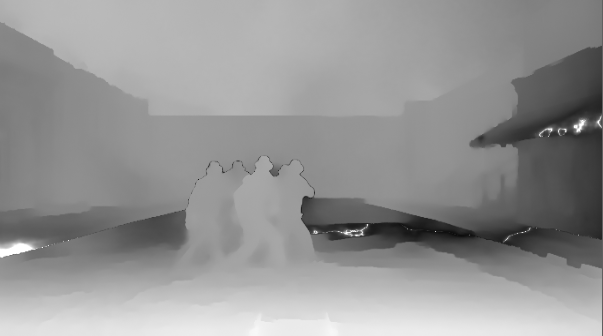
Select depth from the channel dropdown above the Viewer to display the z-depth map. |
|
7.
|
Select the red channel (R) from the RGB dropdown, and adjust the gain and gamma sliders above the Viewer to see the depth map more clearly. |
|
|
|
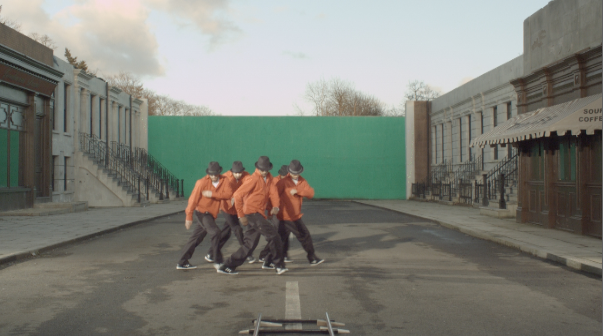
The left view of a stereo image.
|
The red channel of the depth map
(with adjusted gain and gamma).
|
|
8.
|
To use O_DisparityToDepth with ZDefocus, continue to the next section. |
An Example of Using O_DisparityToDepth with ZDefocus
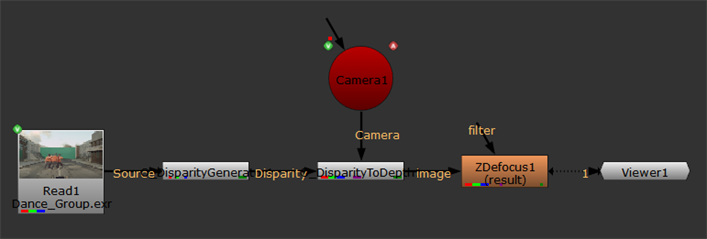
The ZDefocus node blurs the image background according to the depth channels we’ve just created in the previous section.
|
1.
|
Continue with the node tree you created in the previous section. |
|
2.
|
If you inserted a DisparityReviewGizmo node, either disable or delete it. |
|
3.
|
Select Filter > ZDefocus to add a ZDefocus node between O_DisparityToDepth and the Viewer. Your node tree should now look something like this: |
|
4.
|
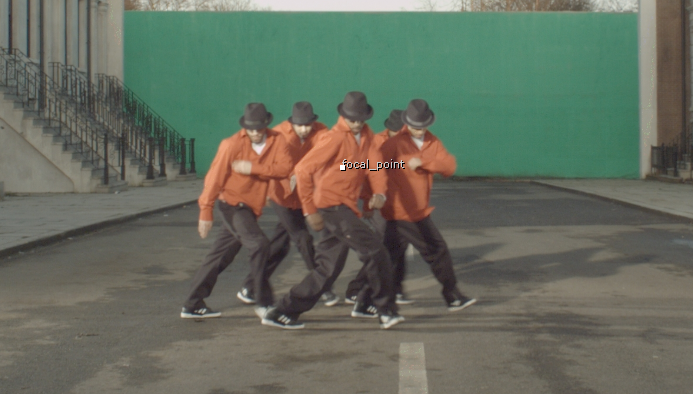
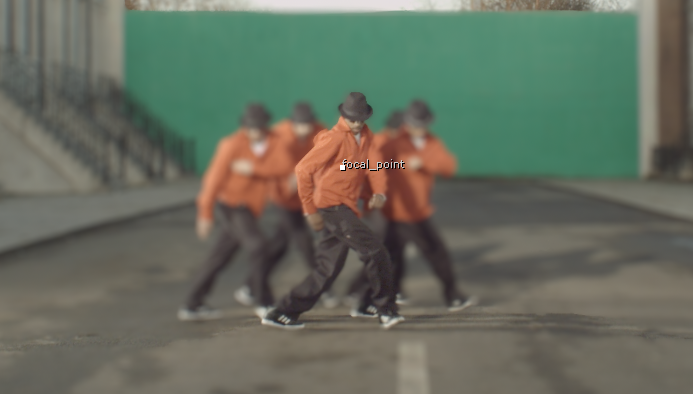
Open the ZDefocus controls. A focal_point widget is displayed in the Viewer. Click and drag the focal_point widget to the area on the image you want to be in focus. In this case, we want the dancer at the front to be the focus point. |
|
5.
|
Then set the ZDefocus controls as follows: |
• channels to rgba
• math to far=0
• size to 63
|
6.
|
View the output. To see the effect of the ZDefocus node more accurately, select the node in the node tree and press D once to disable and again to enable it. |
|
|
|
The left view when the ZDefocus
node is disabled.
|
The left view when the ZDefocus
node is enabled.
|
|
7.
|
You can save the depth in the channels of the input clip for later use. To do this, select Image > Write to insert a Write node between O_DisparityToDepth and ZDefocus. In the Write node controls, select all from the channels dropdown menu. Use the file control to give the file a location and a new name. Choose exr as the file type and click Render to render the image. |