O_MultiSample Example
In this example, we first generate a disparity map for a stereo pair of images using O_DisparityGenerator. Then, we use O_MultiSample to remove an area of the disparity and fill it using the surrounding disparity vector data.
Step by Step
| 1. | Launch Nuke. Open the Project Settings (press S on the Node Graph), select the Views tab, and click the Set up views for stereo button. |
| 2. | Select Image > Read to import Dance_Group.exr. |
| 3. | To calculate disparity vectors, insert an O_DisparityGenerator node after the image sequence. See DisparityGenerator for more information. |
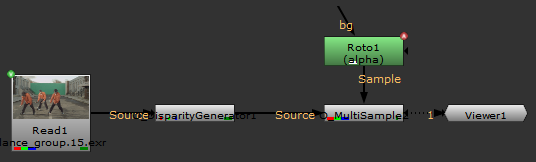
| 4. | Select Ocula > Ocula 4.0 > O_MultiSample to insert an O_MultiSample node after the O_DisparityGenerator node. |
| 5. | Insert a Roto node and connect it to the Sample input of the O_MultiSample node. |
| 6. | Attach a Viewer to the O_MultiSample node. Your node tree should now look something like this: |
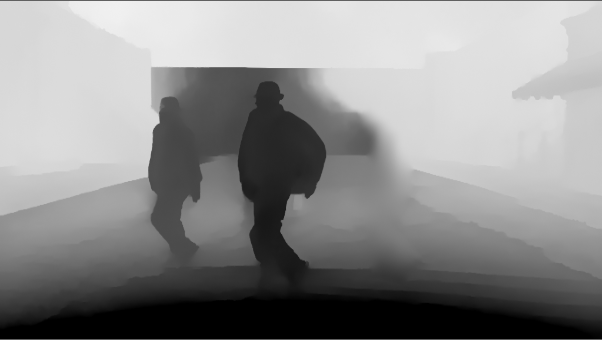
| 7. | Select disparity from the channel dropdown above the Viewer to display the disparity map. |
| 8. | Select the red channel (R) from the RGB dropdown, and set the gain control to -1/45. |
| 9. | Adjust the gamma slider above the Viewer to display the disparity map more clearly. |
| 10. | Open the Roto controls and select Bezier to the left of the Viewer. Draw a bezier around the dancer on the right. |
| 11. | Open the O_MultiSample controls. Select disparity from the Channels control. |
| 12. | Set the Sample control to Sample Inverted Alpha. The selected area of disparity is now filled using the surrounding disparity vector data, replacing the disparity in the selected area. |

|
|
|
The original left view of the disparity map with a bezier marking the selected area. |
The left of view of the disparity with the selected area removed. |