O_Solver Example
In this example, we read in a stereo image, use O_Solver to calculate the camera relationship, review the results, and add a user match to improve the solve data.
Step by Step
| 1. | Start Nuke and press S on the Node Graph to open the Project Settings. Go to the Views tab and click the Set up views for stereo button. |
| 2. | Select Image > Read to import Dance_Group.exr. The .exr format allows both views to exist in a single file, so Nuke reads in both the left and the right view using the same Read node. |
| 3. | Insert an O_Solver node after the stereo image by choosing Ocula > Ocula 4.0 > O_Solver from the Toolbar. |
The purpose of this node is to define the geometrical relationship between the two views in the input image (that is, the camera relationship or solve). The solve information can then be fed to an O_DisparityGenerator, if you want to use the alignment information to create a disparity map, or to an O_VerticalAligner to correct vertical offset between views.
For now, we’ll concentrate on creating an accurate solve using O_Solver.
| 4. | Attach a Viewer to the O_Solver node. |
| 5. | In the O_Solver controls, click Key Frame to set a keyframe for O_Solver to analyze. |
Our example here consists of just one frame, but if you were using a sequence, click Key Sequence to automatically analyze the sequence and add keyframes when the camera setup changes. If the setup doesn’t change, you can get away with using just one or two keyframes. Remember that keyframes should be placed on frames that are easy to match between views - ideally, with enough picture detail, but no motion blur, occluding fog, or dust.
Every time you add a keyframe, O_Solver analyzes the footage and calculates the solve.
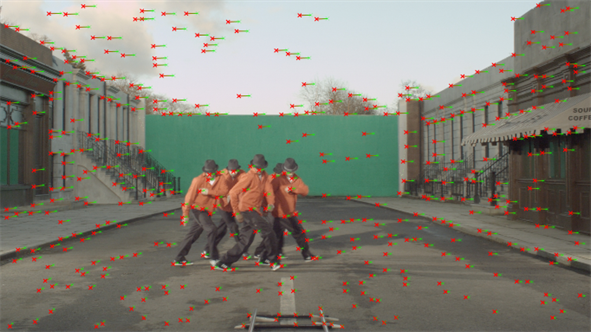
| 6. | O_Solver displays Keyframe Matches by default, but you can change modes using the right-click menu in the Viewer or the Display dropdown on the Viewer toolbar. |
Note: Matches are only displayed when the playhead is on a keyframe, marked with a blue chip.
The calculated feature matches are displayed in a Viewer overlay, and you can switch between views to compare them.
|
|
|
Display set to Keyframe Matches. |
| 7. | Now, set Display to Preview Alignment. This allows you to check the quality of your solve by previewing the alignment of the calculated feature matches in the Viewer. |
Ideally, the lines should all be horizontal. If they have a vertical error greater than the Error Threshold, they are considered poor matches and displayed in yellow.
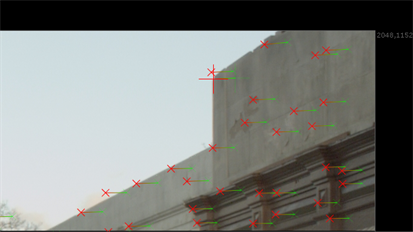
| 8. | To help guide the solve, we can add feature matches manually. It’s a good idea to do this if you have a particularly tricky part of a shot where the automatic feature matching has produced a few yellow matches. |
There's an area in the top-right of the frame containing bad matches, so zoom in on it.
| 9. | Locate a feature in either view that is easily recognizable in both views (for example, edges or areas of high contrast). |
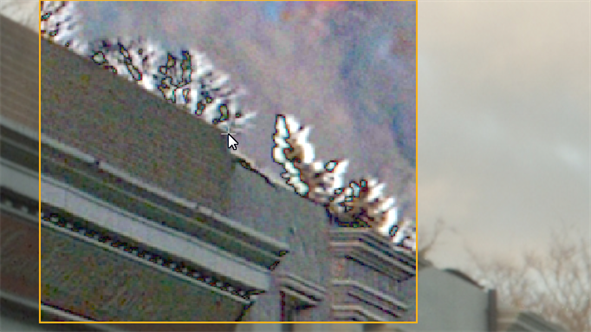
| 10. | Hold Ctrl/Cmd+Alt and then click in the Viewer to place the user match. |
Tip: You can also click the Add User Match button above the Viewer to enable add mode.
A cross is placed in the Viewer, representing the user match in that view, and then O_Solver automatically adds a corresponding match in the other view.
| 11. | You can align views by dragging a user match in one view to its corresponding position in the other view. By default, the two views are overlaid using a difference merge, in a 256px texture at x2 magnification. |
You can change the size of the overlay and magnification using the texture size (in pixels) and magnification dropdowns above the Viewer.
Tip: Holding Ctrl/Cmd displays the left view and Ctrl/Cmd+Shift the right view, allowing you to ping-pong between views. Holding Shift displays a left/right mix, using an over merge, to help you locate bad matches.
You can add as many manual feature matches as you like, so if you see any other areas that might benefit from them, feel free to add more.
O_Solver considers any feature matches you’ve added yourself superior to the ones it detects automatically and pays them more attention. This can also influence the automatic matches displayed in the Preview Alignment mode. Any automatic matches that don't agree with the alignment defined by your user matches are highlighted in yellow and should be deleted.
|
|
|
|
Poor auto-match alignments are |
Adding user matches allows you delete |

| 12. | Next, decrease the Match Offset value gradually until some matches have no horizontal offset. This sets the disparity of those matches to zero, which means accurate feature matches should sit on top of each other. You may need to zoom in to see if they do. |
The matches in the top-left of the Viewer display vertical offset between the feature matches, and are highlighted in yellow. Place a user match on the corner of the building to correct them.
| 13. | Fine-tune matches by dragging the user match in one view to its corresponding position in the other view. By default, the two views are overlaid using a difference merge, in a 256px texture at x2 magnification. |
You can change the size of the overlay and magnification using the texture size (in pixels) and magnification dropdowns above the Viewer.
Tip: Holding Shift when lining up the user match displays a left/right mix of the views, using an over merge, holding Ctrl/Cmd shows the left view, and Ctrl/Cmd+Shift shows the right view in the overlay.
| 14. | The yellow matches can be deleted by pressing Backspace to improve the solve. We recommend adding at least five user matches, one toward each corner of the image to correct the overall alignment, and one at the center on the subject to focus alignment where it is important. |