DisparityReviewGizmo
Description
The DisparityReviewGizmo node allows you to check the quality of the disparity vectors. The DisparityReviewGizmo node is inserted before the Viewer in the node tree. This displays the image with a desaturated background by default, and highlights any depth changes, alignment changes, and occluded regions.
Note: To detect the occluded regions, you need to insert an O_OcclusionDetector node upstream in the node tree.
Inputs
O_DisparityReviewGizmo has the following inputs:
|
Source |
A stereo pair of images. DisparityReviewGizmo requires upstream disparity vectors. If they do not already exist, insert an O_DisparityGenerator node after the image sequence to calculate them. See DisparityGenerator |
To see a table listing the nodes or channels each Ocula node requires in its inputs, see Node Dependencies.
Using DisparityReviewGizmo
Note: DisparityReviewGizmo requires upstream disparity vectors to operate correctly.
| 1. | If disparity vectors do not yet exist in the script, you need to insert an O_DisparityGenerator node after your image sequence to calculate the disparity vectors. See DisparityGenerator for how to do this. |
| 2. | Select Ocula > Ocula 4.0 > DisparityReviewGizmo to insert an DisparityReviewGizmo node either after the O_DisparityGenerator node if you added one in the previous step, or after the image sequence. |
| 3. | Connect a Viewer to the O_DisparityReviewGizmo node. Your node tree should now look something like this: |

| 4. | In the DisparityReviewGizmo controls, output is set to stereo by default. You can also change this to disparityR (right), disparityL (left), or side-by-side. See the Controls section for more information. |
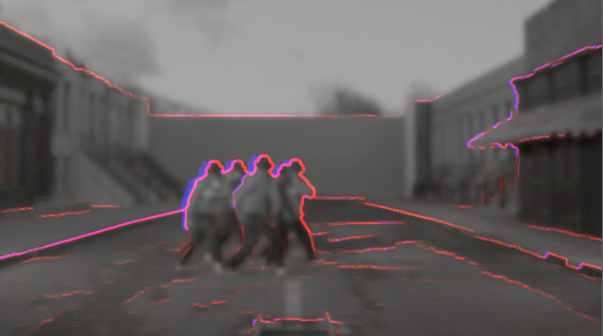
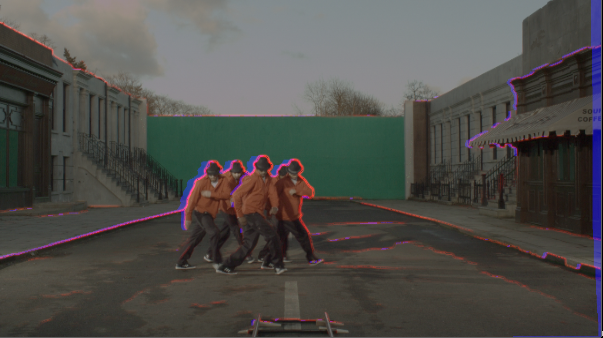
| 5. | You can choose different backgrounds to view including image, desaturated and disparity. By default, the background control is set to desaturated. This displays the image with a desaturated background and highlights the following: |
• Depth changes are highlighted in red.
• Alignment changes are highlighted in green.
• Occluded pixels are highlighted in blue. To detect the occluded regions, you need to insert an O_OcclusionDetector node upstream in the node tree.

|

|
|
The original left view of a stereo image. |
The left view with DisparityReviewGizmo node highlighting any depth changes, alignment changes, and occluded regions. |
| 6. | Adjust the DisparityReviewGizmo controls to get the required overlay. See the following Controls section for more information. |
DisparityReviewGizmo Controls
Output
This is set to stereo by default. When you are using Ocula to update one view to match another, it is advised to check the quality of the view that has been updated. Set the output to one of the following:
|
stereo |
Select stereo to check the quality of both views (left and right) at the same time. |
|
disparityR (left) |
Select this to check the quality of the right view and disparityR only.
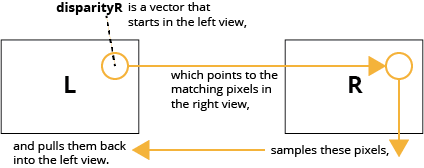
So the R in disparityR means that it samples from the right view and the vectors originate in the left view. They define how to match the right view and rebuild the left just from the right pixels. |
|
disparityL (right) |
Select this to check the quality of left view and disparityL only.
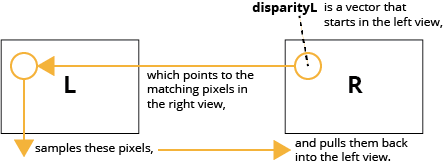
So the L in disparityL means that it samples from the left view and the vectors originate in the right view. They define how to match the right view and rebuild the left just from the right pixels. |
|
side-by-side |
Select side-by-side to output both views beside each other.
|
Background
Use the background control to set the image displayed in the background, which the highlights are then displayed on top of. This is set to desaturated by default.
|
image |
Select image to display the original image in the background. |
|
|
desaturated |
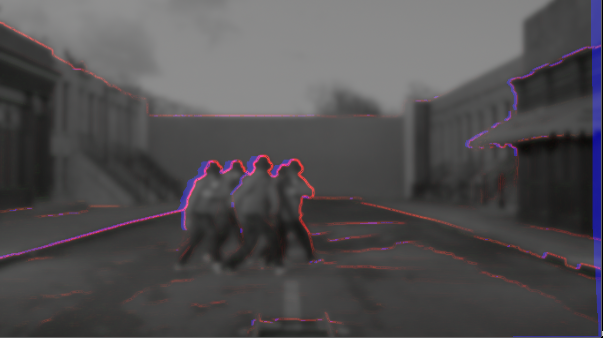
Select desaturated to display a grayscale version of the original image. This makes the highlights more visible. |
|
|
disparity |
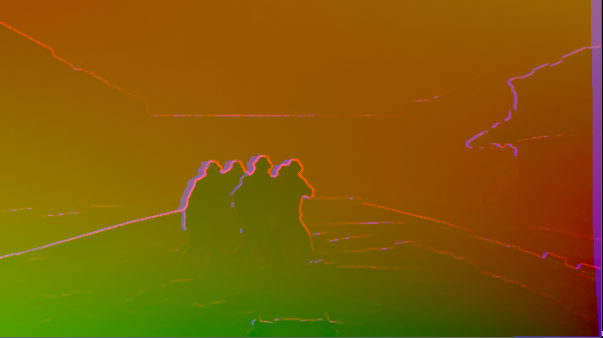
Select disparity to view the disparity vectors for the selected view. This is useful for when you are tuning or editing upstream disparity as it helps you understand how the vectors change as well as allowing you to quality check the output. Set the disparity Limits controls to grade the disparity vectors. |
|
Intensity
Use the intensity control to set the intensity of the background image. To make the quality check highlights more visible, reduce the intensity control.
xDisparity
You can use the xDisparity Intensity control to set the amount of horizontal disparity changes (depth changes) displayed. These changes are highlighted in red. This is useful when you are tuning O_DisparityGenerator to ensure depth changes are correct, or when checking a disparity precomp to determine if there are any irregularities that need to be corrected.
yDisparity
Use the yDisparity Intensity control to set the amount of vertical disparity changes (alignment changes) displayed. These changes are highlighted in green. This is useful to check the quality of vertical disparity when performing a vertical alignment, or to check vertical alignment along with depth to see if there is a misalignment in the camera rig.
Occlusion
Note: To detect the occluded regions, you need to insert an O_OcclusionDetector node upstream in the node tree.
You can use the occlusion control to set the amount of occluded regions displayed. In DisparityReviewGizmo, these changes are highlighted in blue. Occluded regions are pixels that are visible in one view and not the other. This is useful to quality check occluded regions when rebuilding or updating one view from another.
Limits
Note: These controls are only available when the background control is set to disparity.
|
xMinimum |
Set the minimum parallax used to grade horizontal disparity. |
|
xMaximum |
Set the maximum parallax used to grade horizontal disparity. |
|
yMinimum |
Set the minimum pixel offset used to grade the vertical disparity. |
|
yMaximum |
Set the maximum pixel offset used to grade the vertical disparity. |
Set Limits
Click Set Limits to automatically set the minimum and maximum parallax and vertical offset, by sampling the input disparity at the current frame. You can keyframe the limit settings at different frames in the sequence.
Reset Limits
Click this to reset the disparity limits to the default values.
