Photoshop Extension Workflows
The following video provides an overview of how Flix and Photoshop work together.
Setting Up Flix to Work with Photoshop
To use Photoshop with Flix, you need to configure Photoshop as your sketching tool and install the Flix Photoshop plugin.
Note: Ensure Photoshop is closed while setting preferences in Flix.
Configure Flix to Use Photoshop
Open the Sketching Tools settings:
-
Navigate to File> Preferences on Windows or Flix> Preferences on macOS. Alternatively, use the Ctrl/Cmd+, (comma) keyboard shortcut.
-
Expand Third Party Apps and click Sketching Tools.
Set up Photoshop as the sketching tool:
-
Choose Adobe Photoshop as the Sketching Tool.
-
Click BROWSE to locate and select the Photoshop executable. This populates the Executable field.
Install the Flix Extension for Photoshop
You must install the Photoshop Flix extension to use the Flix plugin in Photoshop. For instructions on how to do this see Managing Extensions & Plugins.
Once the extension is installed, open it in Photoshop by selecting Plugins > Flix > Flix.
Customizing the Flix Plugin
The plugin can be customized to suit your workflow by hiding action categories and collecting favorites into a separate section.
Viewing options can be selected using the plugin hamburger menu.
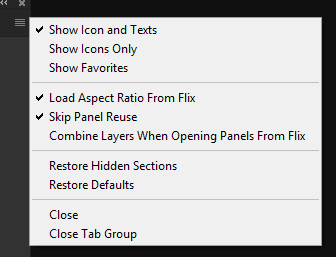
Action Display Options
By default, the action includes an icon and a text label.
-
Click on the hamburger menu and select Show Icons Only to remove the text label
-
Click on the hamburger menu and select Show Icon and Texts to show both icon and text.
Hiding and Managing Favorite Actions
You can hide any category that you no longer need on the plugin panel.
-
Right-click on the category name and select Hide This Section.
The plugin lets you choose favorite actions to show in the Favorites section.
-
Click on the hamburger menu and select Show Favorites to show the Favorites section.
-
Right-click on any action to add it to favorites. Once added, right-click to remove it.
Restoring the Default Layout
-
To reverse any customization and reset to factory defaults, click on the hamburger menu and select Restore Defaults
Defining Panel Preferences
-
If the Skip Panel Reuse option is enabled, any image sent from Photoshop will be added in Flix as a new panel. The image will have a new panel ID or new panel revision. Disable this option to reuse an existing panel revision in Flix.
Photoshop Workflow Options
The Flix plugin offers four ways of composing panels to suit your preferred workflow.
-
Images - This is perhaps the most common workflow and involves simply sending the currently visible image as shown on the Photoshop canvas to Flix as a panel. You can also create a set of thumbnails in a single Photoshop file to design nine panels in a 3x3 grid. Each thumbnail in the grid corresponds to a single panel.
-
Layer Comps - You can maintain alternate versions of images by taking a snapshot of layer visibility, position, and style as a 'layer comp'. You can then use the layer comps to generate Flix panels. Each layer comp corresponds to a single Flix panel.
-
Frame - Photoshop can maintain a sequence of images as frames on a timeline. This is a neat way of previewing panels and playing through the sequence. Any of the frames can be sent to Flix as panels.
-
Layer - Should you prefer, you can design panels using layers and layer groups in Photoshop. Each group or a non-grouped layer corresponds to a single panel in Flix.
Note: When using the Photoshop 1.3.0 extension, the Flix Layer Comp workflow and Frame workflow also work with Photoshop Smart Objects. See more information at Working with Photoshop's Layer Comps andWorking with Photoshop's Frame Timeline.
About Source Files
Throughout this document, we refer to a 'Source File', which is the original file that was used to generate panels. In Flix, when you open panels in Photoshop, you have the option to open the source file or open a file that contains only the visible elements in the panel.
Note: Prior to Flix 7, the Source File was referred to as the Master Image.
-
To open the source file in Photoshop, navigate to Flix > Preferences > Third Party Apps > Sketching Tools and activate Always Open Source File.
To open a source file, it must be stored on the Flix server.
-
To send the source file from Photoshop to the Flix server when sending/replacing panels, check the Always include source file checkbox at the bottom of the Flix plugin.
Note: Source files can inevitably take up more storage on the Flix server than files holding only visible layers. As a result, your organization may recommend best working practices when managing source files to avoid using excessive server storage.
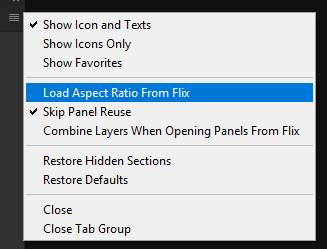
Setting the Aspect Ratio
Make sure you use the correct aspect ratio for your project. By default, the Flix plugin loads the aspect ratio from Flix.
To set the aspect ratio manually:
-
Open the hamburger menu on the Flix plugin and uncheck Load Aspect Ratio from Flix.
-
Use the Aspect Ratio dropdown at the bottom of the plugin to select the required value.
Pushing Panels to Flix
All the workflows have both Send and Replace actions.
Send Actions
Send actions simply insert new panels into the timeline after the current panel selection in Flix.
If the Skip Panel Reuse option is enabled in the hamburger menu on the Flix plugin, any image sent from Photoshop will be added in Flix as a new panel. The image will have a new panel ID or new panel revision, instead of reusing an existing panel revision.
Replace Actions
Replace actions are used to create a new versions of panels in Flix, based on the current panel selection.
When replacing multiple panels, panels are generated in the order of the items used to define the panels in Photoshop. For example, in the order of the Layer Comp list.
Multiple panels will overwrite the same number of panels in Flix. For example, if you have 5 layer comps, you can push them to Flix in order using a single action (Replace Each Layer Comp). This replaces 5 panels in parallel.
Sending New Panels and Thumbnails To Flix
Note: Transferring panels from Photoshop to Flix locks the target Flix revision and you cannot open a new panel in Photoshop or use any of the replace actions during the transfer process.
Create a Panel and Send it to Flix
Flix sends the panel to the edit (sequence revision). The panel is inserted after the currently selected panel
-
Click New Template to open a blank canvas with the correct aspect ratio.
-
Add your artwork.
-
When you're ready to send, click Send Current Image or a different send option if you're using another workflow (see Photoshop Workflow Options).
Creating Thumbnails and Sending them to Flix
Flix sends the thumbnails to the edit. They are inserted as nine new individual panels after the currently selected panel, if any.
-
Click New Thumbnails
-
Draw on the thumbnails.
-
Click Send Thumbnails.
Annotating a Panel Using Photoshop
This video demonstrates how to make annotations on Flix panels using Photoshop.
-
In Flix, select a panel in your edit and click the Open in Sketching App
 button.
The panel opens in Photoshop.
-
In Photoshop, create a new layer and draw an annotation on that layer.
-
In the Flix toolbar, click Send Selected Layers as Annotation.
In Flix, click the Toggle annotations ![]() button under the player to show the new annotation.
button under the player to show the new annotation.
Sending Saved Changes to Flix From Photoshop
When you Save a file in Photoshop that was opened from Flix, the changes will update on the Flix sequence revision.
When you are working on a file in Photoshop and close the file before saving any changes, you will be prompted to save the document before closing. When you are using the Photoshop 1.3.0 extension, selecting Yes to saving any new changes before closing will also send these changes to Flix.
This workflow works for panels that have been sent from Flix as separate PSDs, layer comps, and timeline frames.
Note: This feature only works when closing a single document at a time. It will not work with the Close All option in Photoshop, or when closing Photoshop entirely.
Working with Photoshop's Layer Comps
Layer Comps let you maintain different versions of your work in a single .psd according to visibility, style, and position of layers.
For more information on using layer comps, see the official documentation.
When using the Photoshop 1.3.0 extension, the Flix Layer Comp workflow also works with Photoshop Smart Objects.
Sending Layer Comps
The Flix plugin lets you send either Selected layer comps or every (Each) layer comp. One layer comp generates a single panel, and so the number of panels generated is the same as the number of layer comps you have in the file.
-
Select Send Each Layer Comp or Send Selected Layer Comps to send the layer comps after the currently selected panel in Flix.
Note: Check Always include source file to send the source file to Flix. See Photoshop Extension Workflows.
Making Revisions Using Layer Comps From Source Files
When revising panels, they may be generated using layer comps for which you have stored the source .psd. In this case, you can reopen the source file in Photoshop to apply your revisions.
Note: If a layer does not have a stored source file, see Making Revisions Using Layer Comps Without Source Files.
-
Ensure the File > Preferences > Third Party Apps > Sketching Tools> Always Open Source File is enabled.
-
Select the panel in Flix you want to revise.
-
In the main toolbar, click the Open in Sketching app
button. -
This opens the master image in Photoshop with all the information, including hidden layers and empty groups.
-
In Flix, this opens the Master file that the panel is linked to in Photoshop.
-
After you are done working on your master image, save the .psd file and select Replace Each Layer Comp from the Photoshop actions.
In Flix, this updates panels from in the order of the first layer comp to the last.
This video demonstrates how source images are created and where Flix stores them.
Making Revisions Using Layer Comps Without Source Files
Panels may not have a stored source file, but you may want to use layer comps as a way of storing and editing a collection of panels. In this case, you can send any number of panels to Photoshop and have them collected in a single file containing one layer comp for each panel.
-
To send panels to a Photoshop file using layer comps:
-
In Flix, navigate to File > Preferences and open Third Party Apps > Sketching Tools.
-
Set Panel Open Behaviour to Open in Layer Comps.
-
In your edit (sequence revision), select the required panels you want to open as layer comps.
-
When using the Photoshop 1.3.0 Flix extension in, you can specify the layer comp attributes that you want to apply to your new layer comps. These attributes are Visibility, Position, Appearance and Smart Object Selection. If the file in Flix already has a layer comp, then the existing options of that layer comp will be used.
-
In the main toolbar, click the Open in Sketching app
button to send your panels to Photoshop. -
This opens one .psd file containing a layer comp for each selected panel, each layer comp containing the layers for the selected panels.
-
Edit and save the .psd file to automatically update the Flix panels.
Combining Layers Workflow for Layer Comps
Often, when working with layer comps, there will be panels that are sent to Flix from Photoshop that share layers (such as a common background across multiple panels). When these are opened as layer comps in Photoshop from Flix, by default a layer will be created for each panel, creating duplicates.
In the Photoshop 1.3.0 extension, there is an option to combine these layers instead of duplicating them. This option can be found in the burger menu of the Flix extension window: Combine Layers When Opening Panels From Flix.
With this option selected, opening multiple panels from Flix as Layer Comps combines common layers together. These layers will be in the correct position for each layer comp, and layer effects and displays options for each layer comp will update.
Note: Changes to layer mask settings are not currently supported by this workflow.
Note: Ensure that the common layers you want combined are from the same source document to prevent any problems with combining layers.
This workflow can be helpful in reducing duplicates, and also means you can utilize the layer comps of Smart Objects. The Smart Object layer will only appear once within the layer list, and the Smart Object’s selected layer comp will be applied to each panel when switching through layer comps.
Working with Photoshop's Frame Timeline
Photoshop's timeline feature is a useful tool to construct an animation or play through a series of stills.
You can capture the state of your layers and add the resulting image as a frame to the timeline. By manipulating layer visibility and properties, you can build a sequence of frames and play through them.
The Flix plugin lets you send frames from Photoshop and use them to generate panels in Flix.
Note: For more information on the timeline, see the official documentation.
Send Each Frame To Flix
To send each frame as a separate panel, click Send Each Frame.
Note: Check Always include source file to send the source file to Flix. See Photoshop Extension Workflows.
Making Revisions Using Frames and Source Files
You can revise Flix panels in Photoshop using existing source files that have already been set up using the timeline frame workflow.
To revise a panel using the timeline-based workflow:
-
In Flix, ensure File > Preferences> Third Party Apps > Sketching Tools>Always Open Source File is enabled.
-
Select the panel you want to work on.
-
In the main toolbar, click the Open in Sketching app
button.This opens the source file in Photoshop with all the information, including hidden layers and empty groups.
-
Edit the frames in Photoshop.
-
To propagate the changes, save the .psd file and select Replace Each Frame from the Photoshop actions.
This updates panels in Flix from the first selected.
Making Revisions Using Frames Without Source Files
If you haven't yet used the timeline frame workflow or do not have the original source file, you can create timeline frames in Photoshop from existing Flix panels.
Note: When you are working in a Frame Timeline without any original source file, in the Frame Timeline, click the hamburger menu and disable New Layers Visible in All Frames. This displays all the frames in the Frame Timeline as separate frames, otherwise all the frames use the same images.
-
Navigate to File > Preferences > Third Party Apps > Sketching Tools > Panel Open Behavior and select Open in Timeline.
-
In your edit (sequence revision), select the required panels you want to open in a timeline.
-
In the main toolbar, click the Open in Sketching app
button to send your panels to Photoshop.This opens a .psd file containing one frame for each selected panel, each frame containing the layers used for the selected panels.
-
To propogate the changes to Flix, save the .psd file.
Combining Layers Workflow for Frame Timeline
Often, when working with timeline, there will be panels that are sent to Flix from Photoshop that share layers (such as a common background across multiple panels). When these are opened as layer comps in Photoshop from Flix, by default a layer will be created for each panel, creating duplicates.
In the Photoshop 1.3.0 extension, there is an option to combine these layers instead of duplicating them. This option can be found in the burger menu of the Flix extension window: Combine Layers When Opening Panels From Flix.
With this option selected, opening multiple panels from Flix in Timeline combines common layers together. These layers will be in the correct position for each frame, with only the required layers visible. Layer effects and displays options for each frame will update.
Note: Changes to layer mask settings are not currently supported by this workflow.
Note: Ensure that the common layers you want combined are from the same source document to prevent any problems with combining layers.
This workflow can be helpful in reducing duplicates, and also means you can utilize the layer comps of Smart Objects. The Smart Object layer will only appear once within the layer list, and the Smart Object’s selected layer comp will be applied to each panel when switching through layer comps.
Working with Photoshop's Layers/Groups
The Flix plugin lets you create panels from layers in Photoshop.
When working with your file in Photoshop, you have two ways of delivering panels to Flix:
-
Send layers to create new panels in Flix
-
Replace panels from the selected panel position in Flix using the Photoshop layers
Note: Make sure the layers or groups you want to send are visible, otherwise they will be ignored.
The Flix plugin has the following send actions and a Replace version for each action:
-
Send Each Layer - Sends to Flix each visible layer in an image as a separate panel.
-
Send Each Layer + BG - Sends to Flix each visible layer in an image as a separate panel but keeps the background the same for each one.
-
Send Each Layer + FG/BG - Sends to Flix each visible layer in an image as a separate panel but keeps the background and foreground the same for each one.
-
Send Selected Layers - Sends to Flix only the selected layers of the image as a new panel.
Note: Check Always include source file to send the source file to Flix. See Photoshop Extension Workflows.
Making Revisions from Layers and Groups With Source Files
If you have the source file associated with your panel, you can send this to Photoshop to make revisions.
To open the panel's source file in Photoshop:
-
Ensure the File > Preferences > Third Party Apps > Sketching Tools >Always Open Source File is enabled.
-
Select the panel you want to work on.
-
In the main toolbar, click the Open in Sketching app
button. -
This opens the source file in Photoshop with all information including hidden layers and empty groups.
-
Edit the file and save the .psd
-
Select a Send or Replace layer action (see above) from the Flix plugin actions.
This updates panels in Flix from the first selected starting from the first layer or group.
Making Revisions to Layers and Groups Without Source Files
If you don't have the source file for your panel(s), you can create a .psd with layers corresponding to the selected panels.
To create a .psd with layers using selected panels:
-
Navigate to File > Preferences > Third Party Apps > Sketching Tools > Panel Open Behavior and select Open as separate PSD.
-
In your edit (sequence revision), select the required panels you want to open as layers or groups.
-
In the main toolbar, click the Open in Sketching app
button to send your panels to Photoshop.This opens a .psd file containing your layers or group for each selected panel.
-
To push your changes to Flix, edit the layers and save the .psd file
This automatically replaces the opened panels with the updated layers or groups.