Color-coding Source Clips and Shots
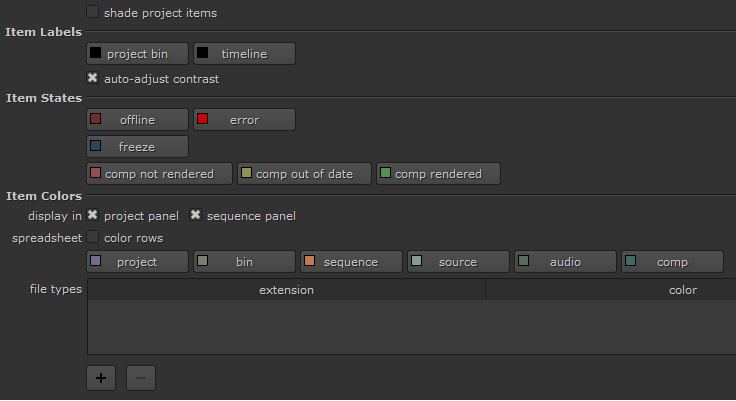
In large projects, the Project bin and timeline can quickly become busy and difficult to manage. Adding colors to items or file types can help you find what you're looking for in bins and sequences. You can quickly enable and disable colors in the Project panel and timeline in the Preferences under Panels > Project Items. See the Preferences page under Panels for more information.
You can set general defaults for items such as bins, sequences, and source clips as well as for specific file types such as .exr or .mov files. You can also set custom colors for individual selections or groups using the right-click menu or color picker button at the top left of the Project panel.
Setting Default Colors
Project items have a default color assigned to them by type, such as orange for sequences and gray for source clips. You can change these assignments using the Preferences > Panels > Project Items dialog.
Note: You can disable the color scheme in the Project panel, timeline, and spreadsheet at any time using the display in controls in the Preferences.
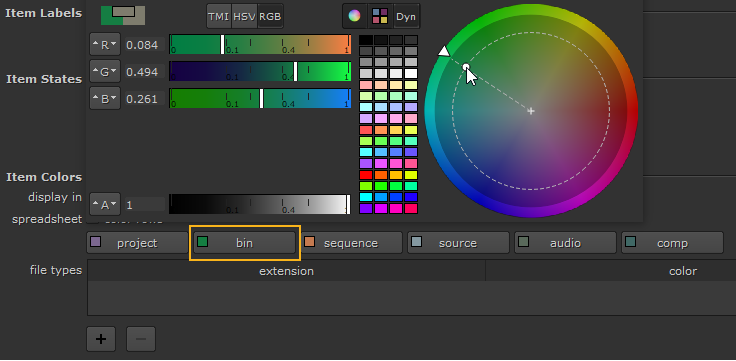
To change a default color, click a button in the Project Items preferences and use the color wheel to change the color.
You can also set the label color for the Project panel and timeline or change the color used to indicate the state of a shot on the timeline, such as offline.
Setting Colors by Selection
You can keep track of particular clips and shots by manually assigning them a color of their own. This custom color overrides any color you set by type. You can set colors on items individually or by selecting multiple instances in the Project panel or timeline.
| 1. | In the Project panel or timeline, select the items you want to color. |
Tip: The selection tools can help you make multiple selections quickly in the timeline. See Using the Selection Tools for more information.
| 2. | Right-click the selection and choose Color > Color Picker or click a color under Recent. |
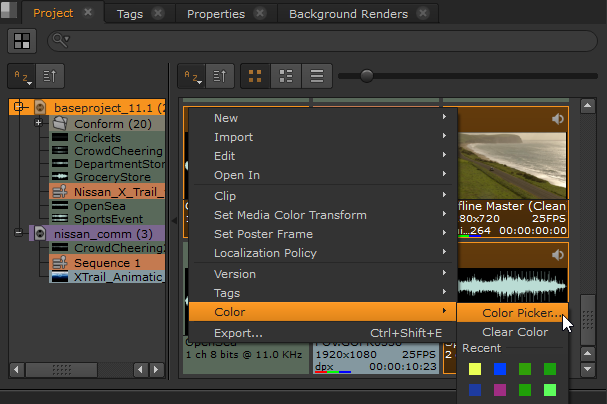
| 3. | Click Clear Color to remove any custom colors applied to the selection. The selection reverts to the default item color set in the Preferences. |
Setting Colors by File Type
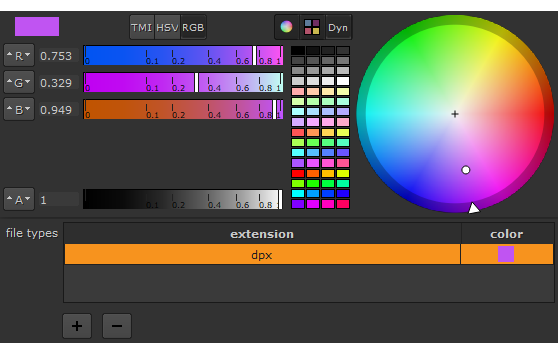
Another way to organize your project is to assign colors to items by file extension. This custom color overrides any color you set by item type.
| 1. | Open the Preferences by pressing Shift+S. |
| 2. | Navigate to the Panels > Project Items sub-menu. |
| 3. | Under file types, click the |
A new entry is added to the file types table.
| 4. | Click the extension dropdown and select the required file type. |
| 5. | Double-click the color swatch and select the new color using the color wheel. |
| 6. | Click OK to apply your changes. |