Performing a Render
You can start a render from the Katana UI by clicking Render and choosing a render option, or by right-clicking a node and choosing a render option. Bear in mind that not all options are available from all nodes.
Note: For more information about the render options, see Render Types.
For more information about which options are available from which node types, see Render Type Availability.
To cancel the current render, press Esc, or select Render > Cancel Current Render.
To cancel all renders, press Shift + Esc on the keyboard or select Render > Cancel All Renders.
You can repeat the previous render by pressing Ctrl + \ (backslash), or choosing Render > Repeat Previous Render.
Note: You can also perform Preview Renders, Live Renders and Disk Renders using the Katana Queue options, for more information on the Katana Queue, see Katana Queue.
Performing a Preview Render
You can perform a Preview Render at any 3D node within your recipe. A scene description is generated up to that node. The extent that the scene is generated or deferred depends upon the renderer. The scene description is then sent to the actual production renderer, and the results are visible in the Monitor tab, the Catalog tab and the Monitor Layer in the Hydra Viewer.
To perform a Preview Render:
- Right-click on a 3D node within your Node Graph.
- Select Preview Render.
You can also start a Preview Render from a node currently set with the view flag by selecting Render > Preview Render View Node, or by pressing Ctrl + P on the keyboard.
Performing Multiple Simultaneous Preview Renders
Multiple Preview Renders can be performed simultaneously in Katana. By default, if a Preview Render is already running and you start another, both Preview Renders continue until complete or canceled. Katana does not limit the number of Preview Renders you are able to run simultaneously, you are only limited by hardware capabilities.
The ability to run multiple Preview Renders simultaneously is useful as it means you don't need to wait until one render is finished before starting a new one. This can help workflows for lighting artists, for example, as multiple camera angles can be rendered at once, streamlining the process of ensuring lighting is consistent across different shots.
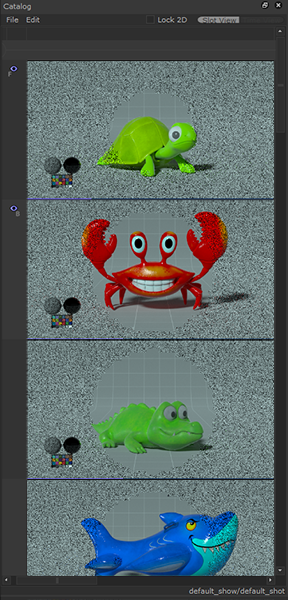
Multiple Preview Renders in the Catalog tab

Multiple Preview Renders in the Monitor tab
Note: You can start multiple Preview Renders by using the Start Multiple Renders dialog that you can find in the KatanaQueue shelf. For more information on the Katana Queue, see Katana Queue.
Article: If you are experiencing issues when rendering in Katana, please refer to the Knowledge Base article: Troubleshooting Rendering Issues in Katana.
Article: If you are using Linux and are experiencing issues where your render hangs, please refer to the Knowledge Base article: Render Hangs or Never Starts on Linux.
Performing a Live Render
Live Renders are useful for getting immediate feedback on changes you make to objects, cameras, lights, and materials. Within a Live Render session, changes to materials and object transformations on specified scene graph locations are communicated to the renderer.
To start a Live Render:
- In the Scene Graph tab, check the objects in the Live Render Updates column
 that you would like to be able to trigger a Live Render to restart when changes are made to those objects.
 - Right-click on the node that you want to start a Live Render from and select Live Render. You can also start a Live Render from a node currently set with the view flag by selecting Render > Live Render View Node, or by pressing Ctrl + Shift + P on the keyboard.
- Adjust the parameters of any object in your Scene Graph that has been included for Live Render Updates.
The image in the Monitor tab, Catalog tab and Monitor Layer updates in response to your actions.
3D node parameter values are finalized with all pending changes prior to performing a render.
Note: Triggering a new Live Render while a previous Live or Preview Render is running automatically cancels the previous render in favor of the new one. You can, however, start a new Preview Render while a Live Render is running and the Live Render is not canceled.
It is possible to perform multiple Live Renders simultaneously using the experimental option in the Start Multiple Renders dialog for the Katana Queue. For more information, see Katana Queue.
Article: If you are experiencing issues when rendering in Katana, please refer to the Knowledge Base article: Troubleshooting Rendering Issues in Katana.
Article: If you are using Linux and are experiencing issues where your render hangs, please refer to the Knowledge Base article: Render Hangs or Never Starts on Linux.
Executing a Disk Render
Disk Renders can only be performed from a Render node. Render nodes acts as a render point within a Katana recipe.
To write a render pass to disk:
- Create a Render node and add it to the recipe.
Add the Render node at the point in the recipe where you are happy with the interactive render.
Tip: Add a RenderOutputDefine node above the Render node to define the output name, format, and file location.
- Right-click on the Render node and select Disk Render or Disk Render with Dependencies.
The scene graph is generated up to that node and sent to the renderer. The render is saved to your temp directory or, if your recipe has a RenderOutputDefine node upstream of the Render node, the rendered output is saved to the locations specified there.
Note: Unlike a Preview Render or Live Render, which show renders in the Monitor tab as they’re generated, the results of a Disk Render are only visible after the render is complete.
Warning: Progressive interactive renders, when configured to send image updates (buckets) with high frequency, may flood the message queue of the renderer plug-in's display driver. To prevent this from consuming unreasonable amounts of memory, the queue is limited in size and, when full, results in delays in updates being sent to Katana. A warning is then printed to the Render Log. The size of the queue (as a number of messages) can be specified using the environment variable KATANA_PIPE_MAX_QUEUE_SIZE. The default size is 16384.
Rendering From the Command-Line
To render a scene from the command-line, you can use both Katana’s Batch and Script modes:
- Batch mode - You must provide a filename or asset ID specifying the Katana project to render, the name of the Render node in the specified Katana project from which to render, and the frame range to render. For example, the following command renders the specified Katana project from the MyRenderNode node for frames 1 to 10:
katana --batch --katana-file=/path/to/myscene.katana --render-node=MyRenderNode -t 1-10
- Script mode - This mode allows you to execute a Python script in Katana’s Python environment, so you can perform more complex actions such as changing parameters, creating nodes, or modifying node connections, as well as launching renders.
Note: For more information on how to use Batch and Script modes, see Command-line Interface.