Using the {attr:xxx} and {globalattr:xxx} Syntax for Shader Parameters
For versatility, shader parameters can be set to the value of an attribute. You can do this using either local or global attributes:
{attr:<attribute name>} - queries local attributes
{globalattr:<attribute name>} - queries global (inherited) attributes
Note: Querying global attributes has a higher processing cost than local attributes.
If you define any string parameter on a shader to be {attr:xxx} (for example), then during MaterialResolve it looks for an attribute called xxx at the location the material is being assigned to, and uses that as the shader value.
To illustrate, suppose you have a 3Delight file reader shader with a parameter called filename, and you set filename to {attr:textures.ColMap}. filename is set to the value of the attribute textures.ColMap on any location the material is assigned to. This means you can set up the original shader to automatically pick up relevant texture name attributes for every object it is applied to.
Example of Using {attr:xxx} to Assign a Parameter
The following steps show you how to create a 3Delight Network Material with a File node, and link the filename parameter of the ImageRead node to a textures.ColMap attribute on geometry locations.
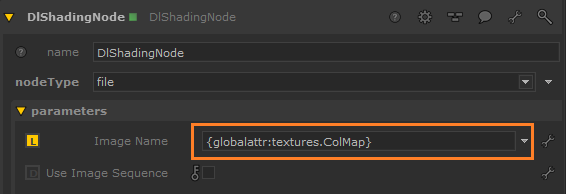
| 1. | In an empty Katana scene create two DlShadingNodes, set one to type File, and one to type Material3Delight. Link the outColor of the File node, to the BaseLayer>Diffuse>Color parameter of the Material3Delight node. |
| 2. | In the filename field in the Image node’s parameters enter: |
{attr:textures.ColMap}
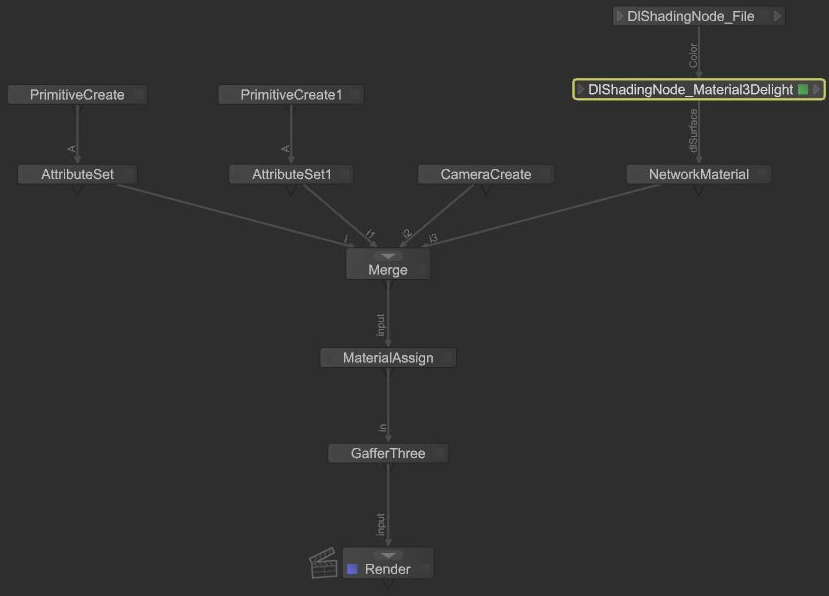
| 3. | Add a NetworkMaterial node, with a dlSurface terminal. Connect the output of the Material3Delight node to the input of the NetworkMaterial node. |
| 4. | Add two PrimitiveCreate nodes and two AttributeSet nodes. With the AttributeSet nodes set a string attribute with the attributeName textures.ColMap on each primitive location. Set the stringValue for each to the path to a texture (for example /tmp/yourTexture.tx and /tmp/yourOtherTexture.tx). |
| 5. | Add a CameraCreate node. |
| 6. | Connect the outputs of PrimitiveCreate nodes, the CameraCreate, and the NetworkShading node to inputs on a Merge node. Add a MaterialAssign node below the Merge node. Assign the NetworkShading material to each applicable scene graph location. For example, use the CEL statement: |
/root/world/geo//*
Assignments created using {attr:yourParameter} are evaluated during material resolve. Therefore any material using those parameters must be explicitly assigned to any relevant scene graph locations, rather than relying on inheritance.
| 7. | Add a GafferThree below the RenderSettings node, and add a spotlight. |
| 8. | Add a Render node below the GafferThree node. |
| 9. | Position the spotlight, and the camera. |
| 10. | Right-click on the Render node and select Preview Render. |
At material resolve time Katana picks up the texture.ColMap parameter on each of the geometry locations, and creates an instance of the assigned material for each, with the material’s filename parameter set to the value of textures.ColMap.
Note: Because {attr:xxx} is evaluated during MaterialResolve you must apply the base material directly to every object that needs it, rather than using material inheritance in the hierarchy.