Node Parameters and Interface Controls
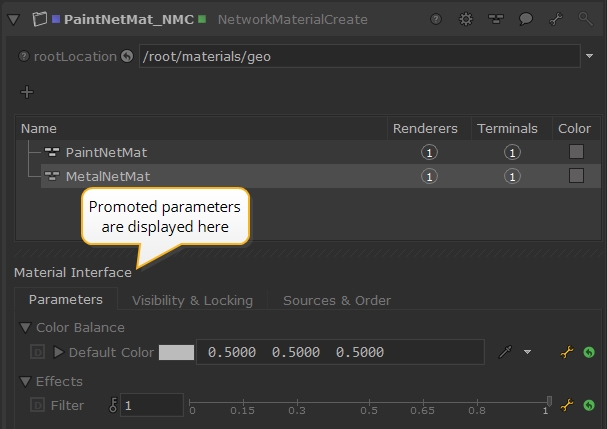
The node parameters and interface controls are found in the Material Interface of the NetworkMaterialCreate node. These controls can be used to customize various shading node parameters that you may want to be accessible from outside the NetworkMaterialCreate node. The controls can be used to provide an artist-friendly set of parameters, established inside the NetworkMaterialCreate node, presented outside as an interface for controlling certain aspects without being exposed to all of the parameters. This can be beneficial as it allows the artist to focus only on the necessary parameters and make quick alterations without having to enter the NetworkMaterialCreate node.
|
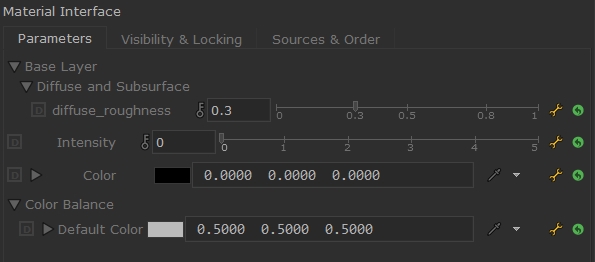
Promoted parameters in a NetworkMaterialCreate Parameters tab |
Adding Custom Parameters to the Material Interface
Network Materials can contain any number of nodes and opening the group to access node parameters is time consuming. If you know that some node parameters are used often, you can expose those internal node parameters on the parent NetworkMaterialCreate's Parameters tab for ease of access. You can promote parameters from any shading node within your NetworkMaterialCreate node, including those within ShadingGroups.
To promote parameters quickly with the default Name, Page, and Label:
-
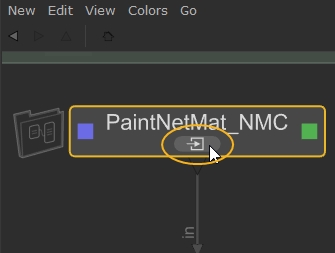
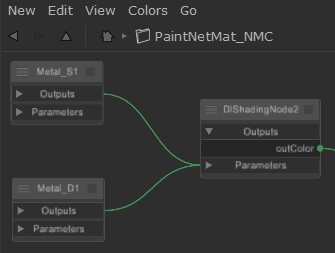
Click the NetworkMaterialCreate node's expand button to display the nodes inside.
-
Double-click the node that contains the parameters you want to expose, or press the E keyboard shortcut.
-
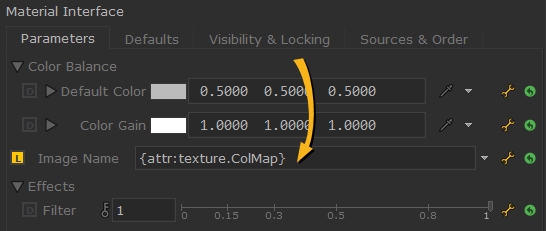
Click the wrench icon
 to the right of the parameter you want to expose and select Add to Material Interface.
 -
Open the Parameters for your NetworkMaterialCreate node to see your promoted parameters.
- Click the wrench
 and select Remove from Material Interface to remove an exposed parameter.
 - Click the green arrow
 next to a parameter to open its source node's Parameters.
|
|
|
Tip: If the source node is in a ShadingGroup, click the ShadingGroup node's expand button to display the nodes inside and then double-click the node that contains the parameters you want to expose..
The node's Parameters tab opens.
The wrench turns yellow ![]() to indicate that the parameter is added to the Material Interface.
to indicate that the parameter is added to the Material Interface.
Editing a parameter in the Material Interface or the source node updates both, so your nodes and NetworkMaterial are always synchronized.
To promote a parameter and customize its appearance:
- Bring up the Parameters of your shading node by setting the edit flag.
- Click on the Edit Parameter
 wrench icon on the right-hand side of the parameter you would like to promote.
 - Choose Edit Material Interface Options from the dropdown menu.
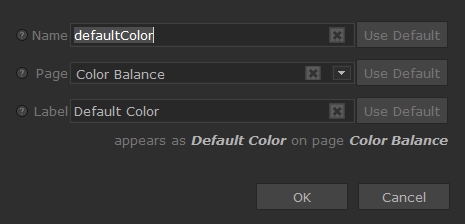
- In the dialog box, enter the name you would like to give to the parameter in the Name field.
- You can use the Page and Label fields to customize the appearance of the parameter.
• Page - creates a subsection in the Parameters tab and places the new parameter in that subsection. If you leave Page blank, the new parameter is added directly to the Parameters tab.
• Label - specifies the label describing the new parameter.
Tip: Pages appear as dropdowns in the Parameters tab. To create a page within a page, put a full stop between the two names. For example, Base Layer.Diffuse and Subsurface creates a page called Base Layer and a subsection called Diffuse and Subsurface.
- Click OK to finish editing.
- Open the Parameters for your NetworkMaterialCreate node to see your promoted parameters.
- Click the wrench and select Remove from Material Interface to remove an exposed parameter.
- Click the green arrow next to a parameter to open its source node's Parameters.
The Material Interface Options dialog is displayed.
Editing a parameter in the Material Interface or the source node updates both, so your nodes and NetworkMaterial are always synchronized.
Adding Prefixes to Custom Parameters from ShadingGroups
Promoting parameters from inside a ShadingGroup to the Material Interface allows you to add prefixes to parameters' page and name. This allows you to group parameters quickly without drilling down into the ShadingGroup to change the page and name of promoted parameters manually.
Note: The parameter name is its scripting reference, not its label in the Material Interface.
To add a prefix to promoted parameters:
-
Open the Parameters for your ShadingGroup node.
-
Click the publicInterface dropdown to open the prefix panel.
-
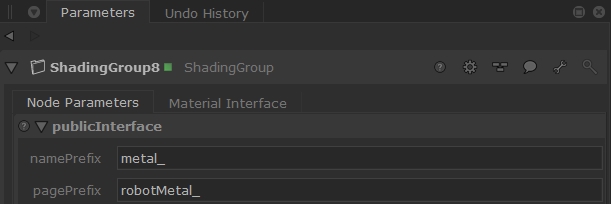
Enter the required prefixes in the available fields:
-
Open the NetworkMaterialCreate node's Parameters.
• namePrefix - adds a prefix to the promoted parameter's name. This is the parameter's scripting reference, not its label in the Material Interface.
• pagePrefix - adds a prefix to the page name visible in the Material Interface.
For example:
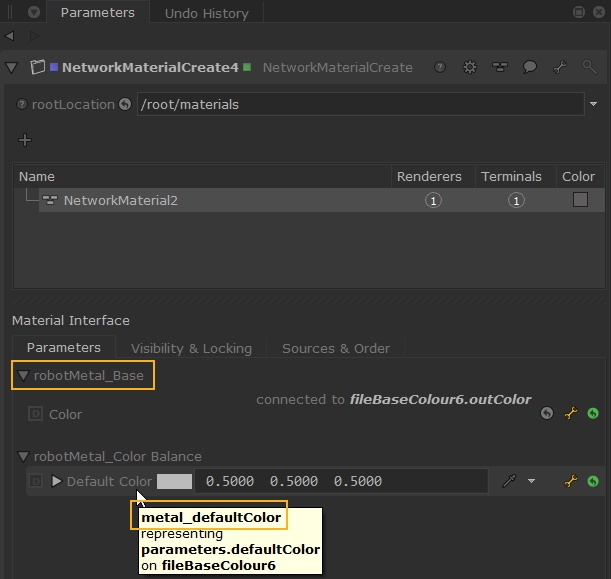
The promoted parameters are prefixed as described.
Note: The name prefix is only displayed when you hover over a parameter.
Adding Visibility and Lock Constraints to Parameters
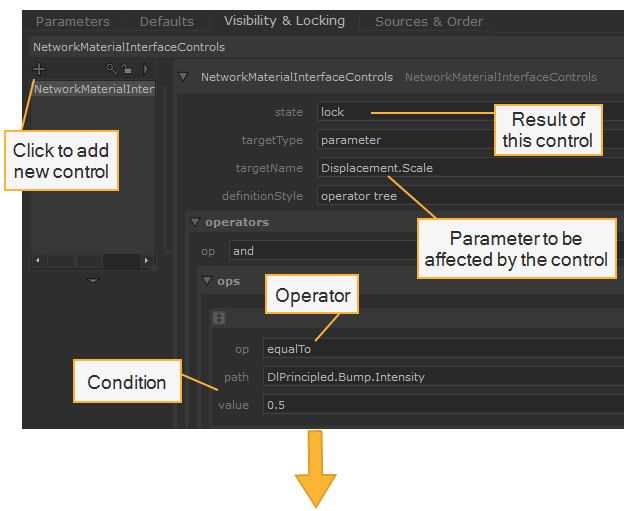
The Visibility & Locking tab uses a GroupStack node that automatically sets the type to NetworkMaterialInterfaceControls. It can manage any number of controls from within the parameters of a NetworkMaterialCreate node.
Visibility & Locking allows you to lock or hide promoted parameters so they cannot be changed under certain conditions. The conditions depend on the operator and the value of another promoted parameter. You can add multiple conditions and operators to customize the public parameter interface exactly as you need.
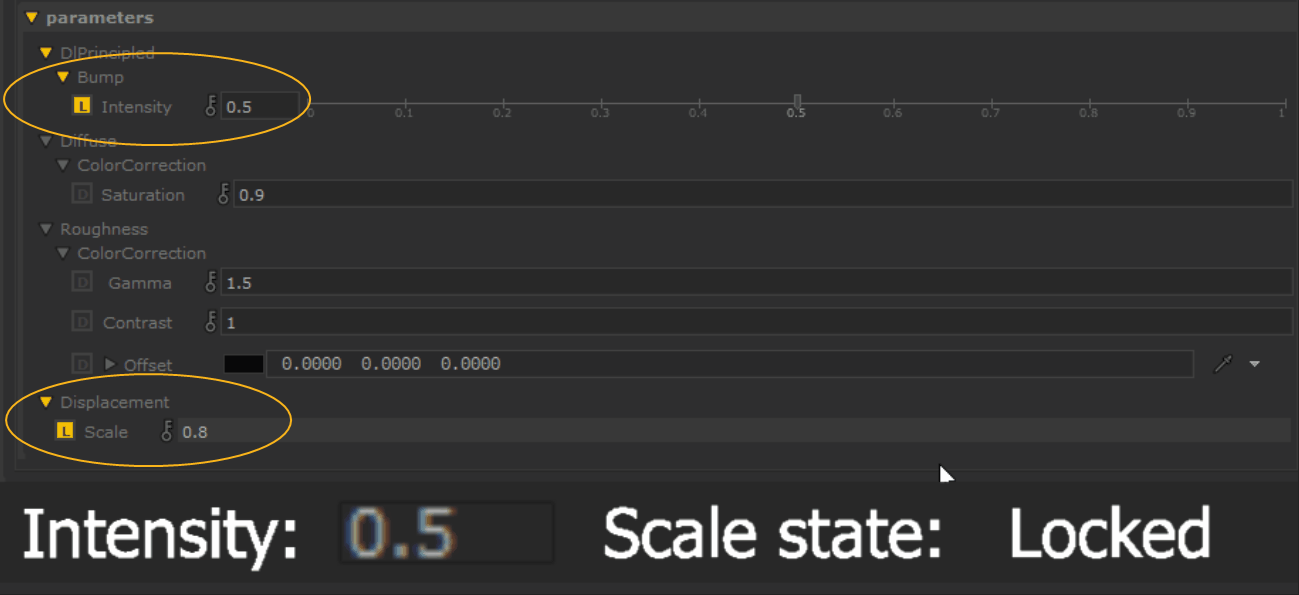
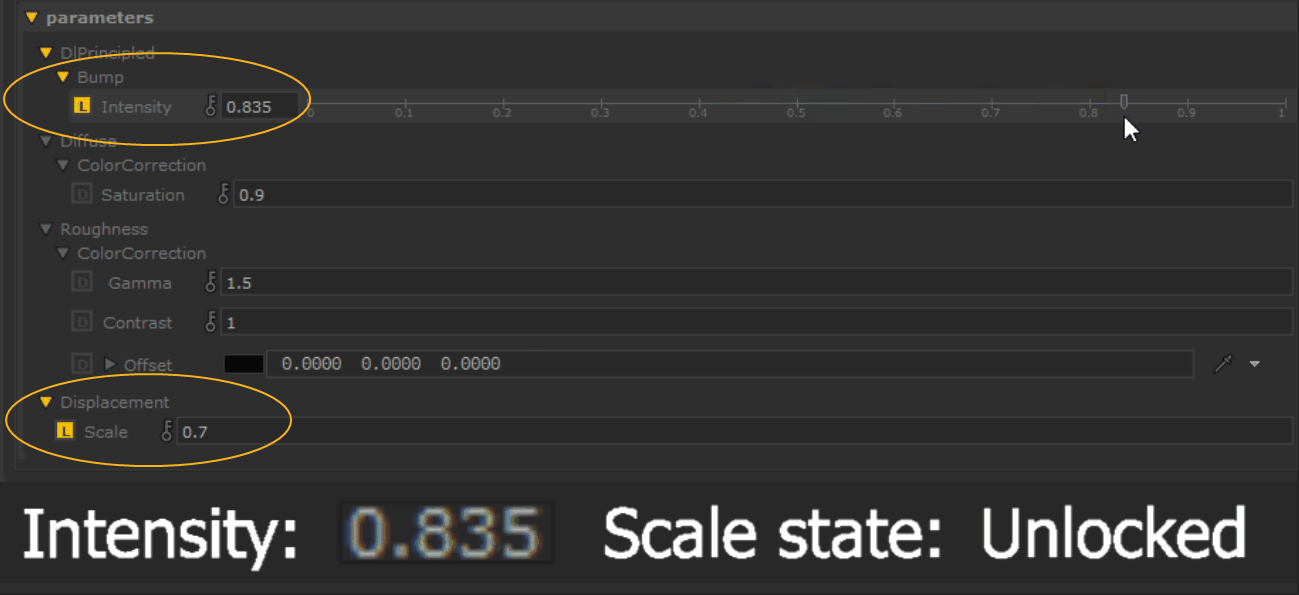
In this example, a control has been set up that causes the parameter Displacement.Scale to lock on the condition that the value of the parameter Dlprincipled.Bump.Intensity is equal to 0.5.
|
The result of a lock on the promoted parameters |
To create a new Network Material lock or visibility constraint:
- Open the Parameters for your NetworkMaterialCreate node.
- Click the Visibility & Locking tab.
- Click the Add
 button to create a new control.
Note: For information about each parameter, see NetworkMaterialInterfaceControls.
Changing the Order of Promoted Parameters
Promoted parameters can be rearranged in whatever order you like. For example, you might want to position more commonly used parameters at the top of the Parameters tab or organize parameters alphabetically. Promoted parameters are listed in the order they appear on the Sources & Order tab.
|
|
|
Default parameter order in the Parameters tab |
|
|
|
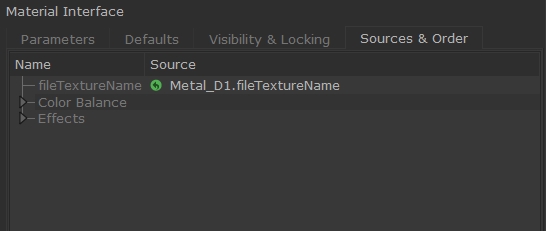
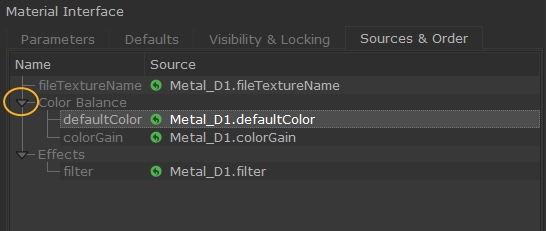
The same parameters in the Sources & Order tab |

To change the order of parameters:
-
Click the Sources & Order tab in the Material Interface.
-
Click the dropdown to display the parameters hidden in pages, if required.
-
Middle-mouse click and drag to rearrange the order of the parameters. A white line highlights the parameter's new position as a guide.
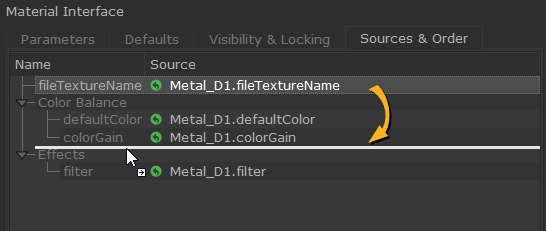
Tip: You can drag and drop entire pages or single parameters, but parameters within pages can only be reordered within the page.
The Parameters tab updates to reflect the changes you made to ordering.