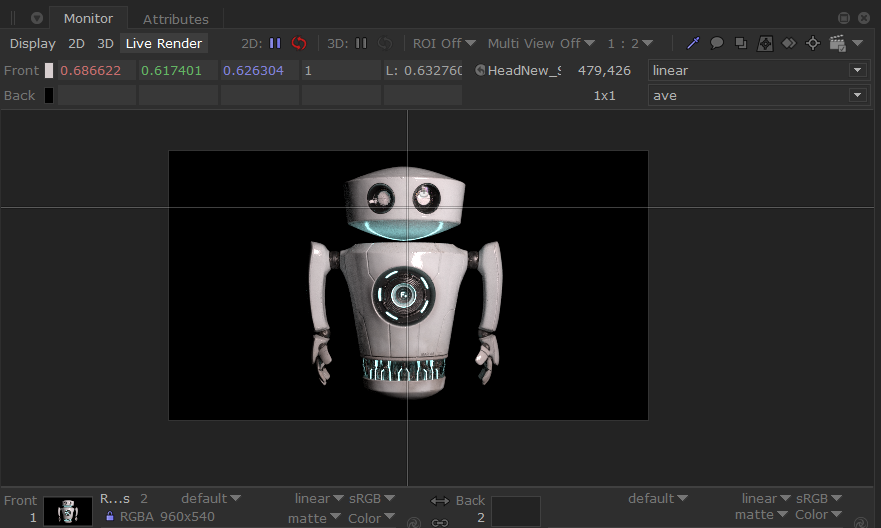
Viewing the Pixel Values
If you are viewing an image render in the Monitor tab and you want to identify geometry, you can use the pixel probe to do this:
| 1. | In the Monitor tab, turn on the pixel probe by selecting |
![]()
| 2. | To change the colorspace for the displayed pixel values, select from the top dropdown in the pixel probe toolbar. |
To change what type of pixel value you want displayed, click the lower dropdown in the pixel probe toolbar and select:
• ave - the mean average of the area selected.
• min - the lowest value for each channel from the area selected.
• max - the highest value for each channel from the area selected.
• stdDev - the standard deviation of the area selected.
| 3. | Pick a pixel on the object in the Monitor. |
To change where the pixel probe samples:
• Ctrl+click to change the sample center point.
• Click and drag the center point.
• Click and drag the vertical bar to move the sample’s center left and right.
• Click and drag the horizontal bar to move the sample’s center up and down.
• When sampling an area, click and drag the bounding border lines to change the area’s bounding rectangle.
Katana's internal 'id' channel mapping identifies the geometry that this color originates from.
| 4. | Click on the scene graph locations widget |
![]()
The scene graph location is highlighted in the Scene Graph tab.
![]()
| 5. | To turn off the pixel probe, click |
Note: For more information on the Monitor tab, refer to Using the Monitor Tab.