Easily Preview Sections of Your LookDev Using Material Solo
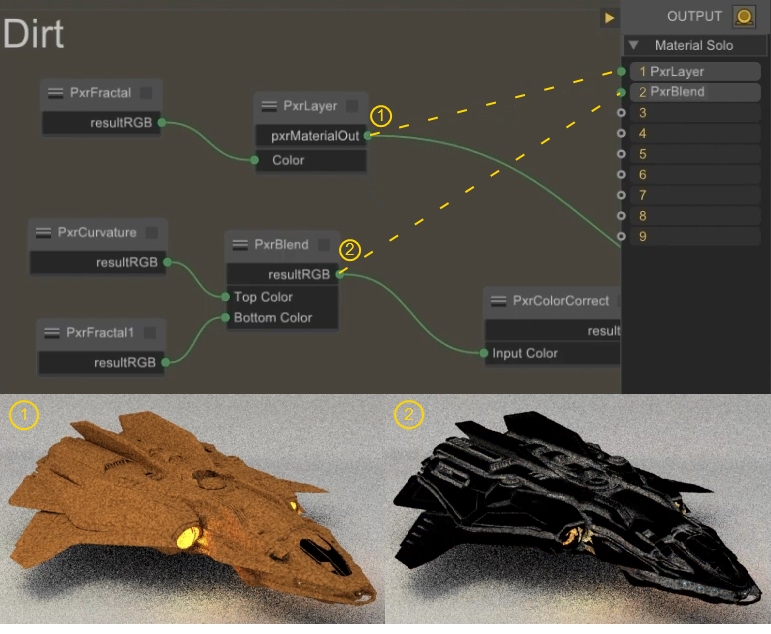
Material Soloing accelerates your look development by short-circuiting a shading network to preview sections of your materials independently. With an interactive Preview or Live render running, use the 1-9 keyboard shortcuts to preview different points of your network and the render updates to display the material output from that point in the node graph.
Note: Soloing only affects interactive, preview, and live render sessions. Disk and batch renders ignore soloing and render the entire scene.
You can map multiple nodes to different hotkeys, even those within ShadingGroups, so it's really quick and easy to switch between different points in a shading network to compare outputs. Soloing also helps you to familiarize yourself with networks handed to you from other artists or debug networks by locating any potential issues much faster.
Note: You can modify soloing behavior using Python. For example, you might not want to connect to the first output available for certain nodes. There are example MaterialSoloingConverters scripts for several renders shipped with Katana here:
<install_dir>plugins/Src/Resources/Core/Plugins/
Enable Material Soloing
Soloing is activated from inside material networks and temporarily replaces the Output sidebar. To enable soloing:
- Click the soloing icon
 in the Output sidebar, or press 0 (zero) on your keyboard.
 - To solo a material, drag the output from the target node into a port in the Output sidebar or drag a port from the Output sidebar to the target node,
- You can disconnect a port by double-clicking the required number in the Output sidebar or by disconnecting the pipe manually.
- Click the soloing icon
 in the Output sidebar, or press 0 (zero) again to disable soloing mode and return to the Network Material view.
The Output sidebar changes to show the available soloing ports. Connecting a port displays the name of the node to which the port is connected.
OR
Select or hover over the target node and use keyboard shortcuts 1 through 9 to assign the node to the corresponding port.
Tip: Pressing the 1 through 9 keyboard shortcuts with soloing disabled activates soloing and connects the port automatically.
Familiarize Yourself with Another Artist's Work
Collaboration is a key component of any pipeline, so working with materials that someone else created is very common. The first thing you'd do as an artist is make sure you understand how this material was set up and how each section of the node graph impacts the rendered result.
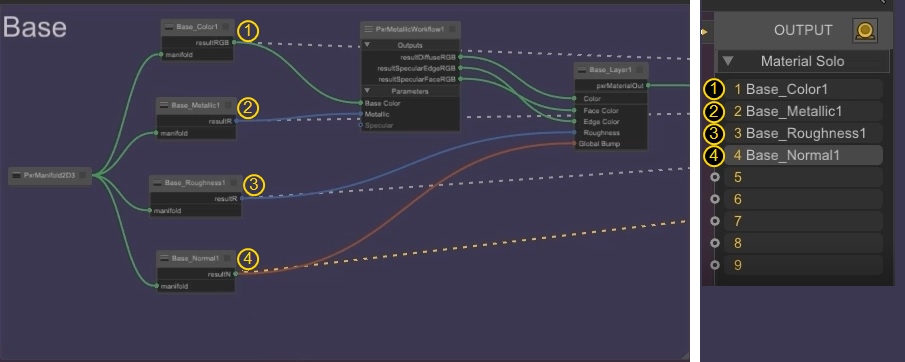
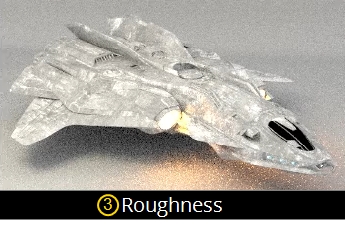
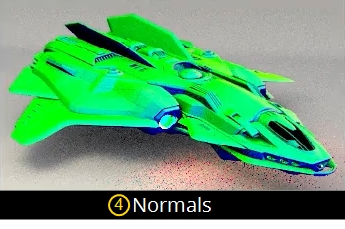
In this example, we'll preview some texture maps for a spaceship asset. Once you understand the setup, you can then develop the look of the asset consistently to retain the overall look of the shot.
- Enable the material soloing tools by clicking the soloing icon in the Output sidebar, or by pressing 0 (zero) on your keyboard.
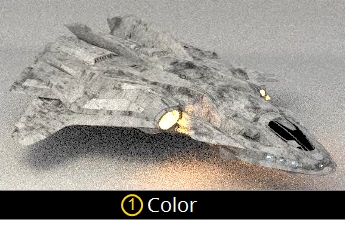
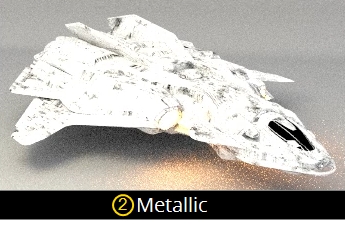
- Connect the Color, Metallic, Roughness, and Normal outputs to soloing ports by hovering over the nodes and pressing the 1 through 4 keyboard shortcuts.
- Cycling between the four ports gives you a clear picture of how each node contributes to the material.
- You can also connect a port to the last node in the this section of the node graph to quickly view all the component parts merged together.
|
|
|
|
|
|
Tip: Switching to an unassigned port also displays the final material. In this example, ports 5 through 9 have no assignment so the final material is displayed instead.
For example, you might want to have the final result in port 1 and the other materials in ports 2 through 5, so that you can always press 1 on you keyboard to see the result.
Working your way through a material network this way before you start work gives you a good understanding of the whole picture and helps to avoid wasting time figuring out what each component is doing to reach a final result faster.