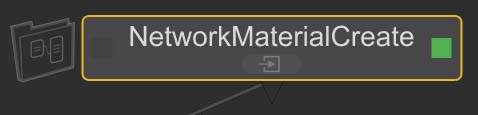
Multiple NetworkMaterials with NetworkMaterialCreate
You can create multiple NetworkMaterials within one NetworkMaterialCreate node. This allows you to share shading nodes across different network materials, reducing the number of nodes needed when creating variants of a material.
Video: For a full tutorial series on managing multiple materials within a NetworkMaterialCreate node, take a look at our Creating Multiple Materials using NetworkMaterialCreate course.
The Material Scenegraph within the NetworkMaterialCreate Parameters allows you to organize your NetworkMaterials through rearranging and adding Namespaces. Adding a Namespace in your Material Scenegraph creates a group in your Scene Graph tab, which can parent multiple Network Materials and other Namespaces for the purpose of organization.
Note: For more information about the Material Scenegraph, refer to the Organizing NetworkMaterials and Namespaces section of this topic.
For more information about the NetworkMaterialCreate Parameters, see NetworkMaterialCreate.
Adding a New NetworkMaterial
To add a new NetworkMaterial to a NetworkMaterialCreate node:
- Open the NetworkMaterialCreate node Parameters by activating the edit flag.
- Click the plus button
 and select Add NetworkMaterial.
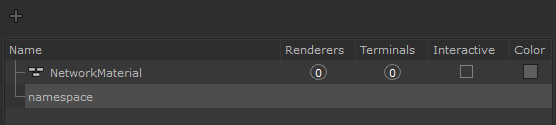
A new NetworkMaterial is created.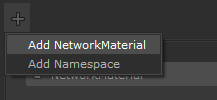
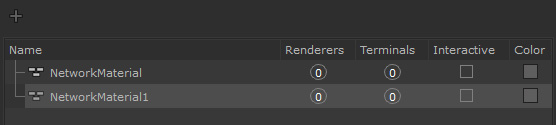
New NetworkMaterial in the Material Scenegraph
- Change the name of the new NetworkMaterial by selecting it and pressing Enter on the keyboard, or by double-clicking.
New NetworkMaterial in the terminal sidebar
Adding a New Namespace
To add a new Namespace to a NetworkMaterialCreate node:
- Open the NetworkMaterialCreate node Parameters by activating the edit flag.
- Click the plus button and select Add Namespace.
A new Namespace is created.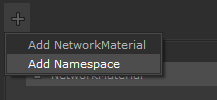
New Namespace in the Material Scenegraph
- Change the name of the new Namespace by selecting it and pressing Enter on the keyboard, or by double-clicking.

New Namespace in the terminal sidebar
Note: You can also add NetworkMaterials and Namespaces through the menu options when right-clicking within the NetworkMaterialCreate Material Scenegraph.
Organizing NetworkMaterials and Namespaces
You can organize your NetworkMaterials and Namespaces through the NetworkMaterialCreate Material Scenegraph in node Parameters.
- Use the middle-mouse button to click and drag the NetworkMaterials and Namespaces into the structure you require.
This structure is reflected in the Scene Graph and the terminal sidebar inside the NetworkMaterialCreate node.
Note: Rick-click in the Material Scenegraph to delete and duplicate NetworkMaterials and Namespaces as well as fully expand or collapse them.
|
|
|
NetworkMaterials and Namespaces organized in the Material Scenegraph |
|
|
|
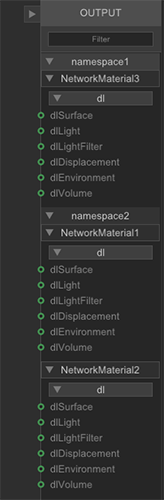
NetworkMaterial and Namespace structure in the Scene Graph |
|
|
|
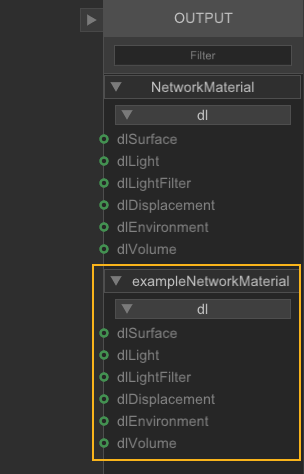
NetworkMaterial and Namespace structure reflected in the terminal sidebar |
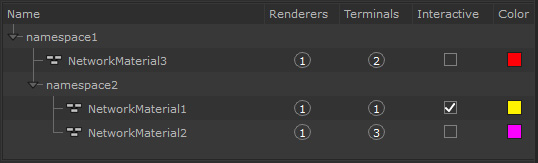

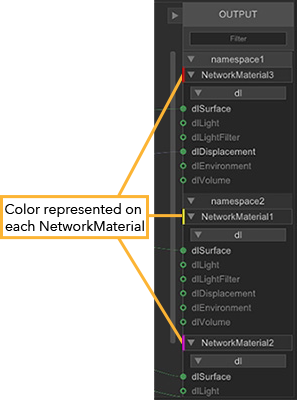
The Material Scenegraph also provides some information about each NetworkMaterial. You can see how many renderers and terminals are connected to each NetworkMaterial, set the interactive state of a NetworkMaterial, and assign it a color.
Note: For more information about the NetworkMaterialCreate node parameters, see NetworkMaterialCreate.
The color helps to distinguish multiple NetworkMaterials at a glance. These colors are represented on the NetworkMaterial names on the terminal sidebar within the NetworkMaterialCreate node.
The NetworkMaterials and Namespaces can be collapsed and expanded using the arrows on the terminal sidebar.
Workflow Example
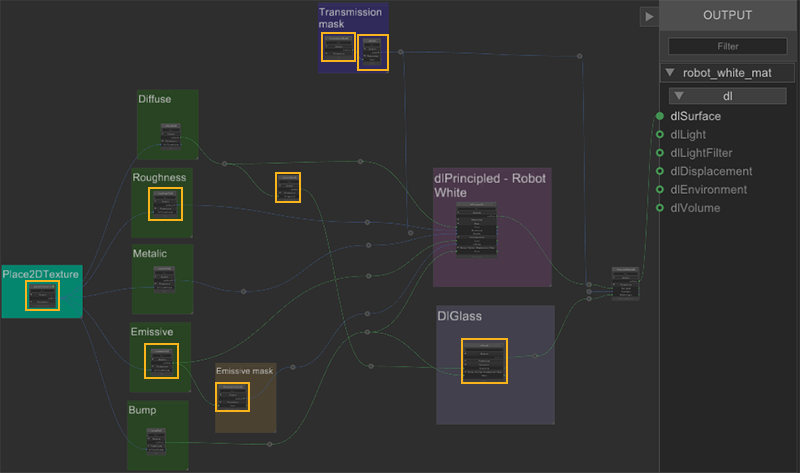
In this example there are two robot characters each requiring a different material variation. The ability to create multiple NetworkMaterials from one NetworkMaterialCreate node is very useful in this situation as each material variation uses some of the same textures and masks.

Each of the robots' materials share a transmission mask, roughness and emissive texture files, and require the same glass shader.
Using a separate NetworkMaterialCreate node for each NetworkMaterial would require a lot of duplicated nodes resulting in more nodes overall. This simple example shows how sharing parts of the network reduces duplication. In production scripts featuring hundreds of nodes, the power of multiple NetworkMaterials within a single NetworkMaterialCreate node is far greater.
|
|
|
|
A NetworkMaterialCreate node with one NetworkMaterial location for a white material. |
A NetworkMaterialCreate node with one NetworkMaterial location for an orange material. |

Using one NetworkMaterialCreate node with two NetworkMaterials means that they can share sections of the shading node network, in this case, the 8 highlighted nodes. This reduces the number of nodes from 27 over two separate NetworkMaterialCreate nodes, to 19 nodes in one NetworkMaterialCreate node by sharing 8 nodes.
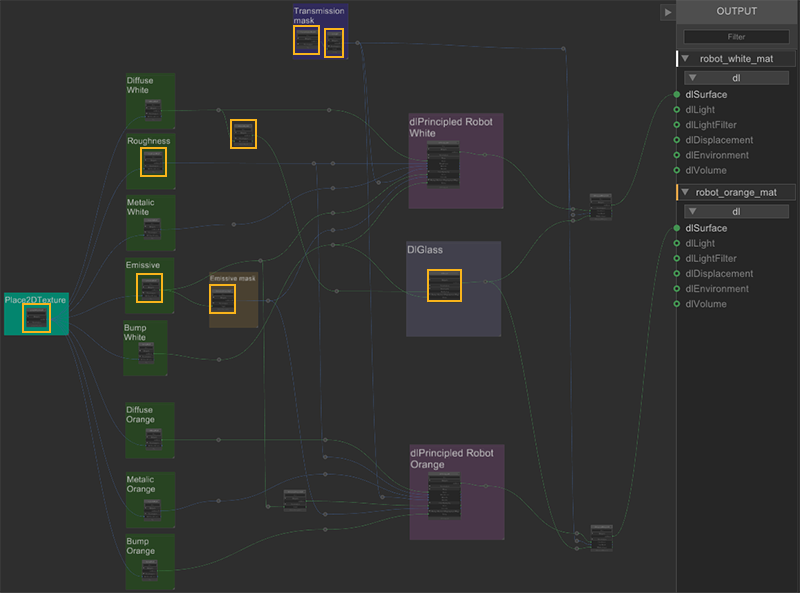
A NetworkMaterialCreate node with two NetworkMaterial locations. Shared nodes highlighted.